Profile Page
Introduction
The User Profile page stores essential information about your profile and offers access to account management features. These include updating your personal details, preferences, language settings, and email notifications, as well as managing workspaces and linked emails. It also provides various editing options, such as changing your password, editing your profile, or deactivating your account.
To access your profile page and perform any of the aforementioned actions, click on your user name at the bottom of the sidebar, then click on Profile.
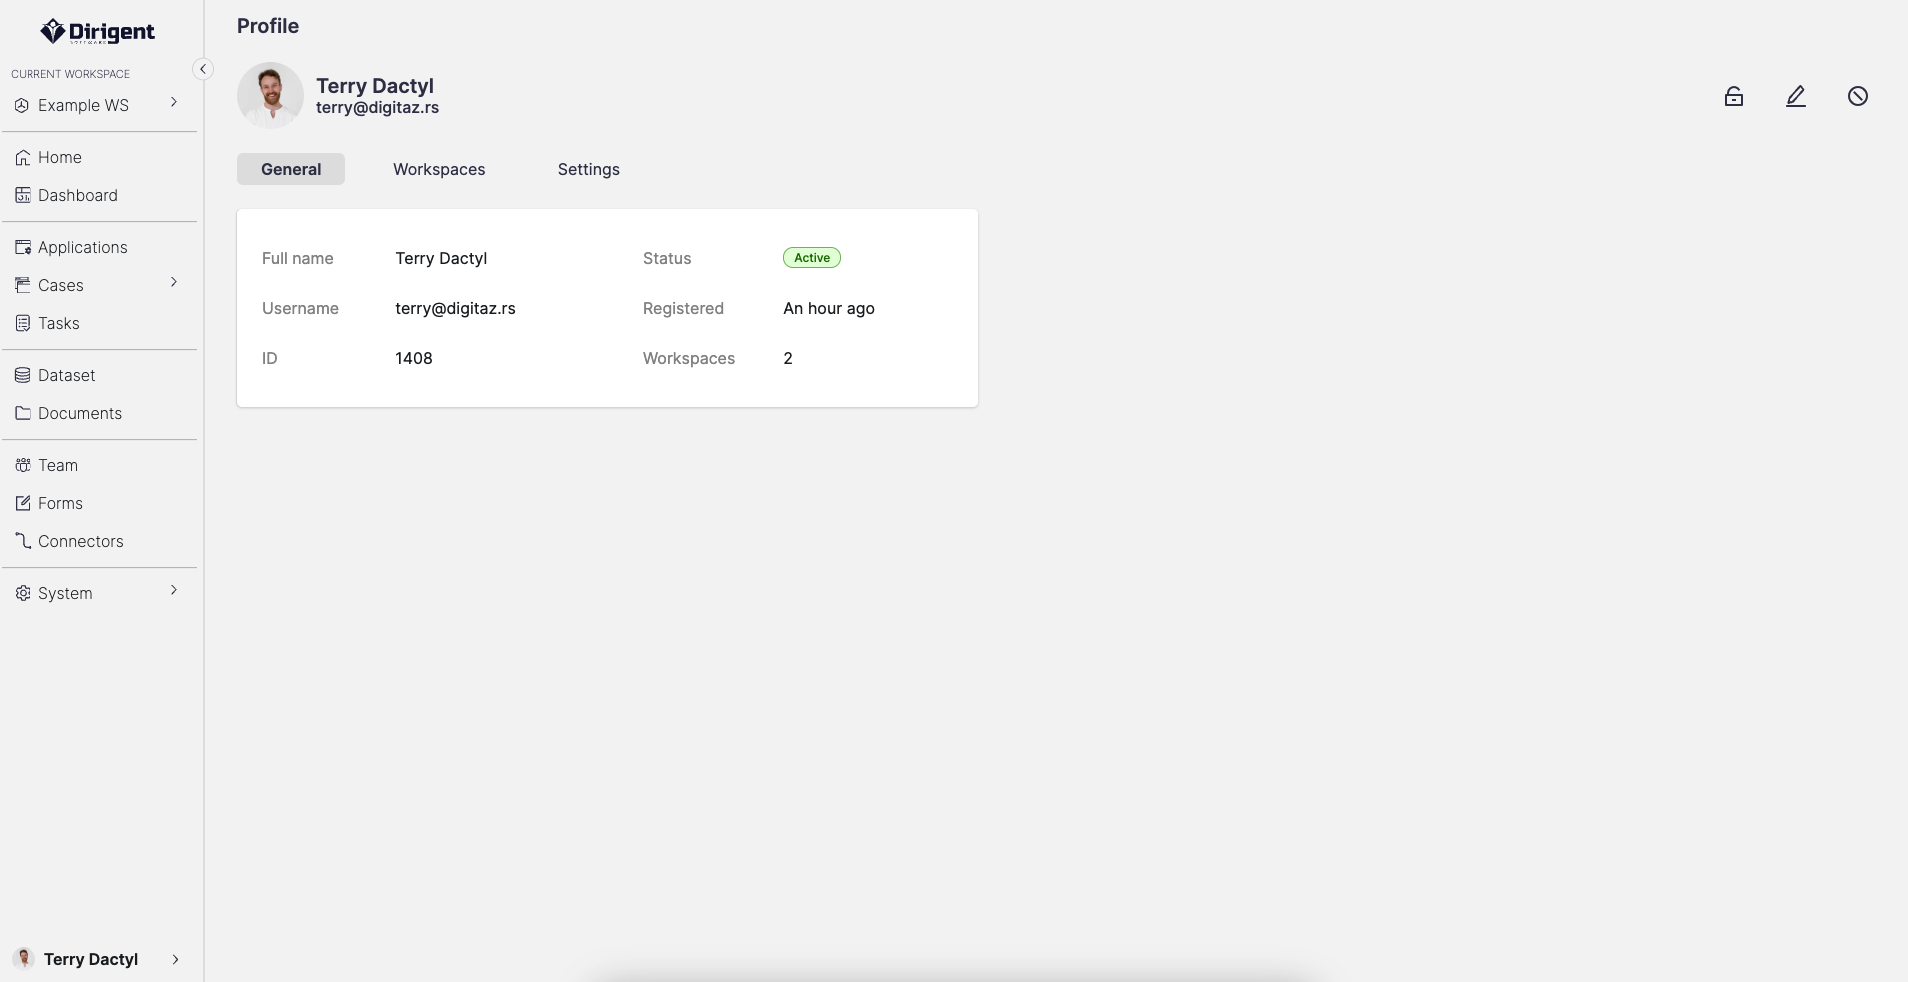
The profile page is organized into three tabs: General, Workspaces, and Settings. The following functionalities are not tied to any specific tab and are always accessible:
Edit profile
You can edit your profile by clicking the Edit button located in the upper-right corner of the profile page. This allows you to update your first and last name, as well as change your profile picture or background image.
Change password
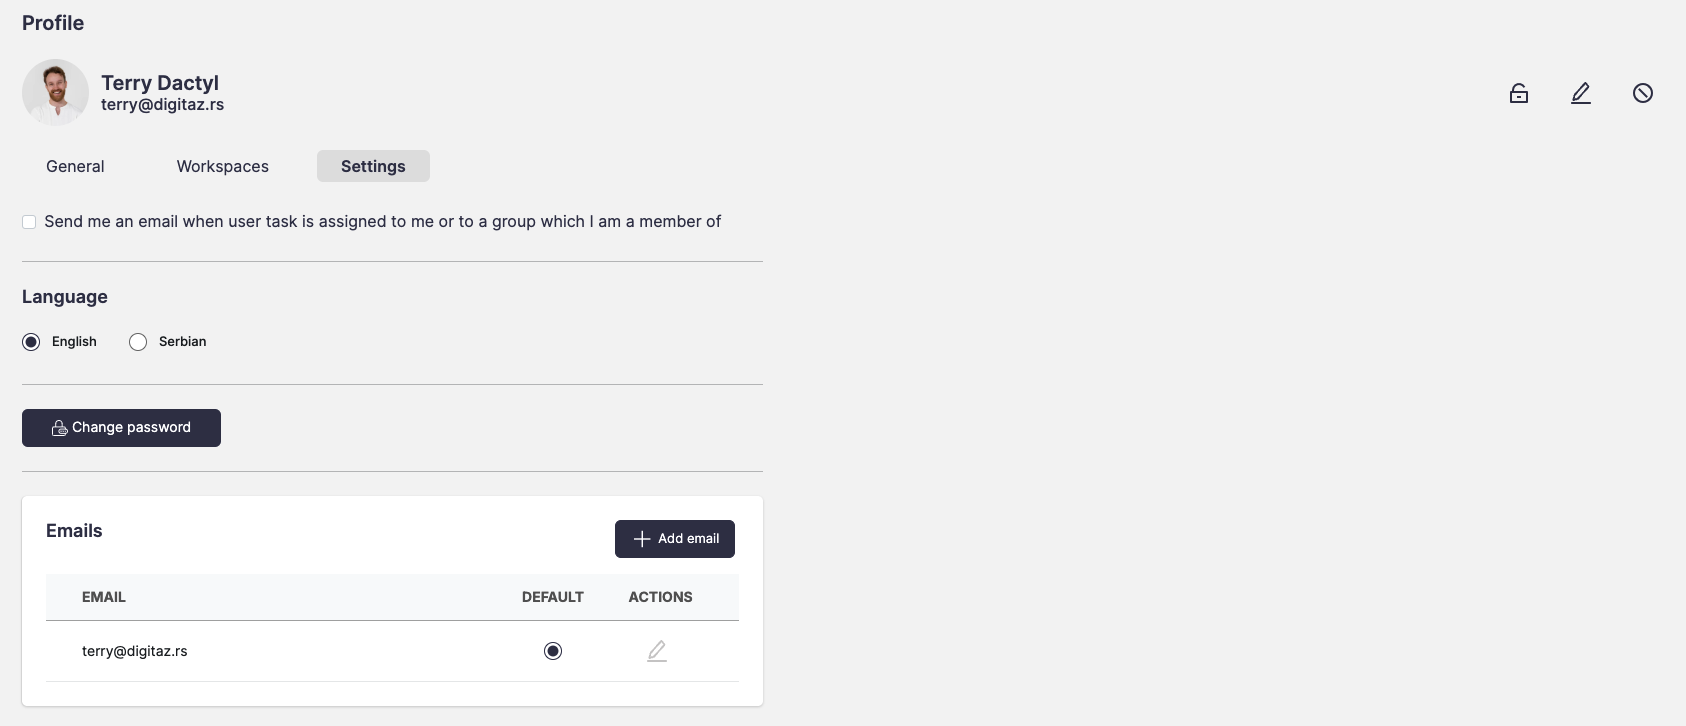
To change your password, click the Change password button positioned located in the Settings tab. You will need to provide your old password as a verification step before setting a new one.
Password requirements
Password must be 8-20 character long and must contain at least one lowercase letter, uppercase letter, number and special character!
Profile deactivation
Account deactivation can be initiated by clicking on the Deactivate account button located in the Settings tab. Current password will be required in order to complete the deactivation.
Can I recover my account after deactivation?
Yes, you can recover your account anytime by initiating the account recovery process. Your existing data such as your profile, workspace, applications, logs and settings will be restored entirely.
General tab
The General tab provides an overview of key information, including your full name, username, ID, status, registration date, and the workspaces you are a member of. This tab also serves as the hub for profile editing, account deactivation, and accessing the permissions page.
Workspaces tab
All workspaces are mutually independent and user can switch between them in order to see and work with content that is created within them. User can be an owner of at least one, while being a member of a wide range of workspaces, depending on a number of received invitations. In addition, user can create as many workspaces as needed in order to optimize the business requirements.
Create a workspace
To create a new workspace, click on the + New workspace button in the Workspaces tab. Once clicked, a modal will appear prompting you to give your new workspace a name and optionally a description.
Change workspace
You can change a workspace only if you are a member of more than one workspace. To do so, click on the workspace name located beneath the profile name in the left sidebar and select from one from the list.
Set a default worksace
To designate in which workspace you will land, you need to specify your default workspace by checking the rounded checkbox located in the Deafult column. Default workspace will be opened every time you access Dirigent.
Edit a workspace
To edit a workspace, click on the Edit workspace button. Once clicked, a modal will appear, enabling you to edit workspace's name, description, large logo, and small logo image.
Delete a workspace
To delete a workspace, click on the Delete workspace button. Once clicked, a modal will appear prompting you to confirm your choice.
Restrictions on deleting workspaces
Workspace can be deleted only by the workspace owner. Default workspaces cannot be deleted. If you want to delete a default workspace, you need to designate another workspace as the default one.
Settings tab
The Settings tab allows users to manage email notifications, change their account language, update passwords, and add, edit, or remove linked email addresses.
User task email notification
There is a checkbox for setting user task email notifications on or off. By ticking the checkbox, you will set an option to receive an email notification on every user task assignment. This means that every time an application is running and comes to the point that your action is needed to complete a task to, an email will be sent in order to notify you.
Change language
Dirigent currently supports Serbian and English lanugages. Languages can be changed by selecting the desired langugage from the profile page in the Settings tab, under Language. The language change is instant, and requires no refreshing of the browser.
Here you can manage all email addresses you want associated with your Dirigent account. Email addresses specified here can be used to receive email notification about various things in Dirigent. There are couple of actions you can take working with your email addresses in Dirigent.
Add new email
A new email address can be added to your account by clicking the + New email button located in the Settings tab. A screen will appear with an input field allowing you to enter a new email address and add it to your account. Email notifications will only be sent to the default email address.
Delete email
If you wish to remove an email address from your account, you can do so by marking the email address in question by ticking the checkbox located on the left side of the email address. Once checked, the delete button will become clickable.
About email address - account relation
There has to be at least one email address associated with an account. The email address cannot be deleted if its the only email associated with the account or if its designated as a default.
Edit email
Email address can be edited if needed by either clicking on the edit button if its the only address, or by first checking the checkbox on the email address we want to edit, and then clicking the edit button. Once clicked, an input will show up asking you to input a new email address.


