Datasets
Introduction
Datasets is a tool that consolidates business data, simplifying organization, storage, and utilization according to specific needs and preferences. It streamlines data management across all levels and departments of the organization, mitigating potential complexities.
Datasets ensures efficient workflow by aligning data structure, content, and layout with your specific business requirements. It enables you to organize and customize datasets based on categories such as Branch Offices, Employees, or Suppliers. This tool simplifies updates and various processes, allowing you to achieve greater efficiency with minimal effort.
Main Dataset page
The main dataset page displays a comprehensive list of all datasets associated with the current workspace. It includes essential details like dataset ID, name, origin workspace, sharing status, and two buttons for accessing dataset sharing and setup options.
Create a dataset
To create a dataset, simply click on the + New Dataset button. A dialog box will appear, asking you to enter a name. If you check the setup checkbox, you will be directed to the setup page. If you leave it unchecked, you will be taken to the Entities page. Once you have filled in the necessary details, the dataset will be created.
Delete a dataset
To delete a dataset, select the checkbox located to the left of the ID column for each dataset you wish to delete. Once you have checked all the desired datasets, click on the Delete button. Alternatively, you can delete a dataset from the individual dataset page by selecting the dataset and clicking the Delete button.
Share a dataset
To share a dataset with another workspace, locate the dataset and click on the Share button on the right side. This action will open a new screen where you can configure the sharing settings for that specific dataset such as workspace name, workspace owner email address and the level of permission granted.
Dataset's page
To access the dataset setup page, click the Setup button on the Datasets page. The individual dataset page can be divided into four sections: Header, Setup Stages, Components, and Template. On the left side of the header, you will find essential information about the dataset, including its name, creation/update date, and the user responsible for those actions.
Save as a dataset
To create a copy of a dataset, simply use the "Save as" button located on the right side of the header. Clicking this button will prompt you to provide a new name for the copied dataset.
Do dataset entities get copied as well?
When saving a dataset as a copy, it's important to note that the entities associated with the original dataset will not be automatically copied over. The copied dataset will not retain the entities from the original dataset.
Rename a dataset
To change the name of a dataset, click on the Rename button located on the right side of the header. This action will allow you to input a new name for your dataset.
Can multiple datasets have the same name?
Dataset names must be unique within a workspace. It is not possible to have two datasets with the same name within the same workspace.
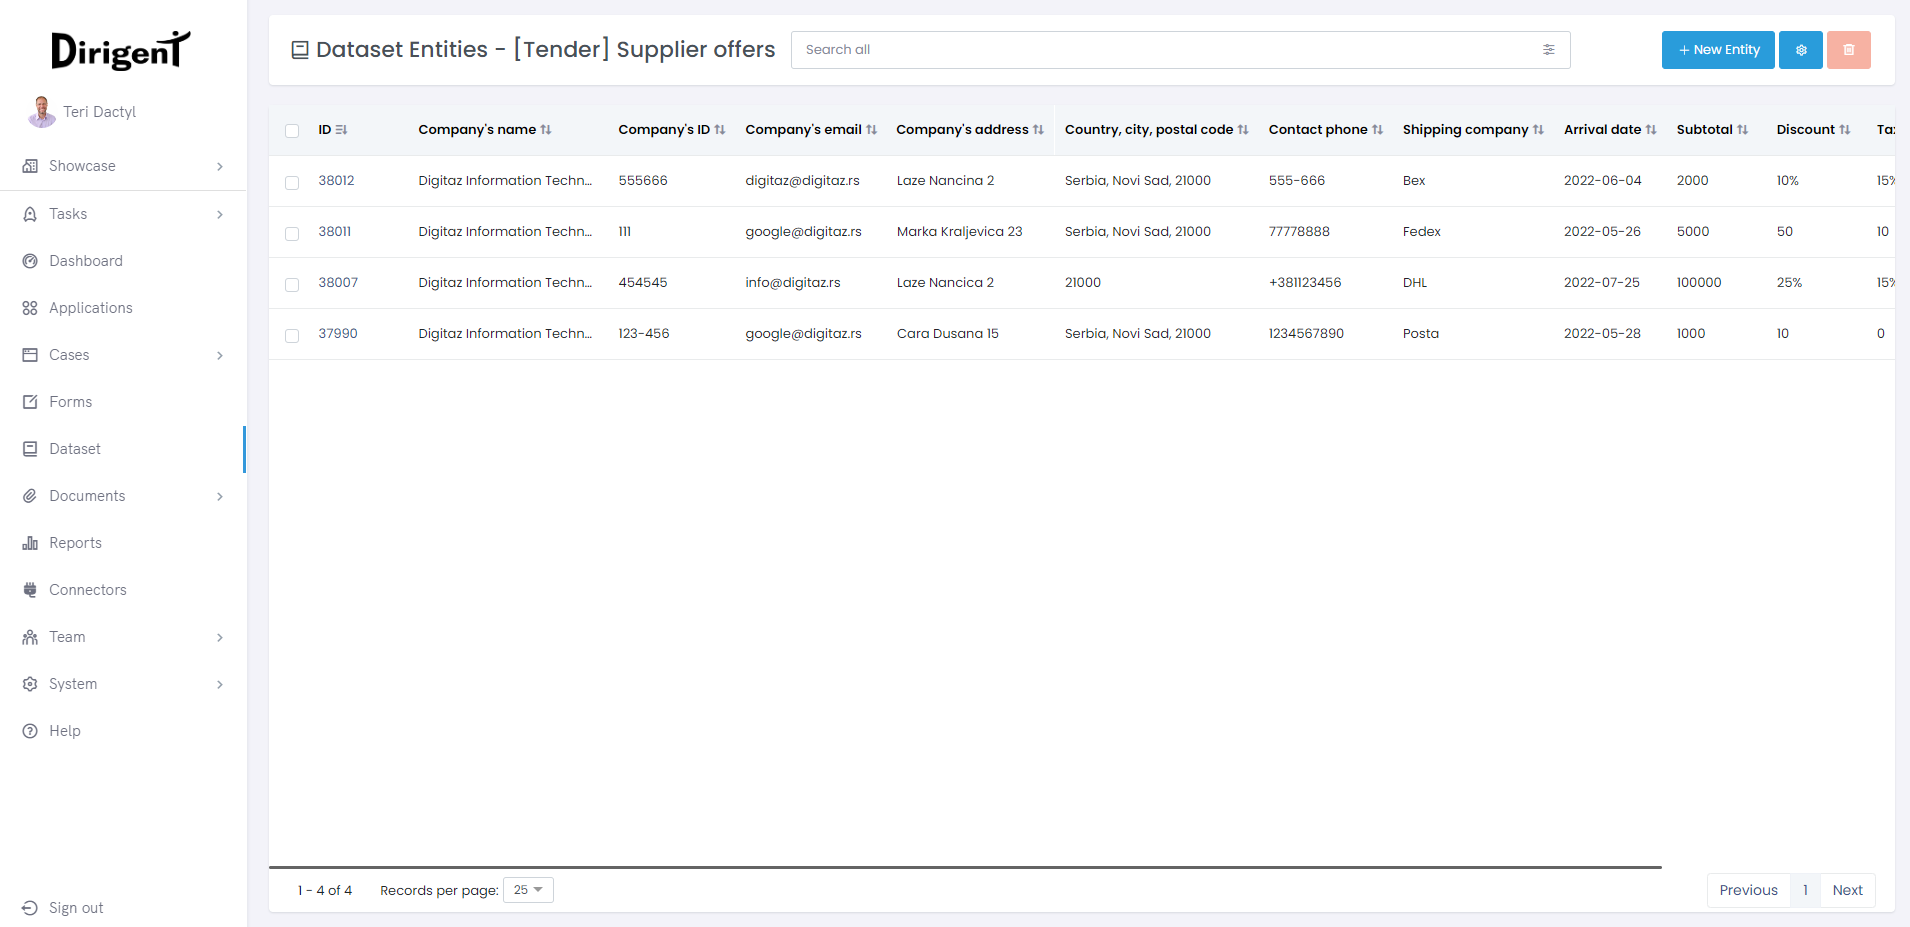
Entities
Entities are individual data entries that are stored within a dataset. To access the entities, you can click on the Entities button located on the individual dataset page. This will provide you with access to view and manage the data entries within the dataset.
Add an entity
A new entity can be addded to a dataset by clicking the + New Entity button. Form that was configured for the dataset will be displayed, enabling you to fill in the data as necessary.
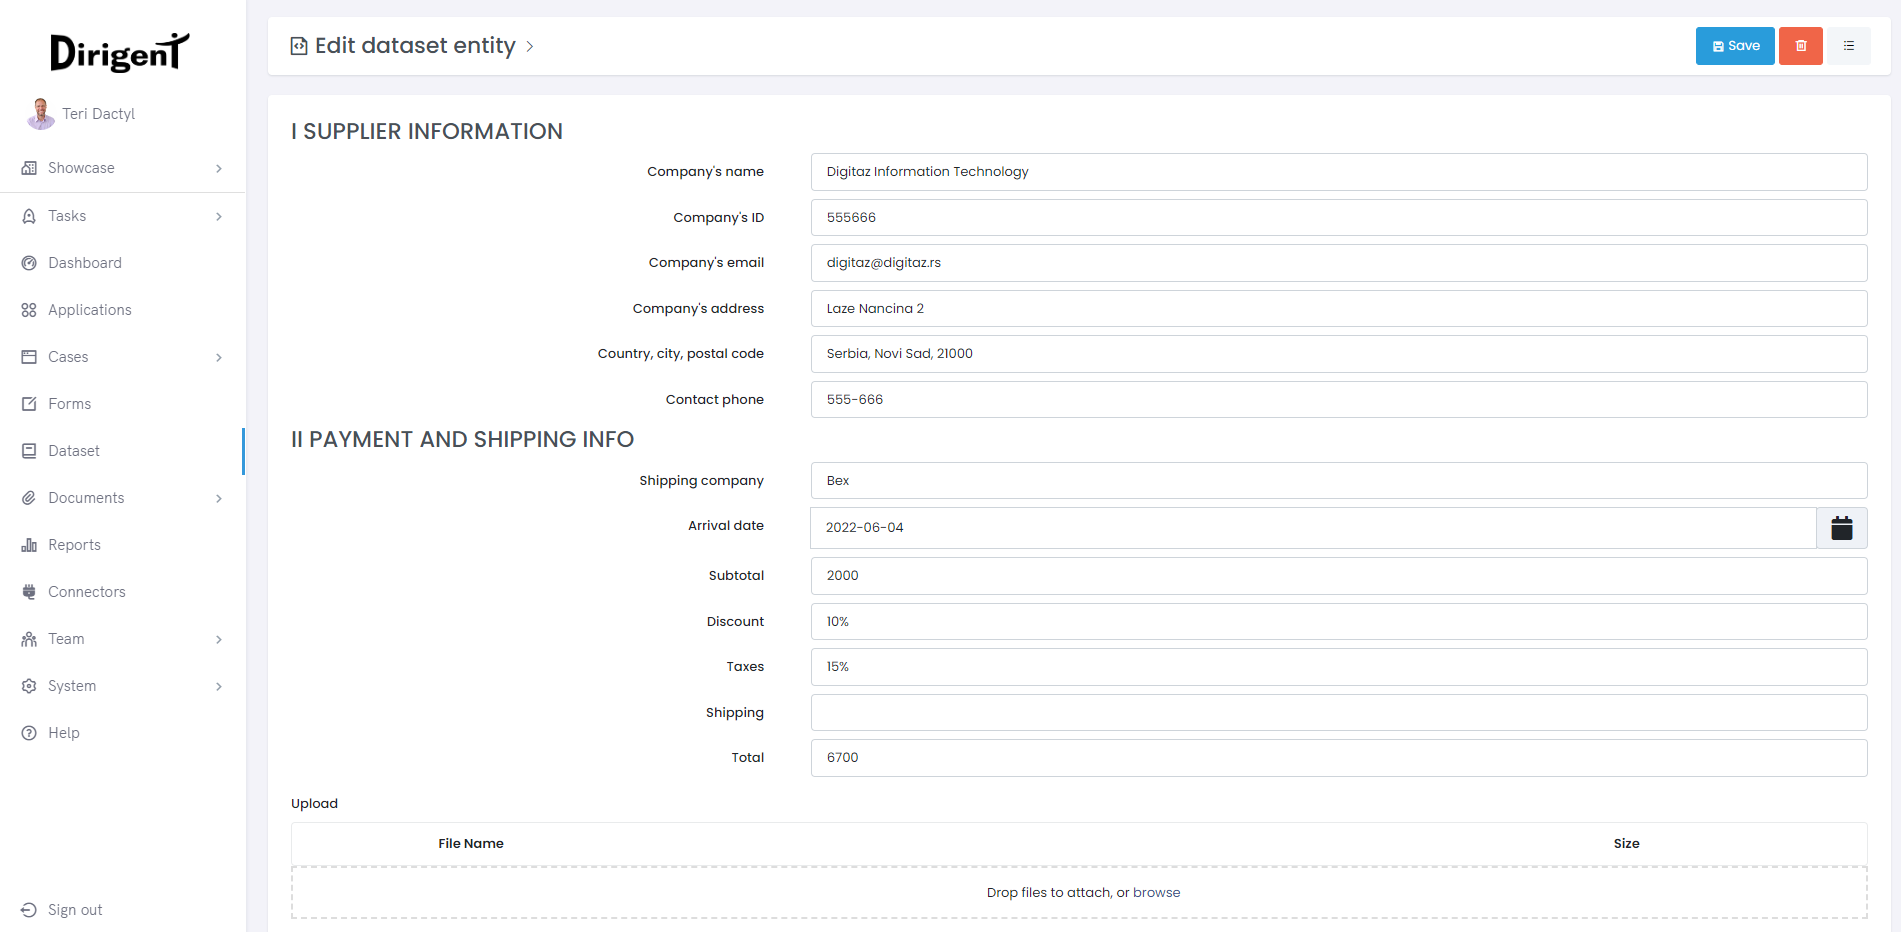
Edit an entity
To edit an entity, simply click on the desired entity within the dataset. This action will allow you to change the values associated with the entity. Once you have made the desired changes, click the Save button to save the modifications.
Delete an entity
If for any reason an entity needs to be deleted, you can do so by ticking the checkbox on the left side of the ID and then clicking the Delete button. Alternatively, you can delete it from the entity's screen by pressing the Delete button.
Setting up a Dataset
After creating a dataset, the next step is to properly set it up for use. This involves a two-stage configuration process, which includes setting up the Template and Display Columns. These steps ensure that the dataset is organized and displayed in a way that aligns with your specific requirements.
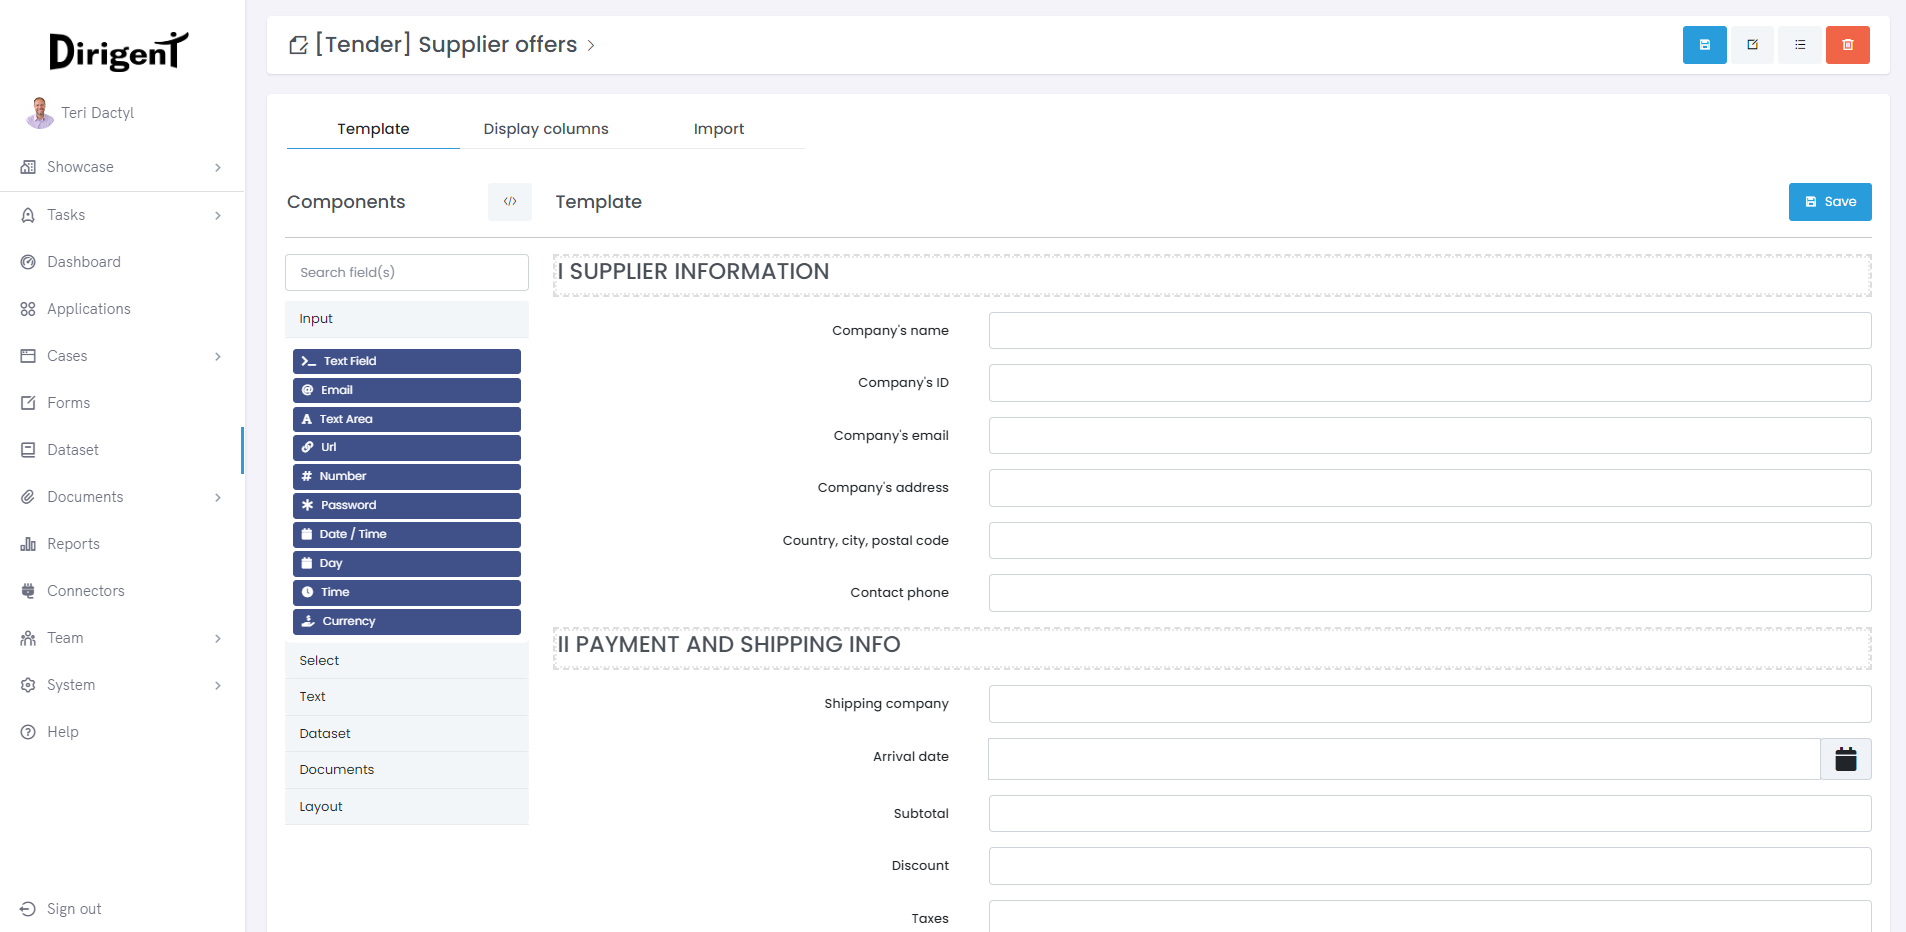
Template
To customize the dataset according to your specific requirements, start by setting up the Template. On the Setup page, click the "Template" tab. You can then easily customize the Template by dragging and dropping the desired components onto it.
Components represent the essential structuring element of each Dataset, and they are categorized into five groups: Input, Select, Text, Dataset, Documents, and Layout.
How template changes can affect the dataset structure?
If you want to change an already defined template, you may experience the respective changes in your Dataset structure too. This is normal and it will happen as a direct consequence. In order to avoid some of the unexpected consequences, please refer to the next points:
Delete template component: This will directly impact the dataset entities that were created already, removing all associated data values. However, the values will remain visible in the entity table until the component label is removed from the display columns setup.
Add new template component: When adding a new component to a predefined template, it will appear as a blank value in the existing dataset entities. You can edit these values later to add the new data values.
Components covered in Forms
Since datasets and forms mostly share the components except the Dataset group, Input, Select, Text, Documents, and Layout were already covered on the forms page. If you wish to learn more about those component groups, click here.
The dataset group consists out of Dataset entities component and a Unique identifier component.
Unique Identifier
The unique identifier is an auto-incremented number that cannot be modified. It assigns a unique ID to each entity based on the pattern specified by the user.
For instance, if the user enters the pattern {yy-mm-dd-HH:mm} in the Pattern field, the resulting unique identifier would be 2023-06-02-16:35.
Dataset entities
The dataset entities component provides users with the ability to perform lookups on other datasets and present their entities in a dropdown format. This feature allows users to access and utilize data from multiple datasets within a convenient dropdown menu.
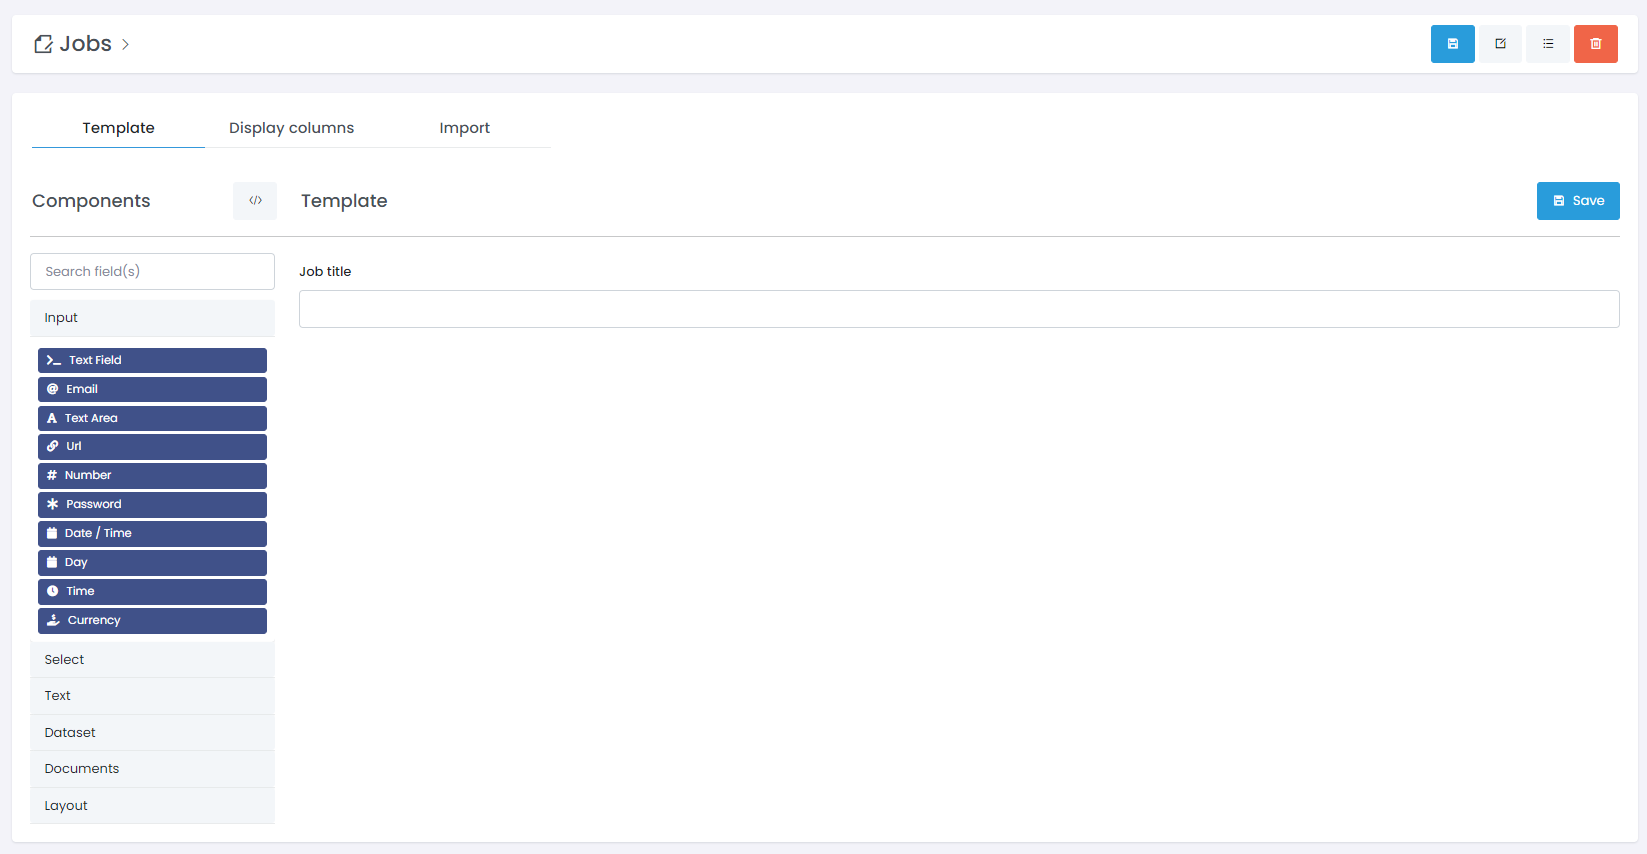
For example, we will set up our test dataset by using a couple of components.
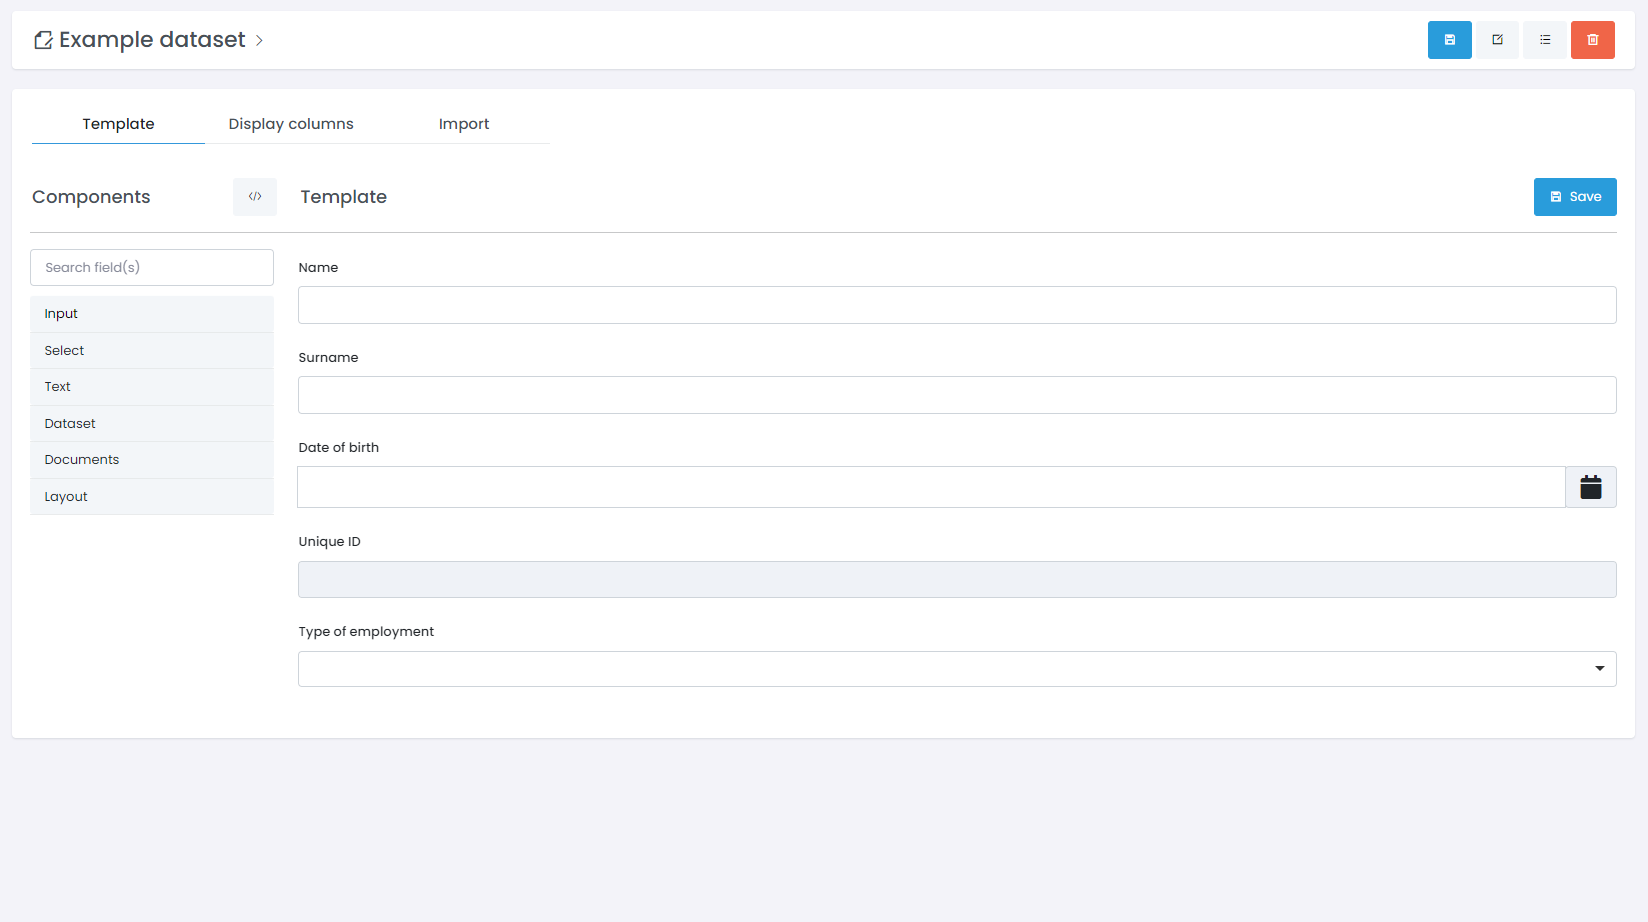
Name- Input.Surname- Input.Date of birth- Date / Time.Unique ID- Unique Indentifier with the pattern set to:{yy-mm-dd-HH:mm}.Type of employment- Dataset entities with the lookup set toJobs.
Where did we get the Jobs dataset from?
The Jobs dataset is an example dataset serving as the lookup. It consists of a single input field called "Job title" and includes several job entities. Below are the pictures showing you how to set up your own Jobs dataset.
Display columns
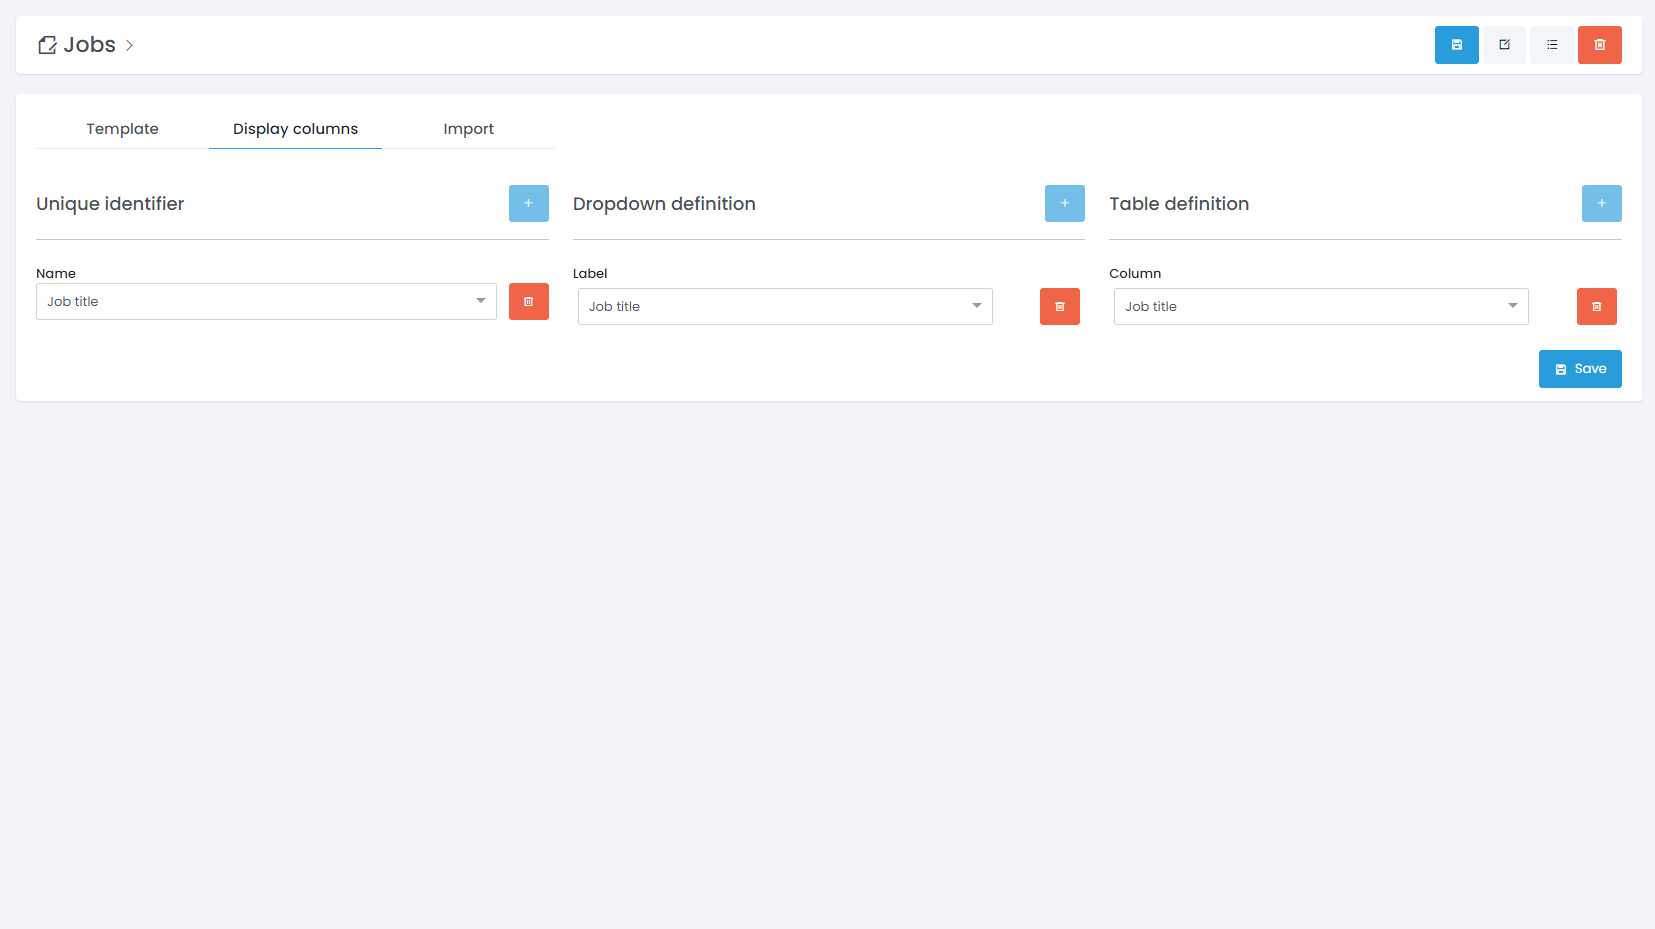
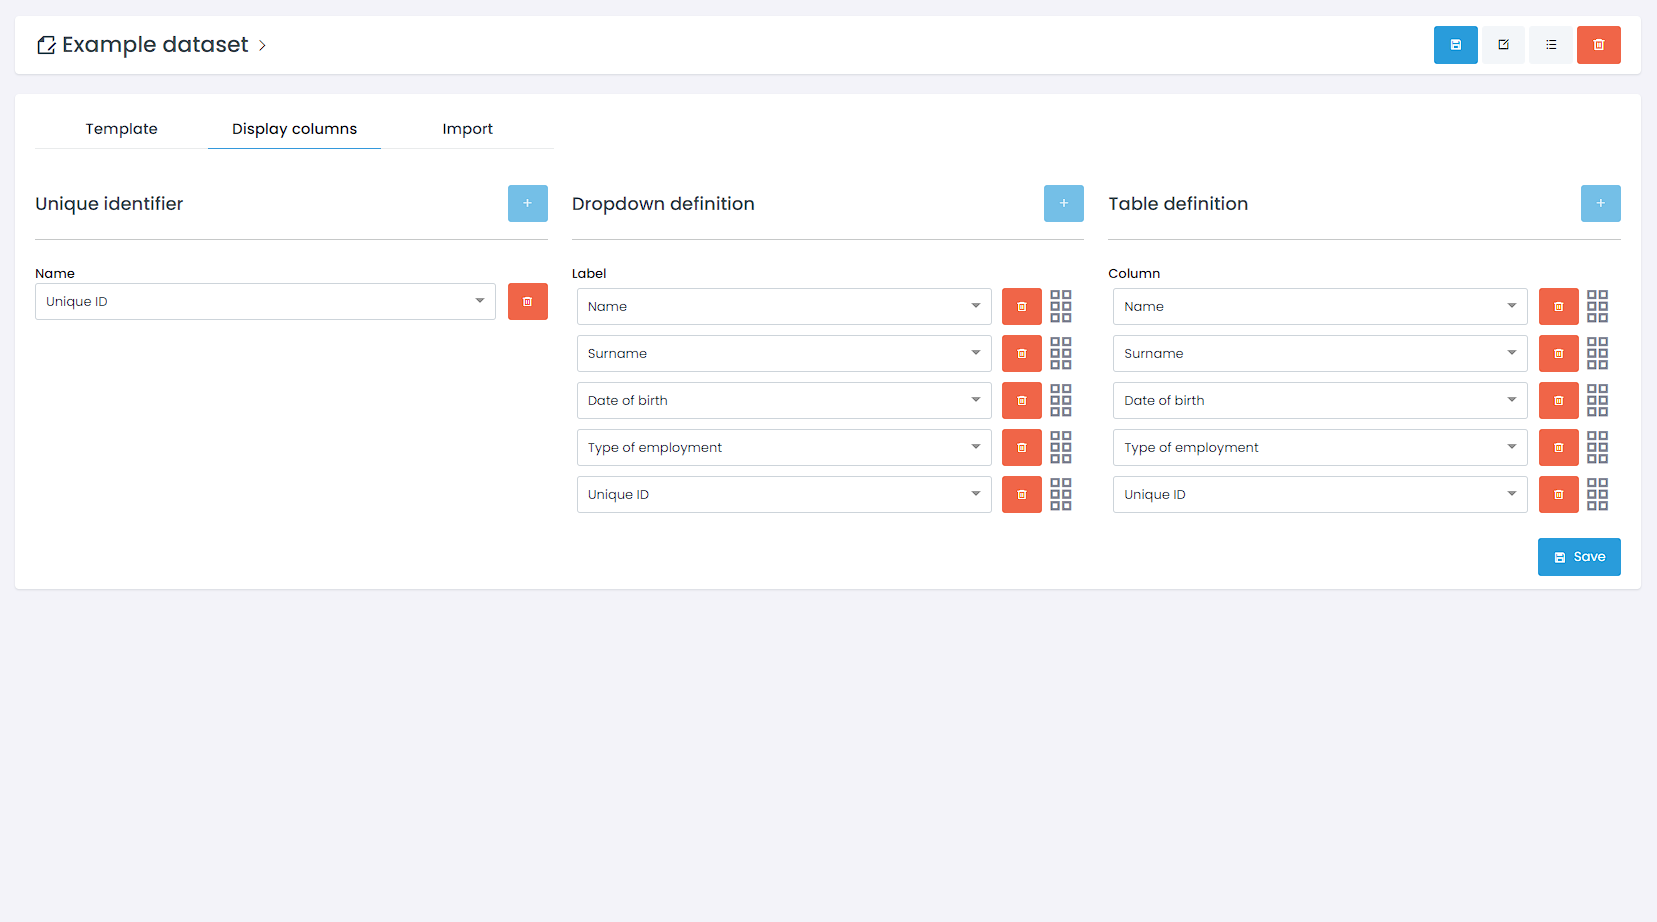
After you have created a dataset and have set up the template, it is necessary to define Display columns which is the second step in the dataset configuration process. Once the template has been saved, switch to the Display Columns tab. There, you will be greeted with three types of setup, Unique identifier, Dropdown, and Table definition.
Unique identifier
The unique identifier is essential for importing datasets as it uniquely identifies the selected dataset. It ensures that the correct dataset is associated with the import process. There can only be one unique identifier.
Dropdown definition
Dropdown definition in the context of a dataset refers to the set of values that are displayed to the user as a dropdown menu in various tasks and during process execution. These values are selected from the dataset template and allow the user to choose the desired value from the dropdown menu for use in processes. To modify the dropdown definition, you can add additional values using the + button or delete existing values using the Delete button.
Table definition
The Display columns settings are used to determine the data columns that will be shown in the dataset entity table. By default, all data values defined in the template are included as separate columns in the table. You can use the + button to add additional columns or the Delete button to remove existing ones.
Once you have finished configuring the Display columns, remember to save the changes to ensure they are applied. For our example, our display columns would look like this:
About unique ID
When setting up the Unique Identifier for your dataset, it is crucial to choose a value that is truly unique within the dataset. This helps to avoid any potential confusion or conflicts with the data. In our example, we chose the Unique ID component. By considering this factor, you can maintain data integrity and prevent any ambiguity when working with the dataset.
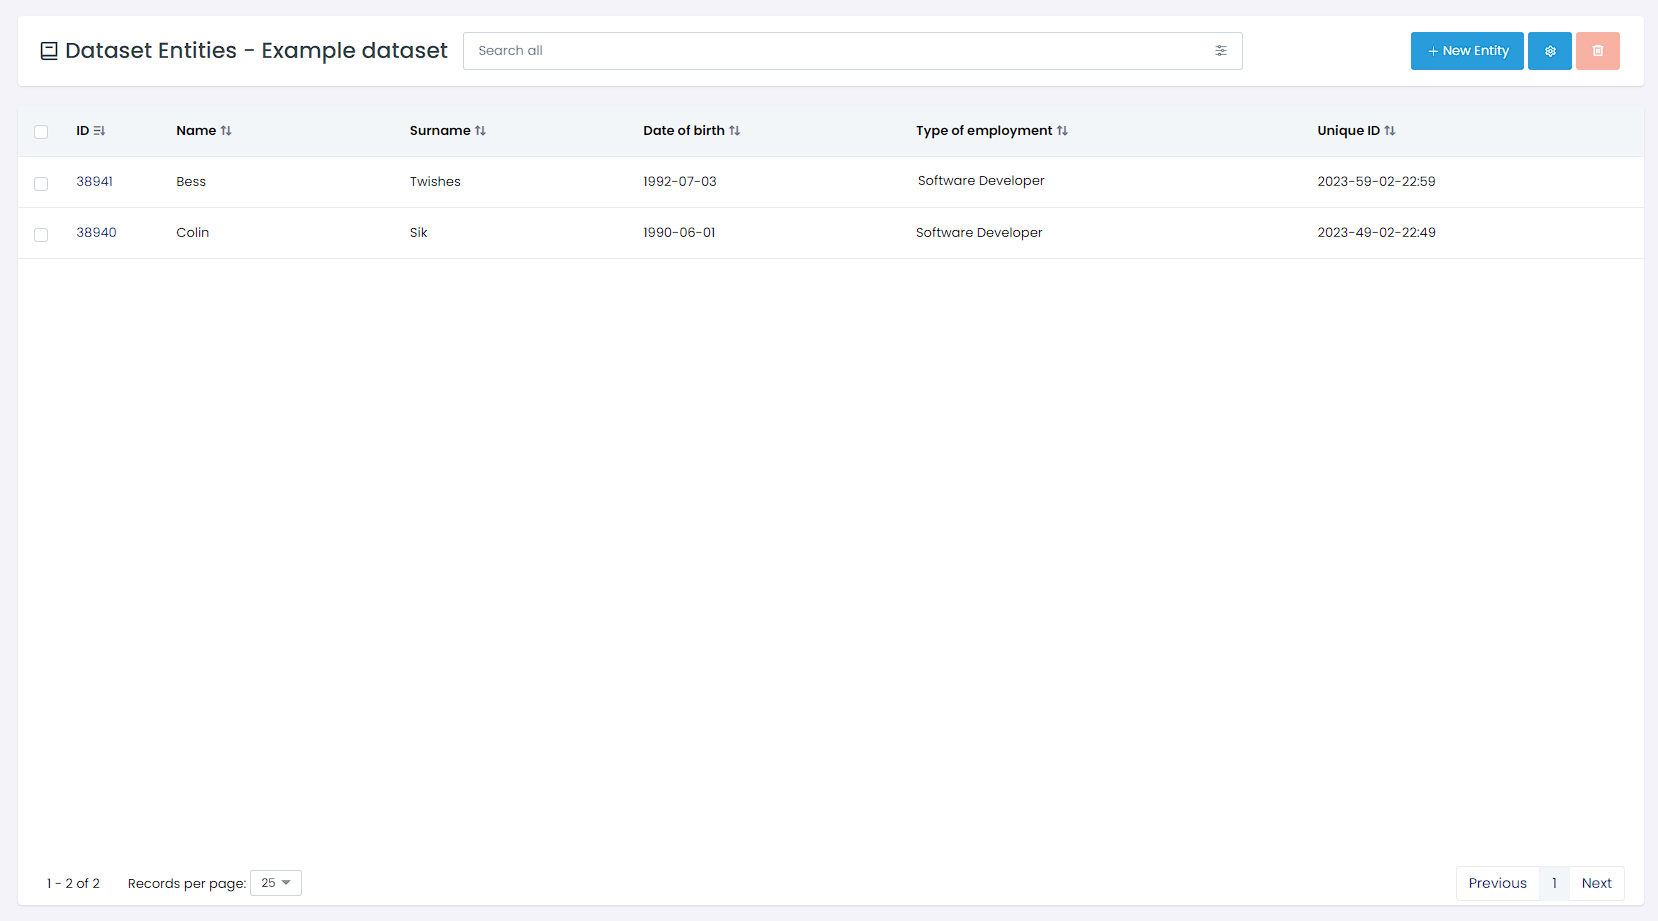
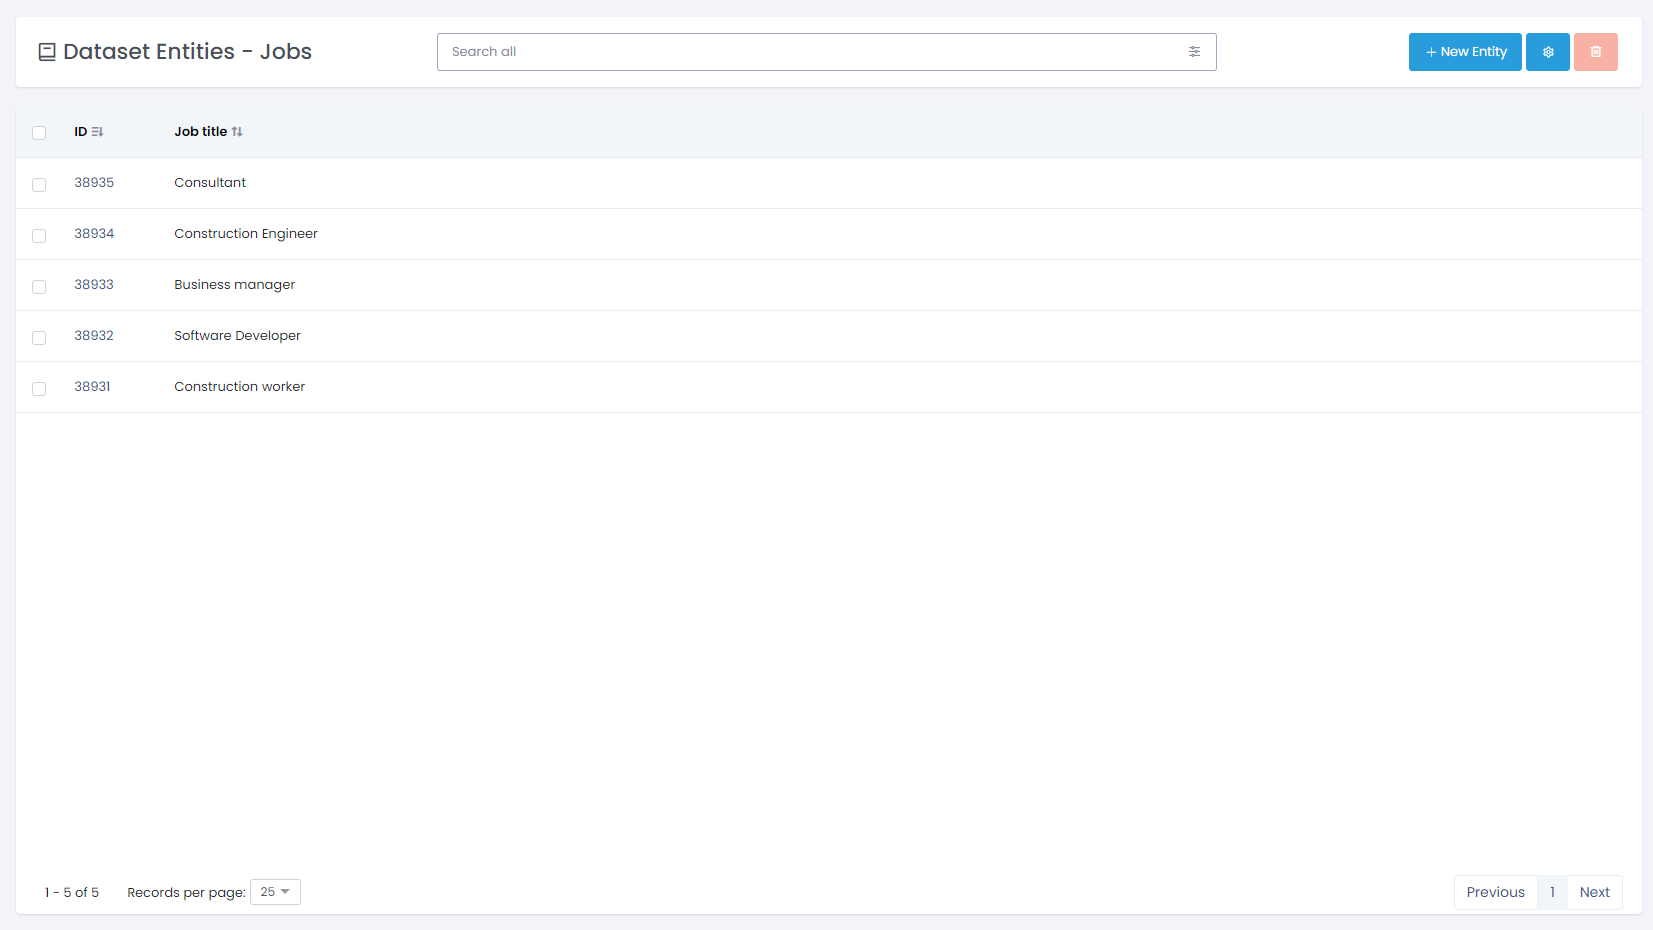
Once we are done with the Display template, the final thing to do is to add some entities to our dataset. To do so, click the Entities button that is located in the header of the page, and then click the + New Entity button.
Fill out the information, and note that when selecting the job the positions are listed from the dataset Jobs which we configured to be looked up. Once done, click Save and take a look at Unique ID component generating an ID according to the given pattern.

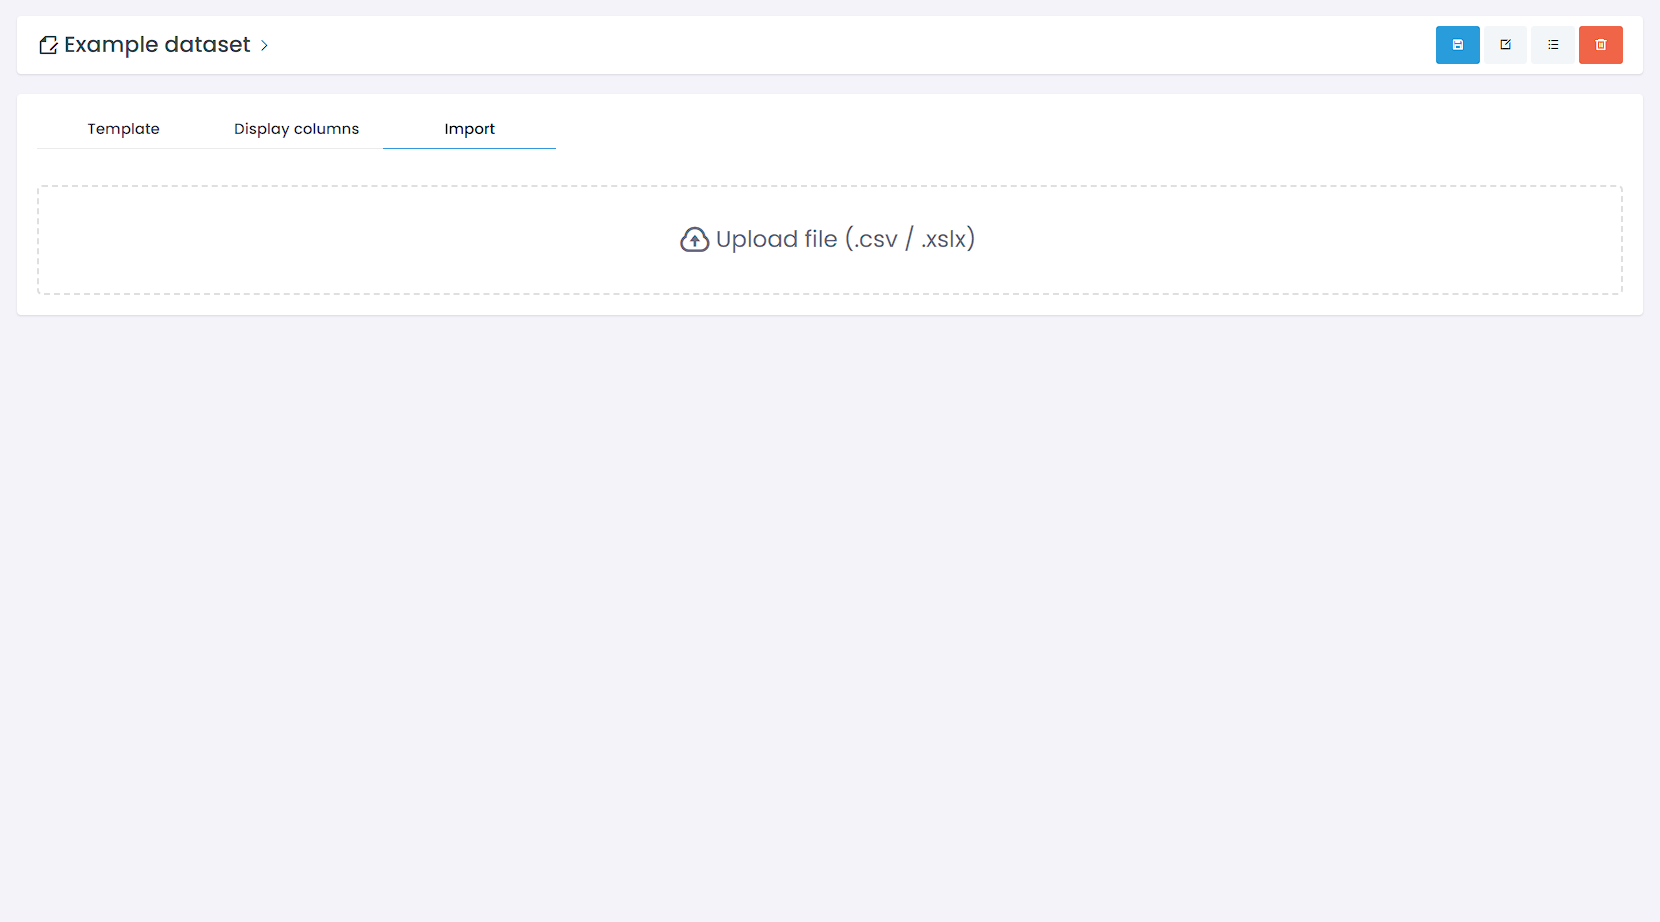
Import dataset
In case you work with complex Excel files and large amounts of data, Dirigent has a way for you to overcome all of that manual data entry in just a few clicks. In order to do so, make sure you set the template and the display columns.
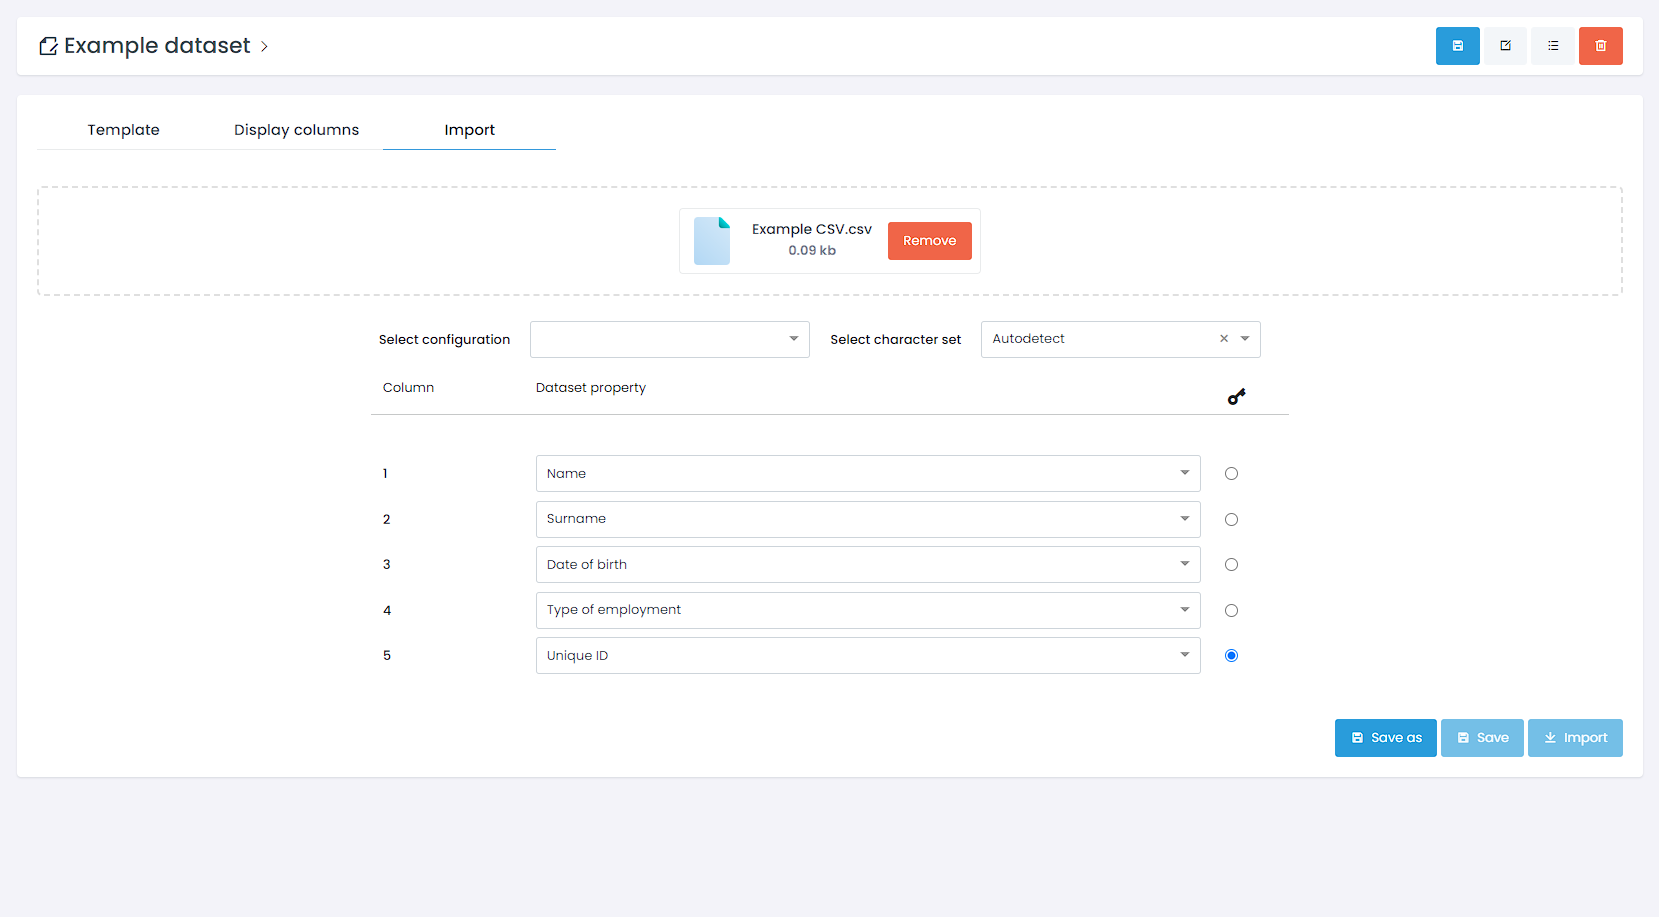
In our example, let's say we want to export some more people to our dataset. In order to do so, the columns and rows in the .csv file need to match our dataset configuration. An example of an .csv file that matches our configuration can be seen below.
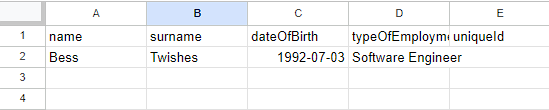
As you can see, the headers bear the API names of our components from the Dataset template. That way, when the import happens, it know where each value from the imported file needs to go.
Click on the Import tab and upload a .csv or /xslx file. Once you've done that, an import configuration screen will be shown to you.
Select configuration
Select configuration allows you to save a configuration once you set it up. That way, when you import another file in the future, the configuration process does not need to go from the start. Instead, you just select an already used import configuration.
Select character set
If your dataset uses any special characters, you can select an appropriate character set to go with the imported file. Currently, Dirigent offers 4 sets: ISO-8859-2, Windows-1250, UTF-8 and ISO-8859-1. If you are not sure about which one to use, you can always select the Autodetect option which will pick the best one based on your import file.
More about character sets
ISO-8859-1: Also known as Latin-1 or Western European, is a character encoding standard. ISO-8859-1 is primarily designed to support the characters used in Western European languages, including English, French, German, Spanish, Portuguese, and many others. In addition to the ASCII characters, it includes accented characters like é, ü, ñ, è, and others.
ISO-8859-2: Also known as Latin-2 or Central European, is a character encoding standard. ISO-8859-2 is specifically designed to support the characters used in Central European languages, such as Czech, Slovak, Polish, Hungarian, Slovene, Croatian, Romanian, and others. In addition to the ASCII characters, it includes accented characters like Č, Š, Ž, Ł, Ő, Ű, and others.
Windows-1250: Also known as CP1250 or Windows Central European, is a character encoding standard primarily used in Microsoft Windows operating systems. It is designed to support the characters used in Central European languages, such as Czech, Slovak, Polish, Hungarian, Slovene, Croatian, Romanian, and others. In addition to the ASCII characters, it includes accented characters, such as Č, Š, Ž, Ł, Ő, Ű, and others.
UTF-8: Or Unicode Transformation Format-8, is a widely used character encoding standard that is part of the Unicode encoding scheme. It is designed to represent and encode a vast range of characters from various writing systems, including Latin, Cyrillic, Greek, Chinese, Arabic, and many others.
Set Columns, Dataset property and Unique ID
Here, you should align the properties with the dataset template. The best practice is to just match the way your dataset template has been configured. After that is done, you can check the selectbox on the right side in order to determine which of the fields will be the unique ID.
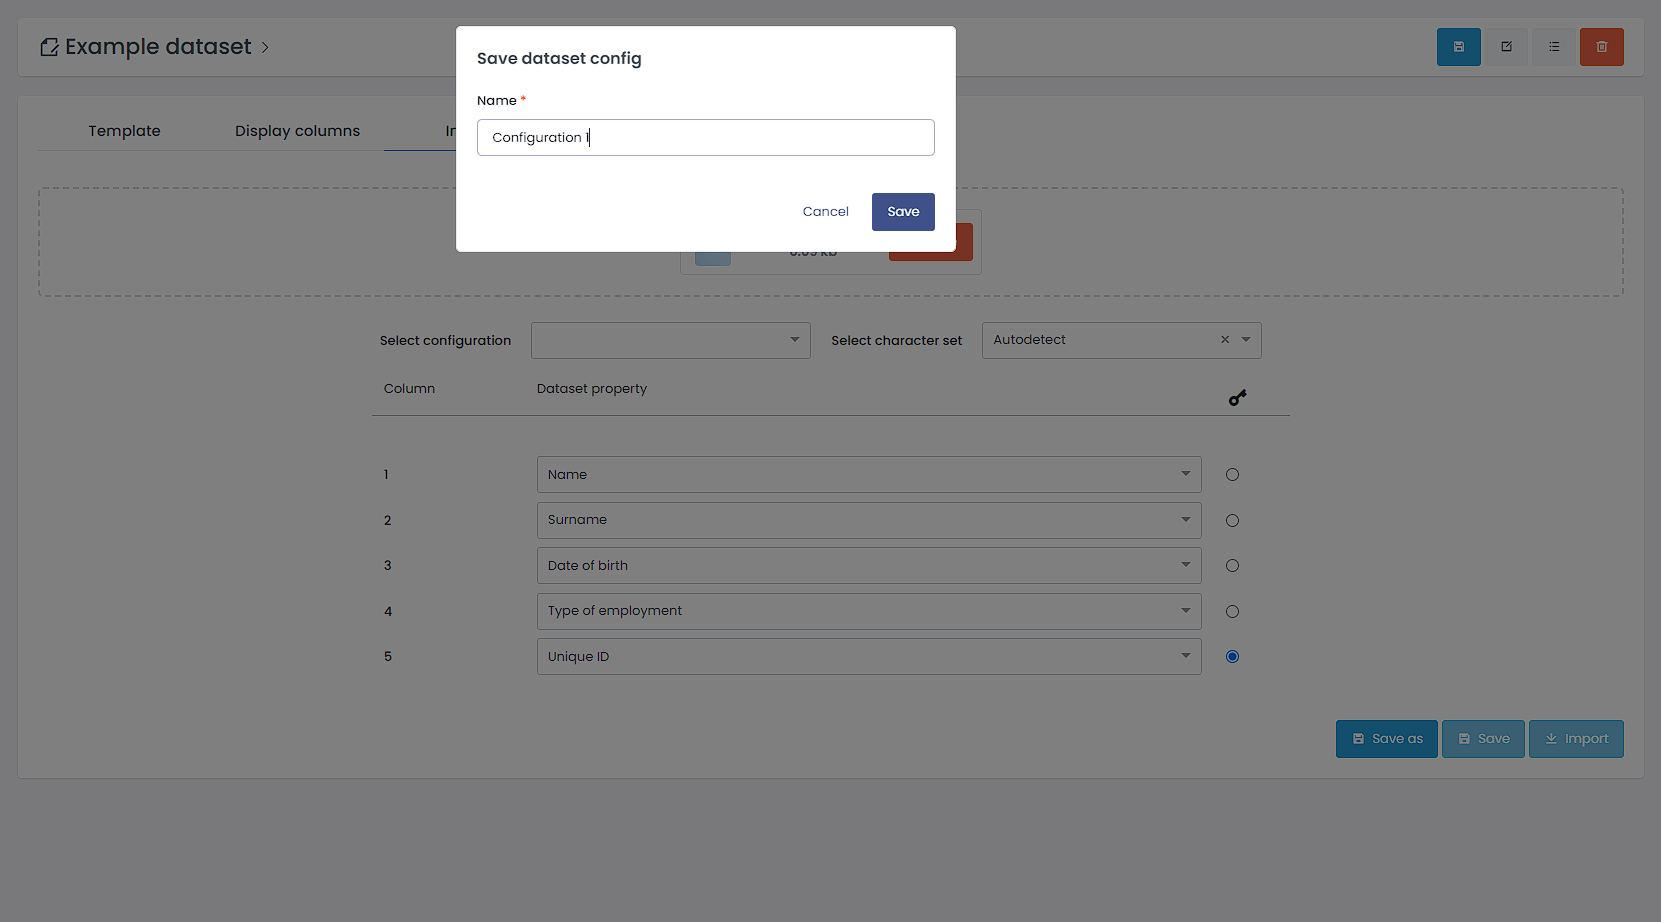
Once that is done, you can click the Save as button which, after you give the configuration a name, will save it for later use. After that, you can click Import button, and if everything has been set up correctly, your file should be imported to the Dataset entities.