Applications
Introduction
The application is designed to automate various business processes. It consists of a primary process and allows for the creation of multiple external processes through the Designer.
Each process, as an essential component of the application, comprises a collection of elements. These elements include a starting event and at least one ending event, which can be executed either manually or automatically. The elements in the Designer are interconnected through connections.
Applications page
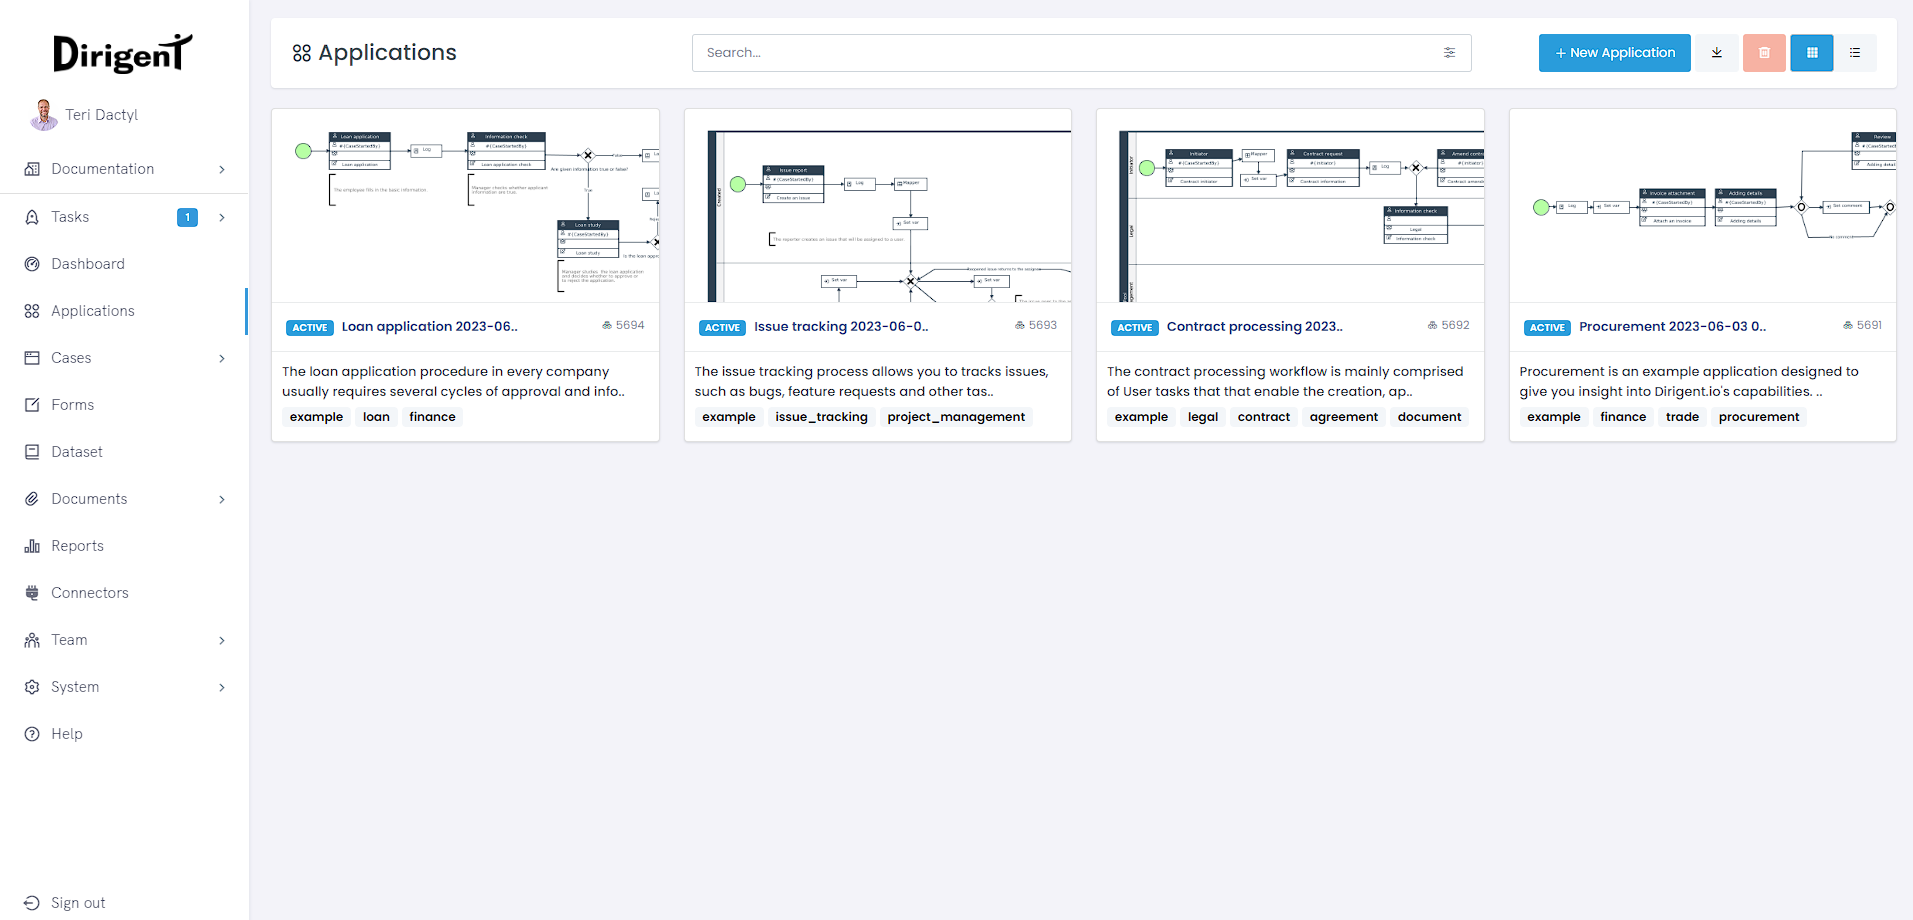
The applications page displays all applications created within a respected workspace. On the top of the page menu, you can choose between creating a new application, importing pre-made application examples, or changing the view type that can be either card view or table view. Search and advanced filters are present as well, where you can search applications by status and tags.
Create an application
You can create a new application by clicking on the + button. Name the application however you deem fit and you can go straight to the application design part from the same window by ticking the checkbox Open in designer.
Delete an application
An application can be deleted by ticking the checkbox on the application card or to the side of the ID if on the table view, and then clicking the Delete button. Alternatively, the application can be deleted by clicking on the application, and then clicking the Delete button.
Application page
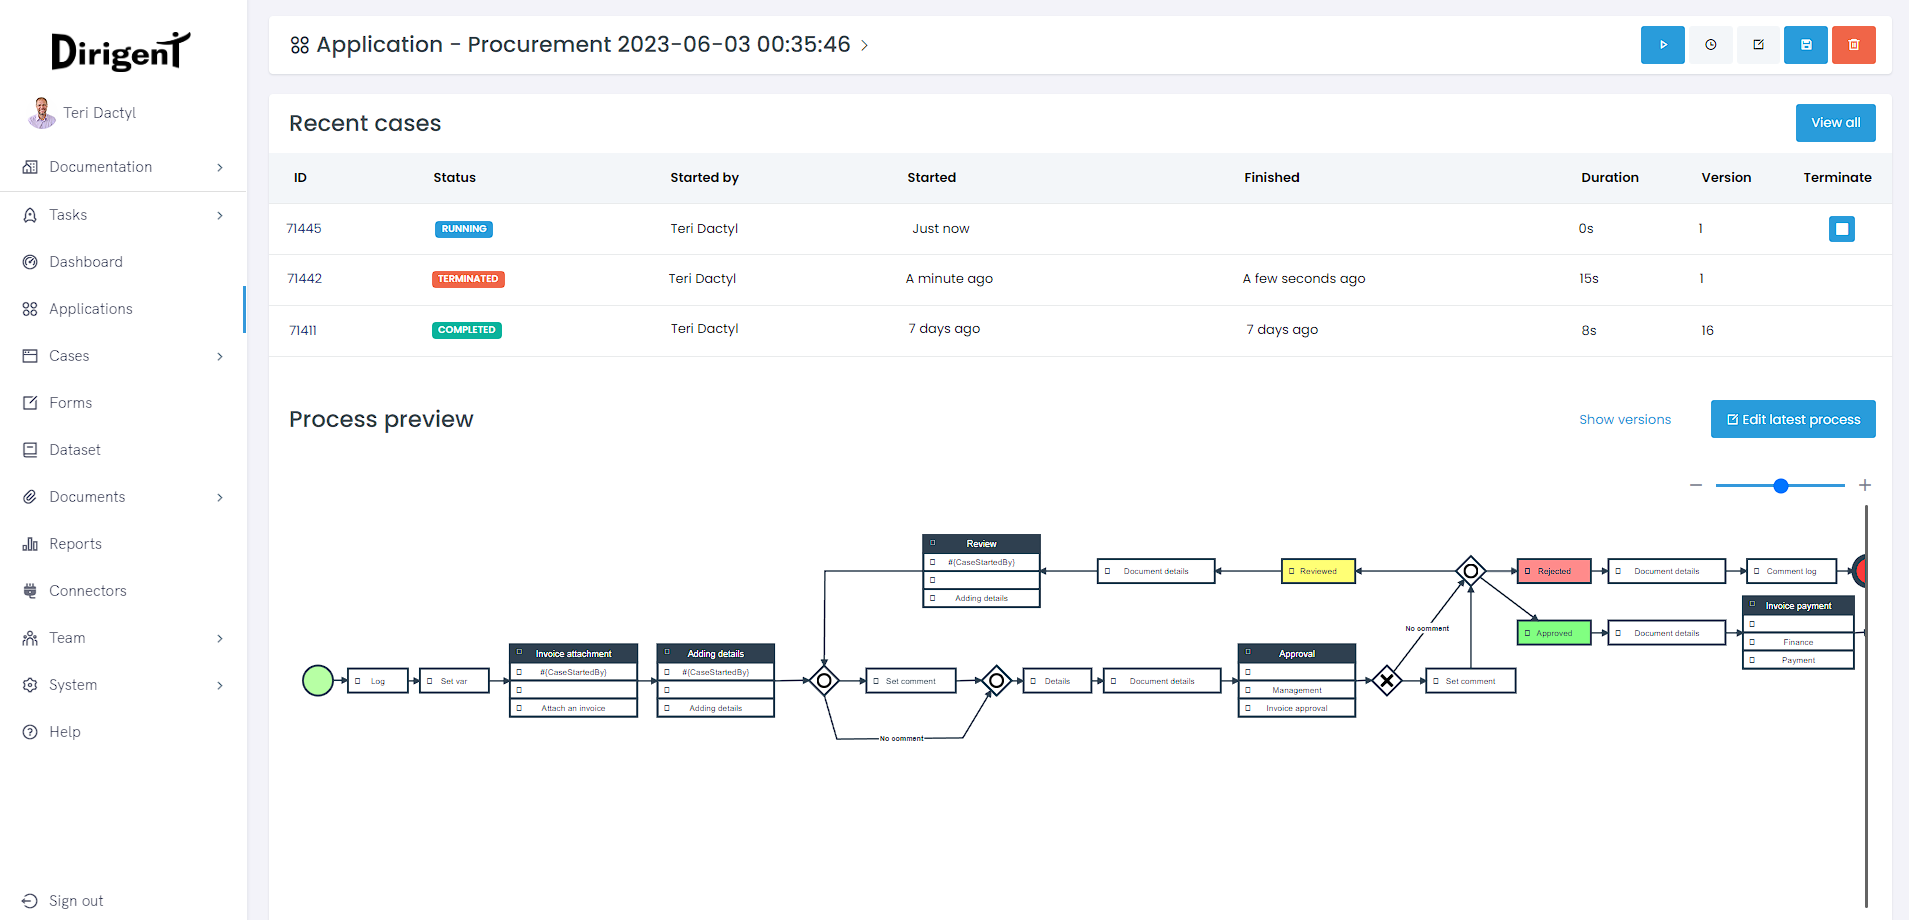
Application page containts various information regarding the application. In the header of the page, you can see applications id, created and updated date, tags, and description. You also have access to various actions such as to run an application, schedule, edit, save as or delete.
Schedule an application
Applications can be scheduled to execute at any time you want. Dirigent offers two ways in which you can schedule an application, Basic schedule and Cron expression.
Basic schedule
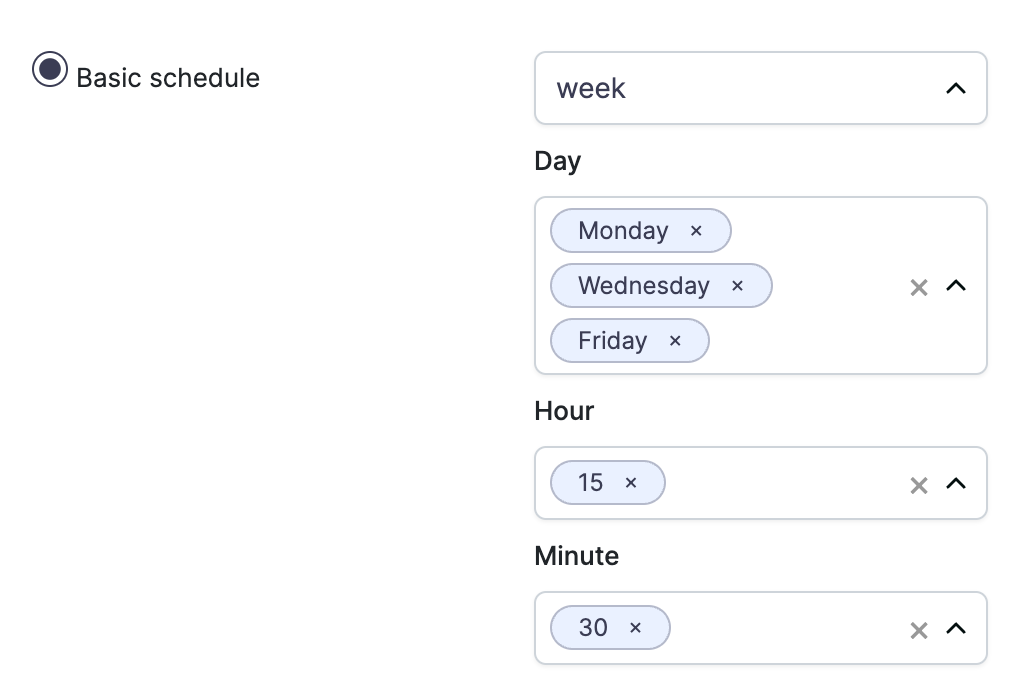
When using the basic schedule, you will be presented with dropdown in which you can pick a desired time period. It can be 5 minutes, hour, day, week, month, or a year.
In a given example, our application will execute weekly, every Monday, Wednesday, and Friday at 08:00 and 16:00 hours.
Cron schedule

The cron expression consists of 5 fields which represent the time to execute the command. You can take a look below to see how the cron expression works.
To replicate what we did with the basic schedule but this time using the cron expression, we would write 0 08,16 ? * MON,WED,FRI.
┌───────────── minute (0 - 59)
│ ┌───────────── hour (0 - 23)
│ │ ┌───────────── day of the month (1 - 31)
│ │ │ ┌───────────── month (1 - 12)
│ │ │ │ ┌───────────── day of the week (MON - SUN) (Monday to Sunday)
│ │ │ │ │
│ │ │ │ │
│ │ │ │ │
* * * * *
In a given example, our application will execute weekly, every Monday, Wednesday, and Friday at 08:00 and 16:00 hours.
Edit an application
Editing an application allows you to add some additional information such as tags and description. Status of the applications dictates whether the application can be started (Does not account for designer errors) or not. Validity of an application can also be set, which makes the application runnable in the given period of time.
Clone an application
If you want to have a copy of the application, you can have it by clicking the Save as button. You can give it a new name, and the application will be cloned together with all forms that the application uses.
Recent cases
Every run of an application creates a new separate case. In this section of the application's page, only the most 3 recent ones will be listed for you to inspect. If you wish see all cases for the application, a View all button is available in the upper right corner of the recent cases screen.
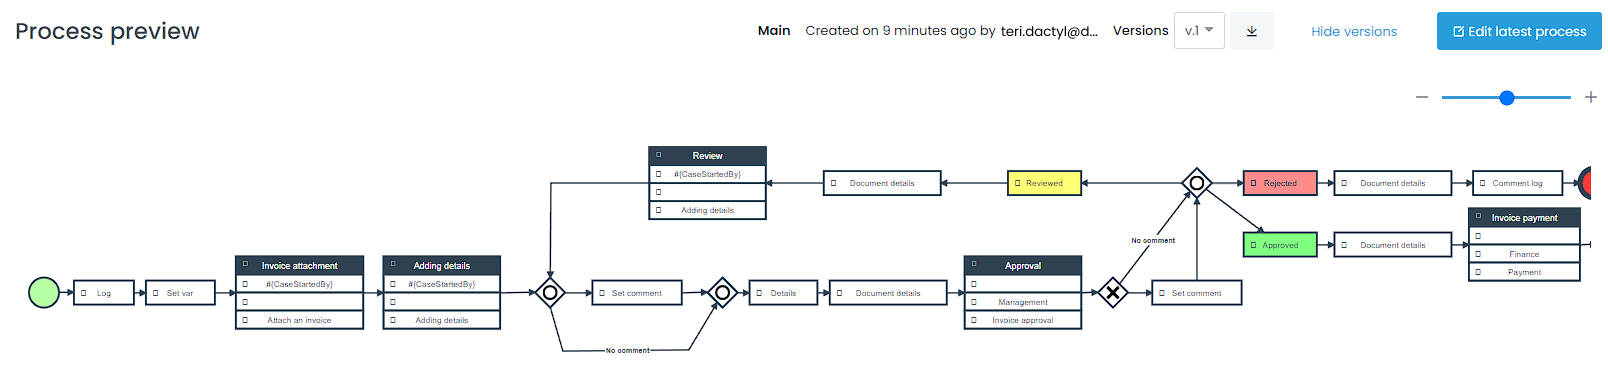
Process preview
The latest version of the main process can be viewed here. You can click on the Show versions button, revealing the version dropdown menu. Here, you can see all of the previous versions of the application with the Created on and Created by information. When another version is selected, the process preview will change automatically, showing you how the process looked at the selected version. To download the process, use the Download as JSON button.