Connectors
Introduction
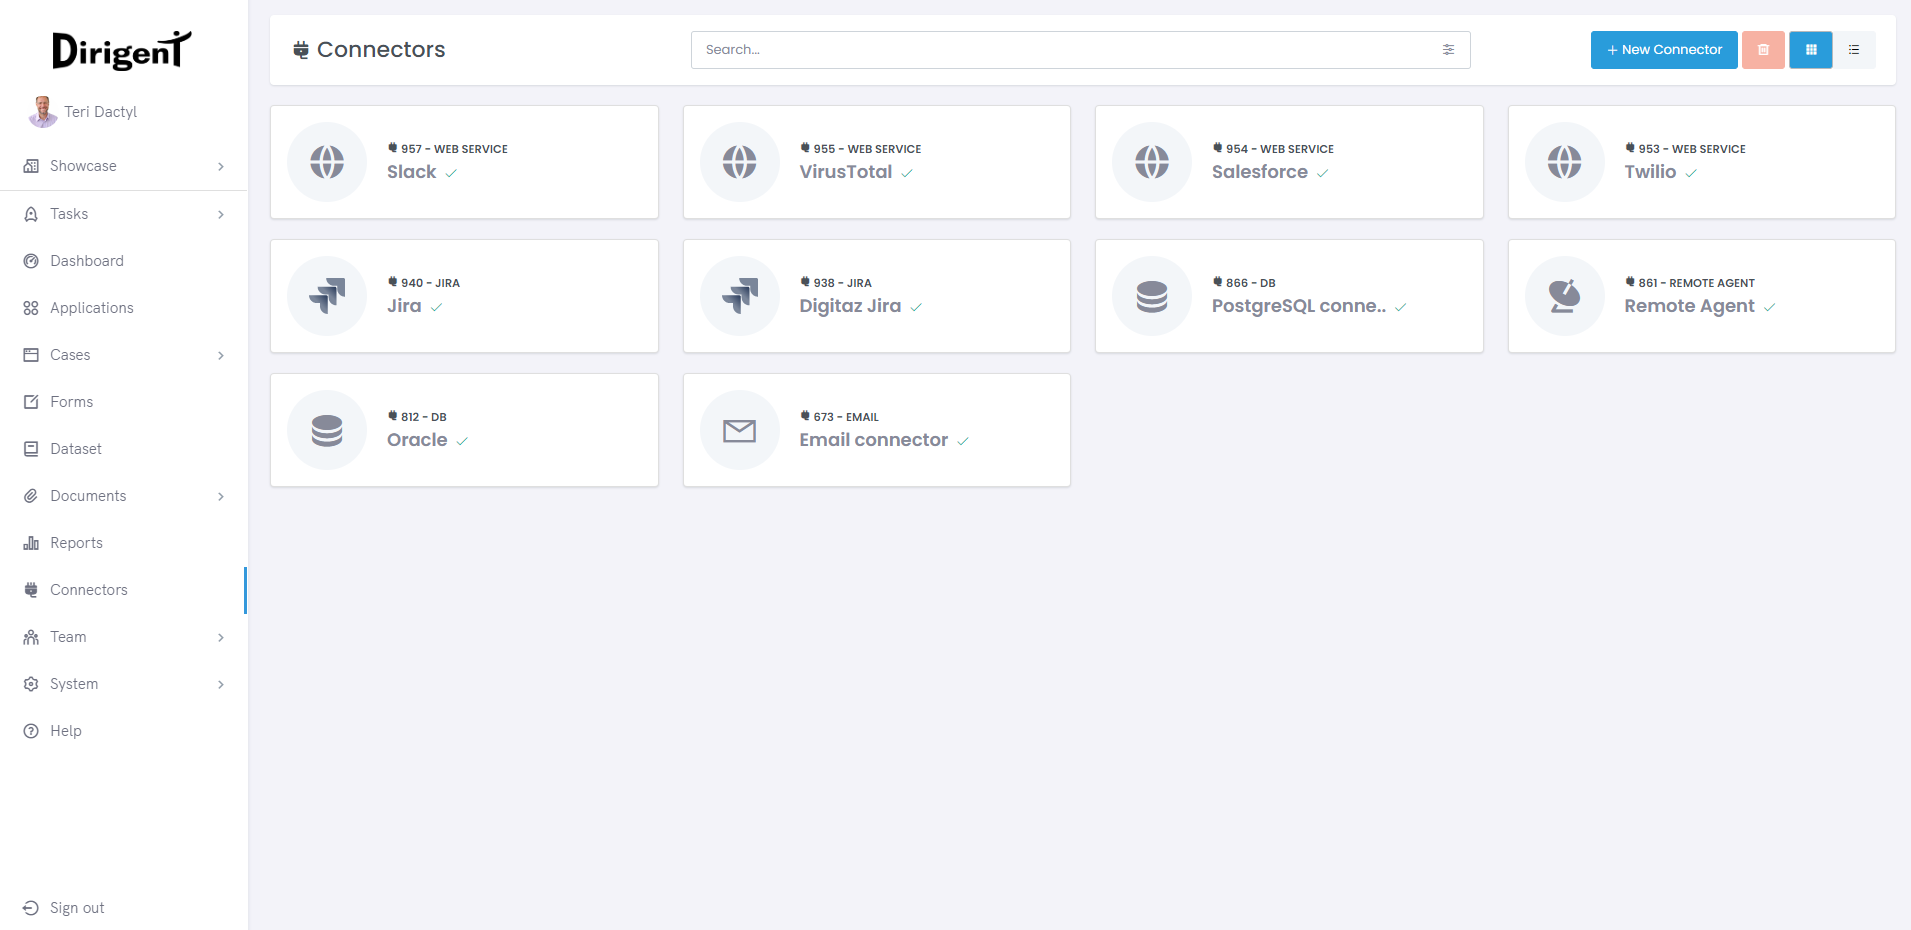
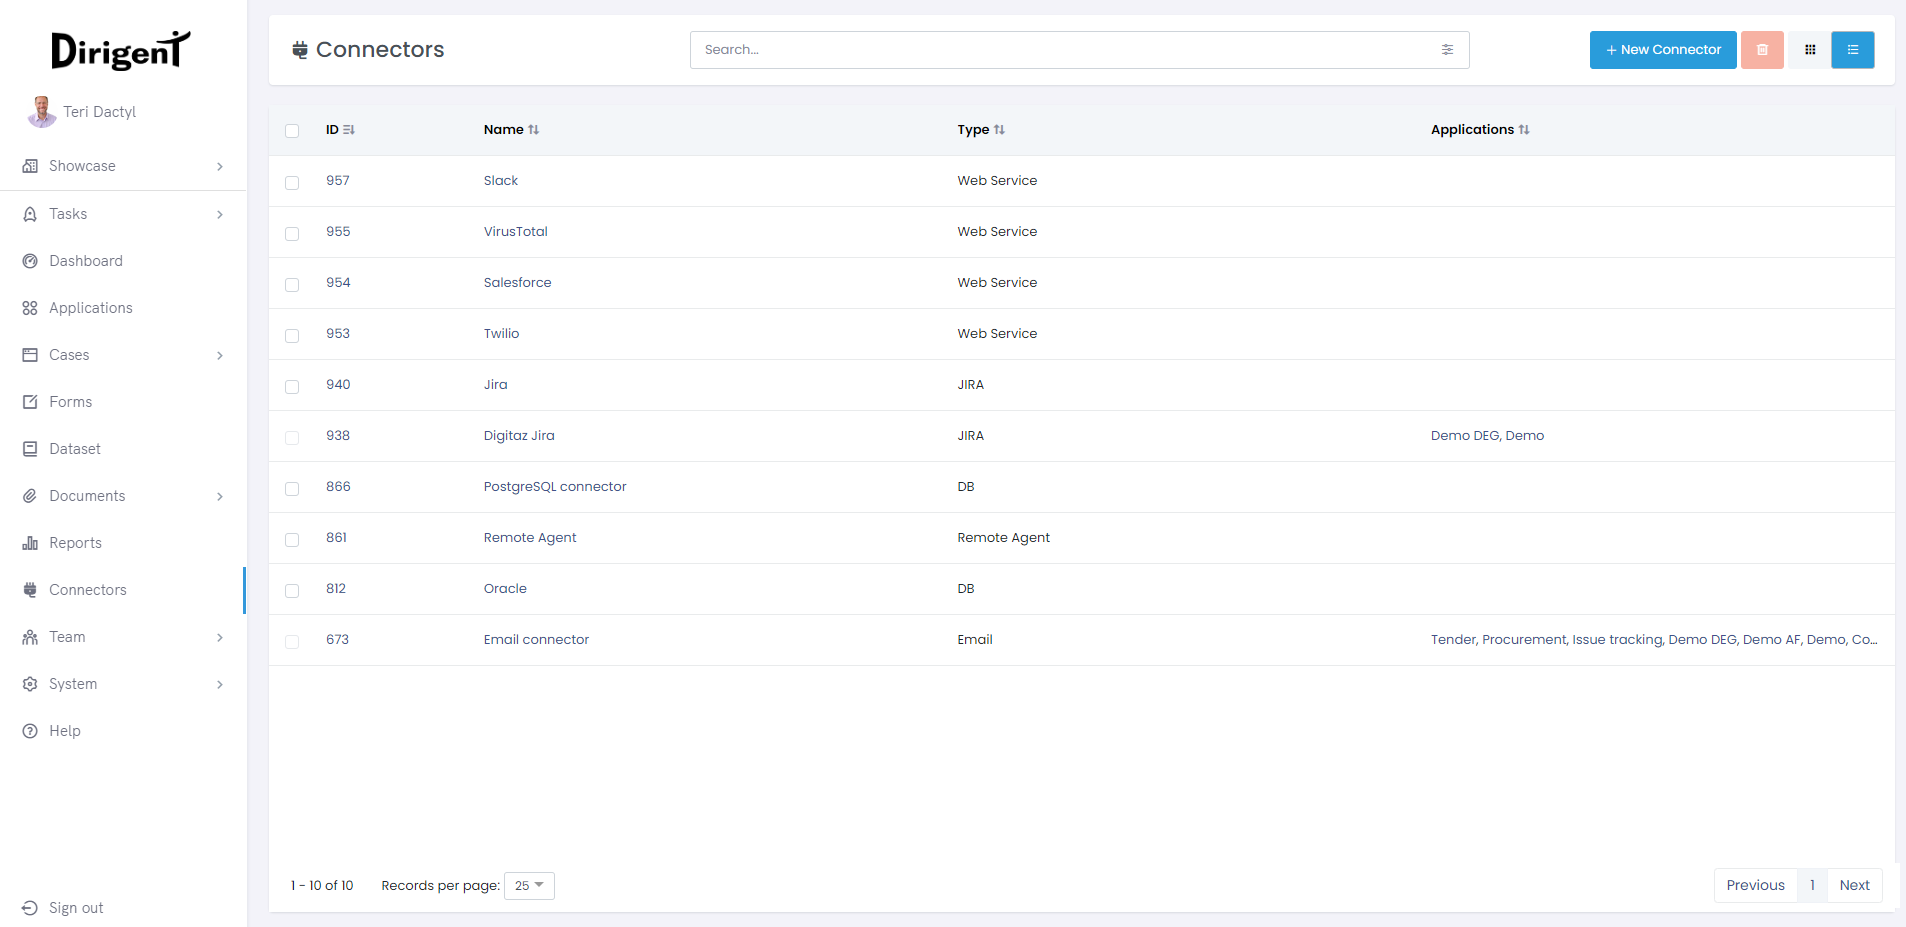
Connectors are used to allow Dirigent access to third-party users or services by using tasks. In order for those tasks to work, an appropriate connector is required. The connectors page displays all created connectors within a particular workspace.
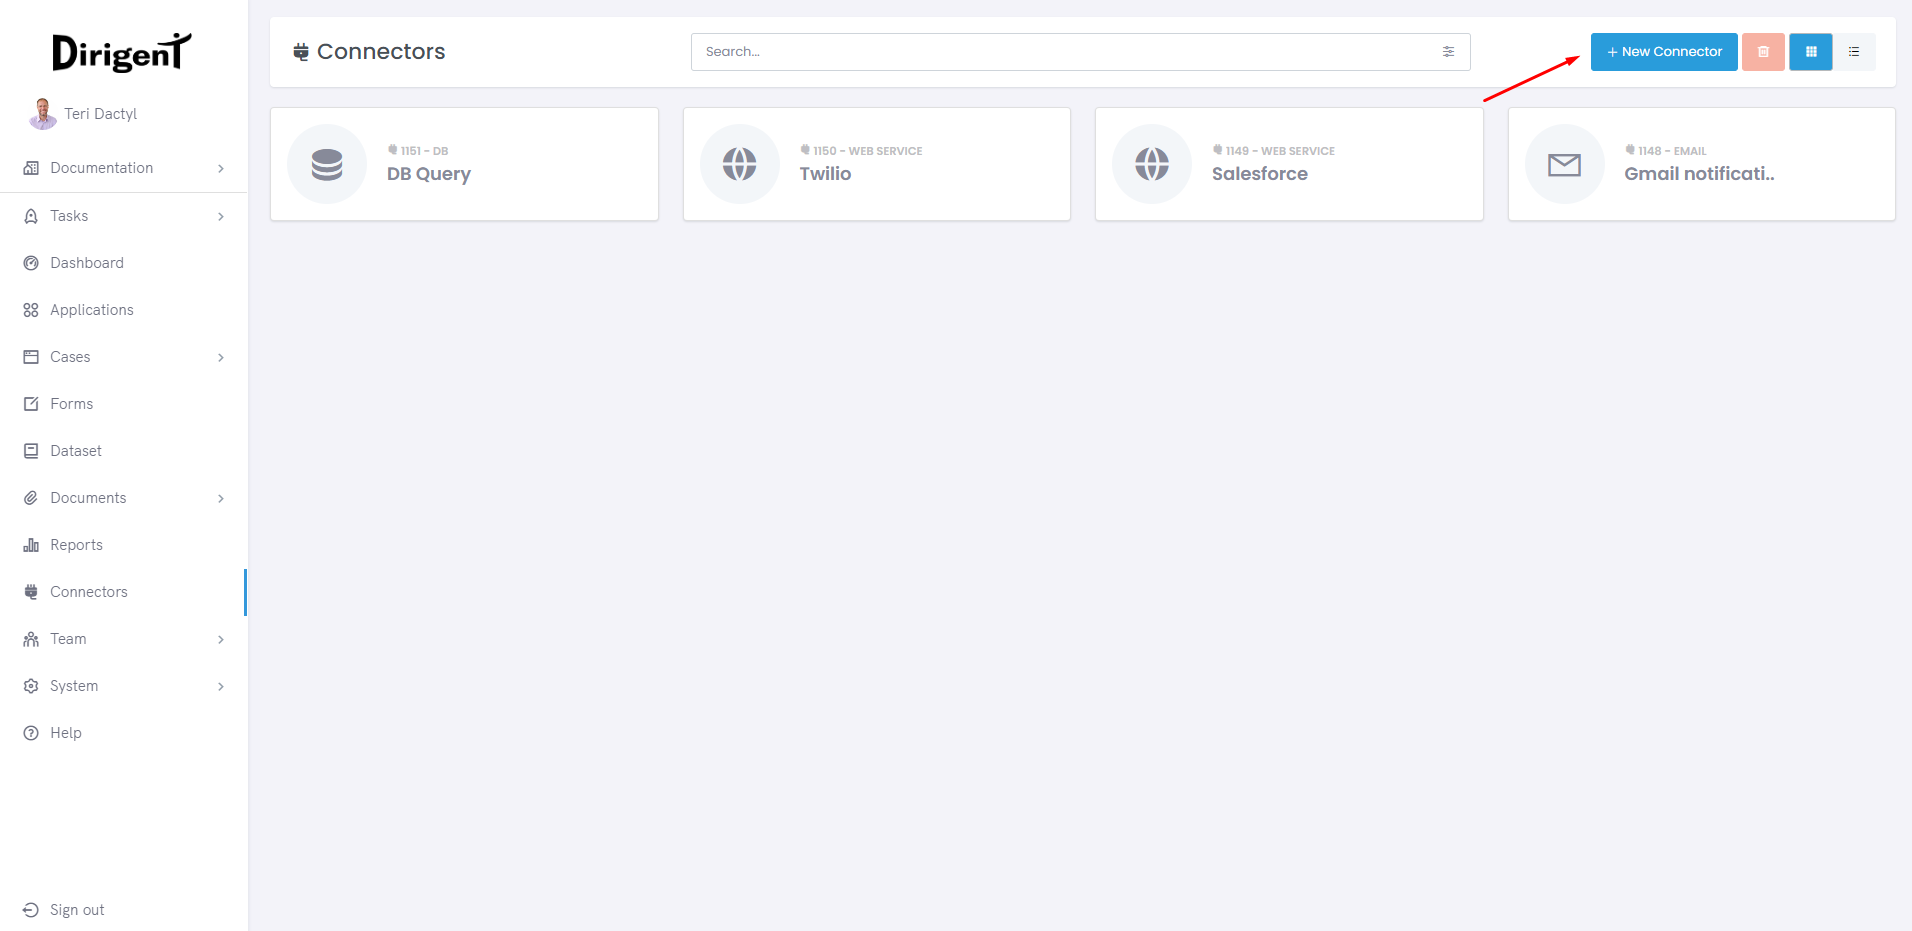
On the top of the page menu, you can create a new connector, switch between the card and table view, or search through existing ones. The list of connectors on the page shows the created items with information about the ID, Name, Type and Applications.
Connector types
Dirigent offers a wide range of connectors, allowing for use of Email, Remote Agent, Database, FTP or a Web Service. Our Web Service encompases integrations with various third-party services such as Salesfoce, Slack, Twilio, etc.
Let's explore the connector types Dirigent has to offer.
Email connector
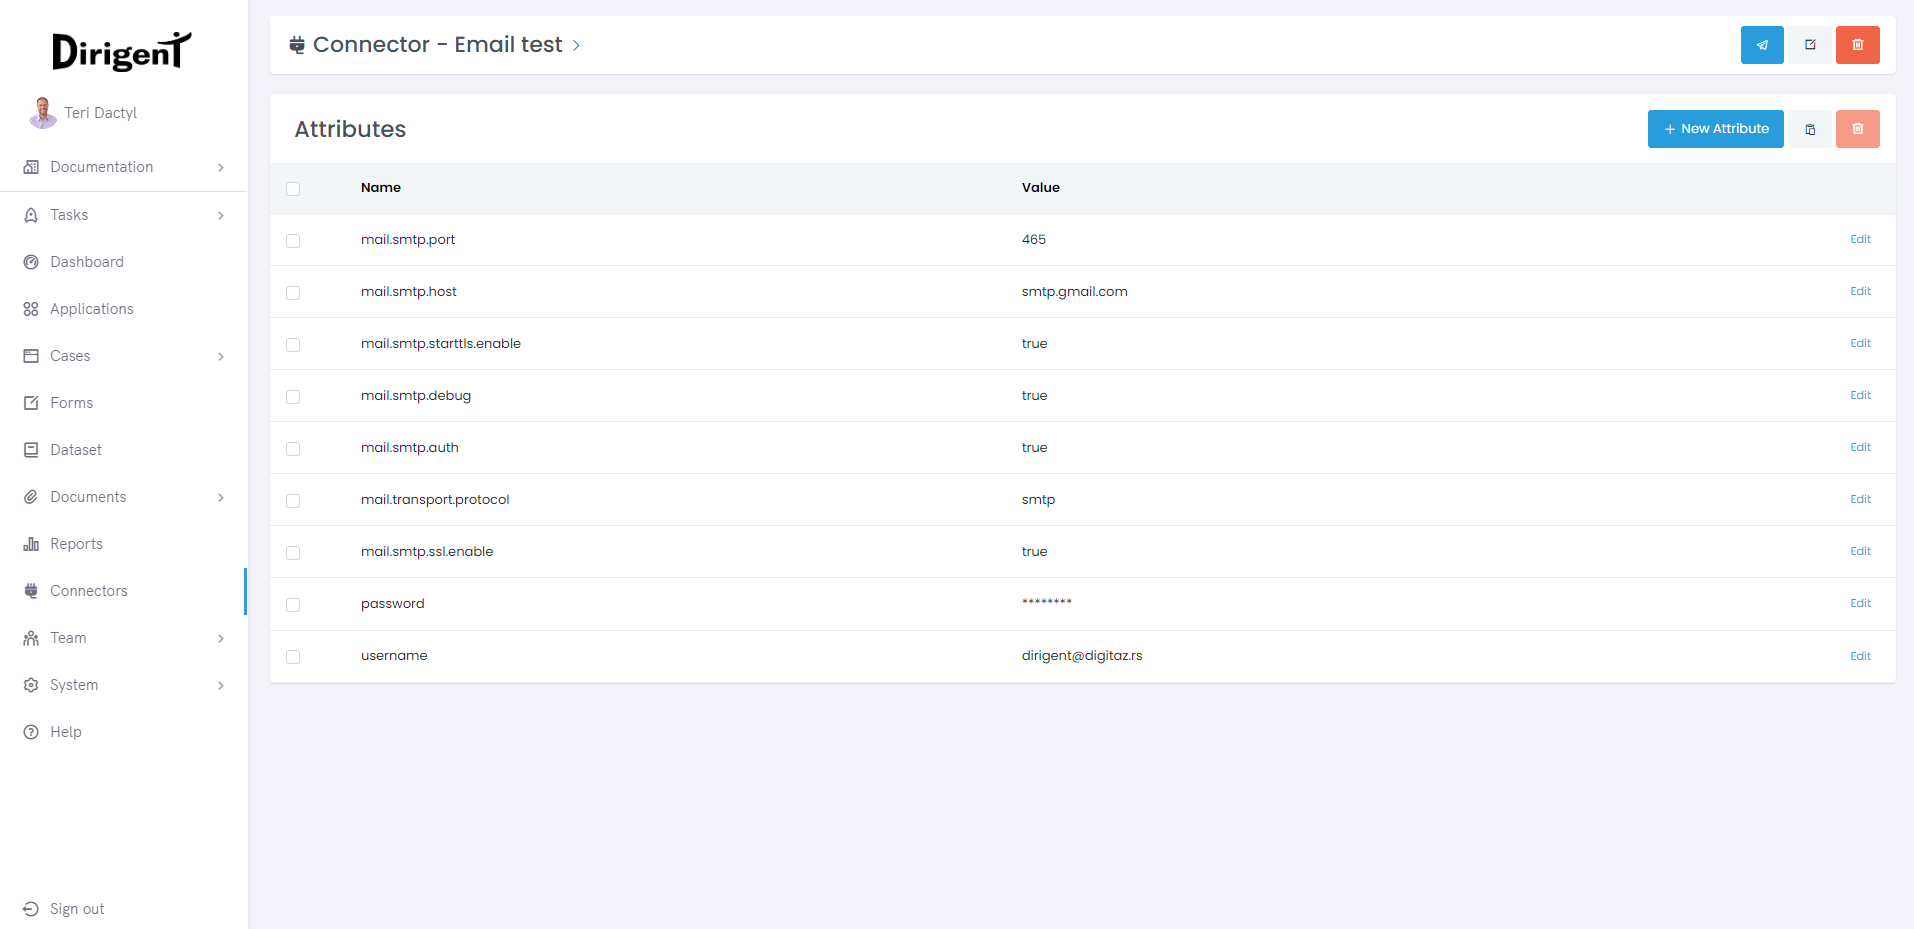
The email connector utilizes the Simple Mail Transfer Protocol (SMTP) to facilitate message transmission. The volume of messages sent within a specific timeframe is determined by the SMTP server's characteristics. Different SMTP server providers may require distinct sets of attributes.
These attribute sets are categorized into four templates: Gmail, Mandrill, Yahoo, and Outlook. To configure an email connector, follow the steps outlined below:
What to do if email can't reach your inbox?
Sometimes mails from Dirigent may be mistaken for spam or a less trusted source, so here is how to fix the situation if it appears:
Gmail: In case Google prevents Diringet from accessing your email address, go to the Gmail settings, find the less secure applications page, and select the "turn on" option. Visit Google Help Center for a detailed explanation.
Outlook: Outlook will prevent Dirigent to access the user email in case the application is running a task that contains an email connector:
- Click on the email received from the Microsoft team.
- Verify the password
- Click to send the code to an alternative email address or phone number.
- Send the code once you receive it.
- Verify the activity
Alternatively, go to Outlook security settings and turn on the 2-step verification option, then go to App passwords and use the generated password in the configuration email connector.
Yahoo: In case Yahoo prevents Dirigent from accessing the user's email, click on the Verify your email in the email received from Yahoo.
Delay in service
Keep in mind that sometimes it takes several hours for the less secure app's settings to be applied. In such cases, the user is advised to sign out and sign in again.
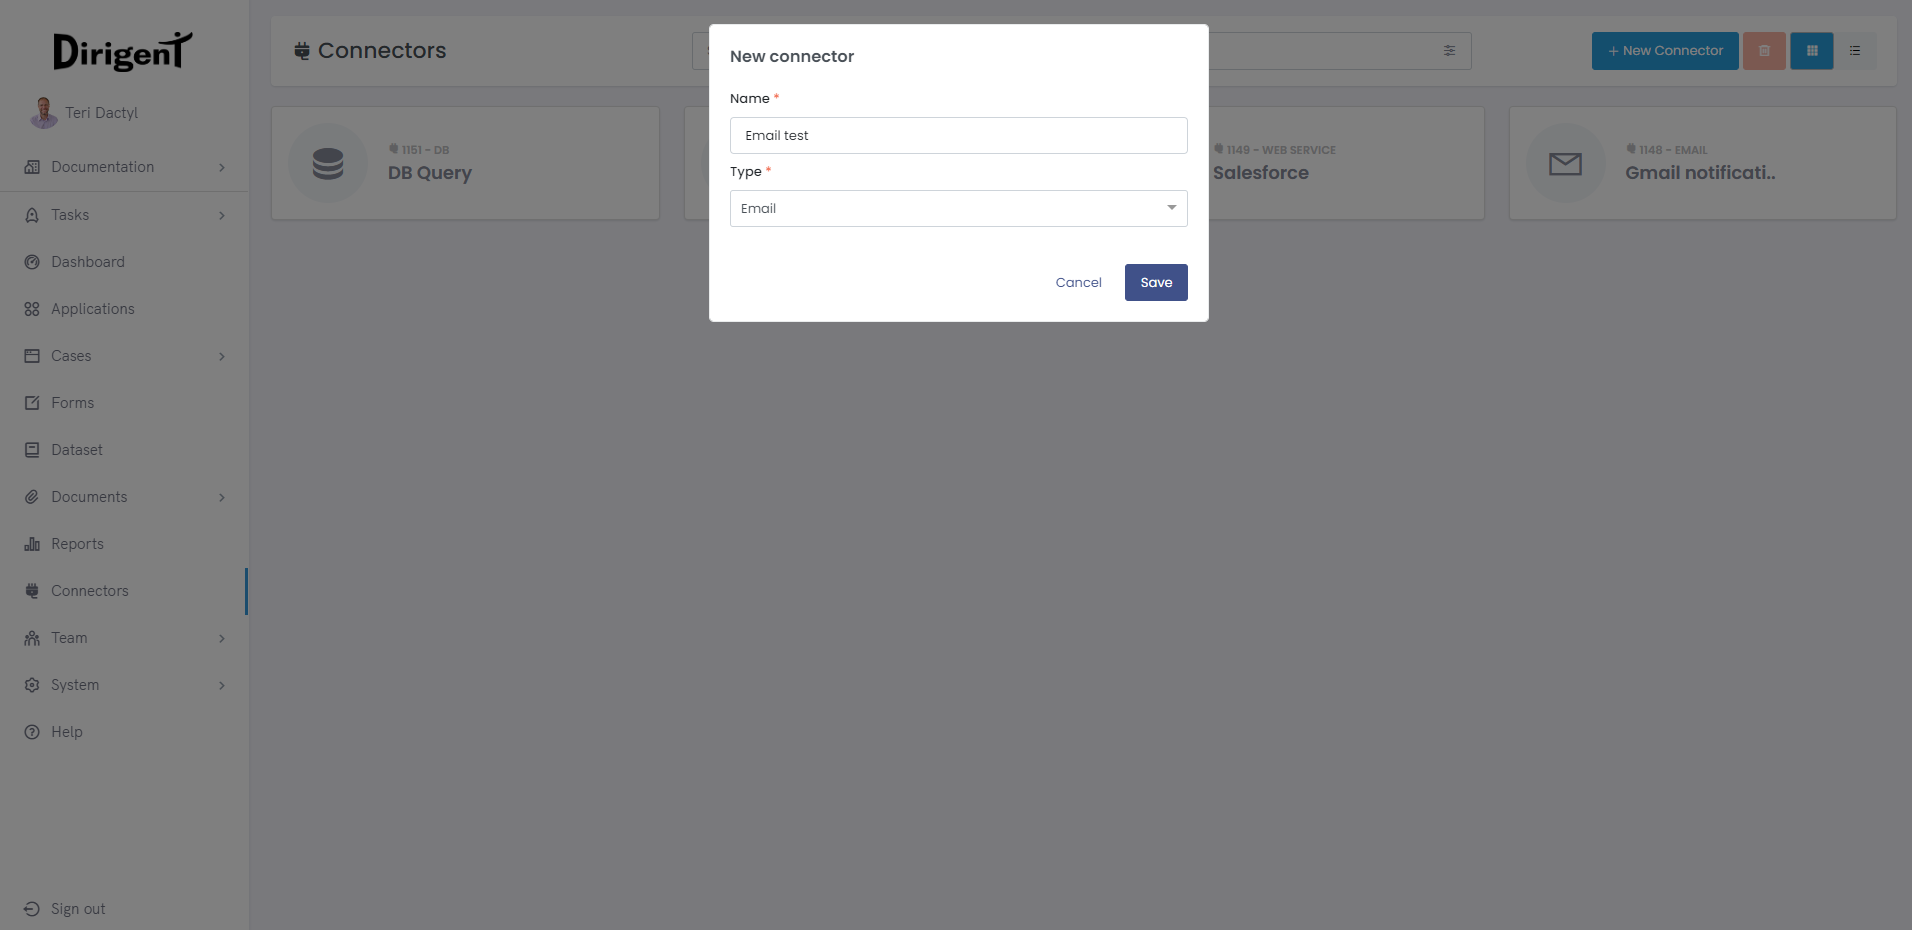
Create and configure email connector
- Click on the
+ New Connectorbutton on the main Connectors page. - Give the connector a name and set its type to
Emailand save. - On the connector page, click the
templatebutton and select the one you will be using. - Fill the username and password of the account that will be the sender, then save.
- A template will be generated for you, thus configuring your email connector.


Send a test email
If you want to test your email connector, you can do so by sending a test email to a an email address that is tied to your Dirigent profile. Select an email address and click Send.
Remote agent
The Dirigent remote agent is a service capable of running and executing remote actions. Remote agent connectors are not strictly invoked for a task but rather activate themselves without any user interaction.
The remote agent is a convenient and powerful way to describe a complex entity capable of acting with a certain degree of autonomy in order to accomplish tasks on behalf of its host. The following tasks require at least one remote agent: Script, copy, move, list files, wait for file, and git.
Every remote agent connector must consist of an identical set of attributes. You can add or remove attributes by clicking the corresponding buttons. The most up-to-date version of the remote agent JAR can always be downloaded from the remote agent connector's page.
Remote agent system variables
It's important to note that the remote agent has two attributes Remote agent ID and Remote agent token which cannot be edited.
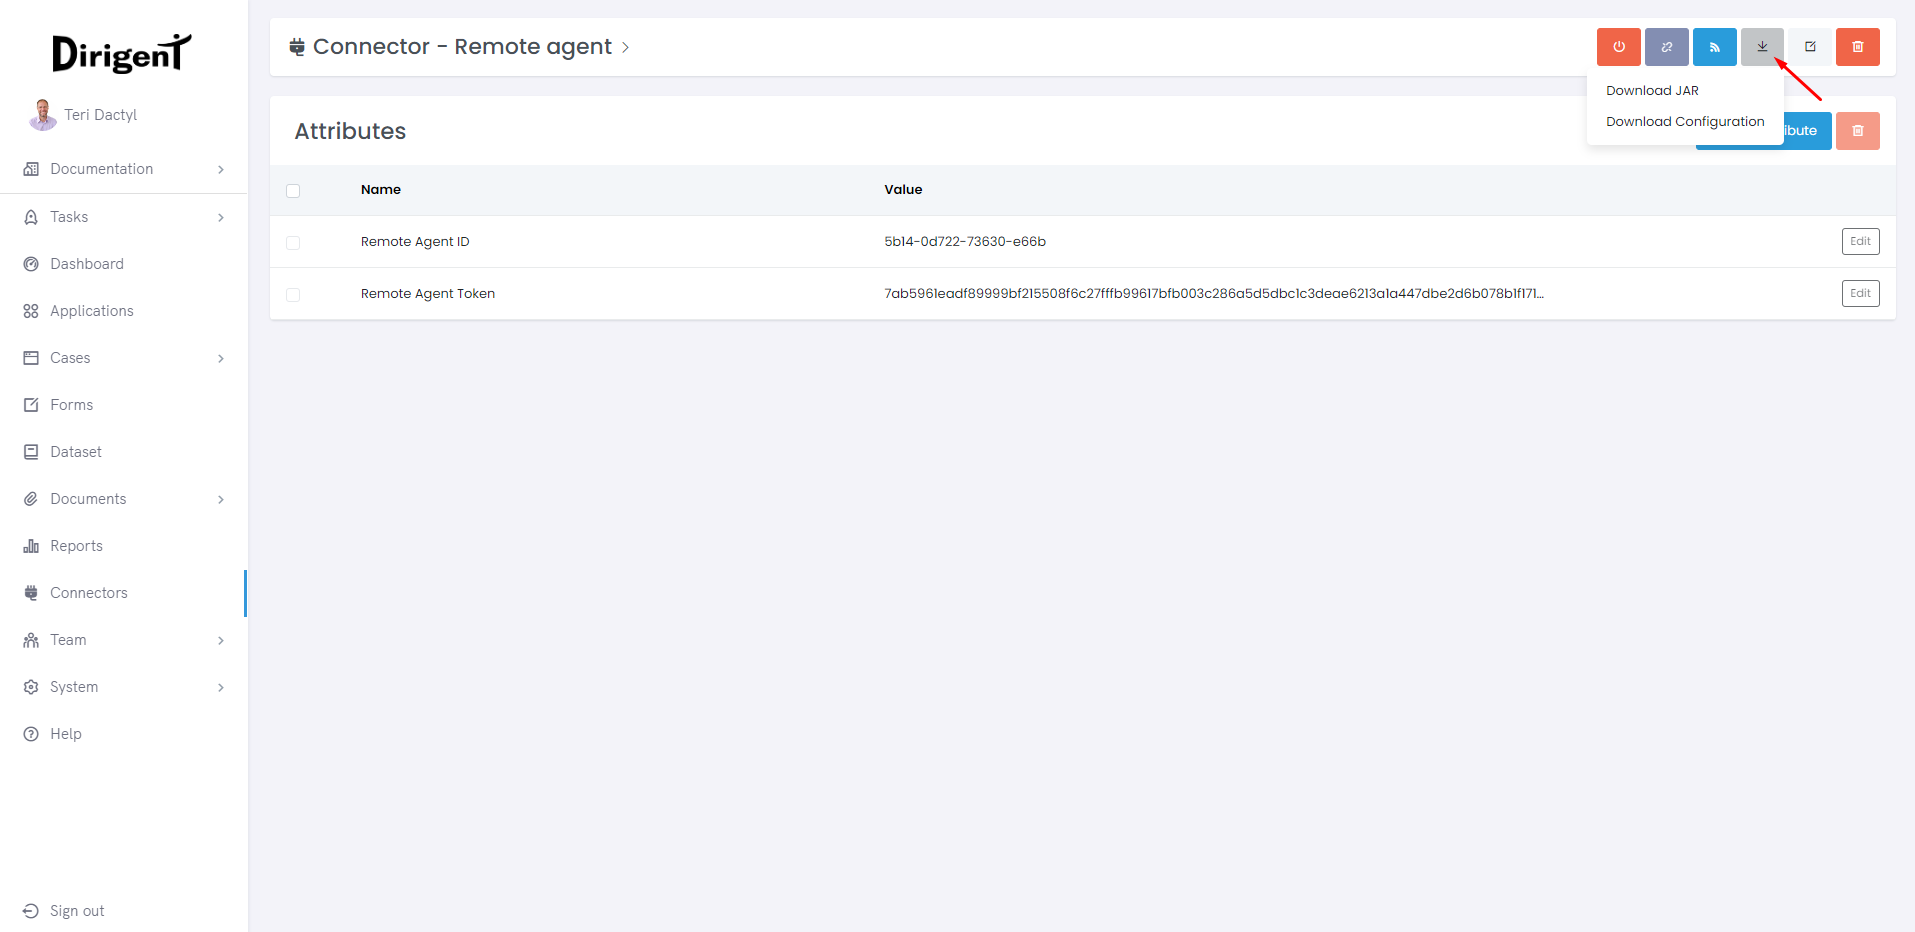
Create and configure Remote agent connector
- Click on the
+ New Connectorbutton on the main Connectors page. - Give the connector a name and set its type to
Remote agentand save. - On the connector page, click the
Download asbutton and download JAR and Configuration. - Put the downloaded files in the same directory and run a terminal from that location.
Running a terminal for different OS
Windows: Access the command prompt by going to the start menu, and typing "cmd" into the search field.
Linux: The shortcut for opening the terminal is Ctrl + Alt + T.
Mac OS X: Type "terminal" in the search field or go to the /applications/utilities/ foder and find the terminal there.
The command line will open the default directory. Change directory to the location where the remote agent JAR and Configuration are been placed.
Once in the remote agent JAR directory, run the following command: For example Once the command has been successfully executed, the Remote agent will be ready to go!Database connector
The DB connector serves the purpose of facilitating DBQuery and DBUpdate tasks, enabling the saving of necessary parameters for connecting to a database. The attributes associated with the DB connector are as follows:
Url - Java database connectivity url
User - Registered user that has acces to the database.
Password - User's password.
Driver - Name of the java database connectivity driver.
Driver path - Path to the java database connectivity driver you are using for this connection.
FTP connector
FTP connector is used for a file transfer protocol task, FTP for short. There are four types of FTP connectors: FTP (File transfer protocol), SFTP (secure file transfer protocol), FTPS (extension of the common FTP protocol which adds support for the transport layer), and CISF (common internet file system).
Choose an FTP connector depending on which FTP server you want to connect to. It will allow you to save parameters that are required to connect to the FTP server. Attributes go as follows:
Type - Type of the file transfer protocol.
Host - Address of the host.
Port - Port that will be used for file transfer protocol connection.
Username - Registered user with access to the FTP server.
Password - Password corresponding to the user.
Web service
The Web Service connector allows communication and integration with external web services, enabling data exchange, retrieval, and interaction with APIs and other web-based systems. It provides the capability to make HTTP requests and handle responses.
When configuring a Web Service, you can choose between Basic, API key, or OAuth authentication type. Because everything is custom, the Web Service connector serves as a joker, in a way that with proper configuration, it can serve as a connector to any service.
Integrations
Integrations are a part of Web Service connector which allow you to integrate a software with Dirigent, meaning that processes in Dirigent can have an impact in the integrated software.
Twilio
Twilio uses two credentials to determine which account an API request is coming from:
Account SID - Your account string identifier which acts as a username.
Auth Token - Acts as a password.
Once the configuration process is comleted, the connector can be used in the Twilio task.
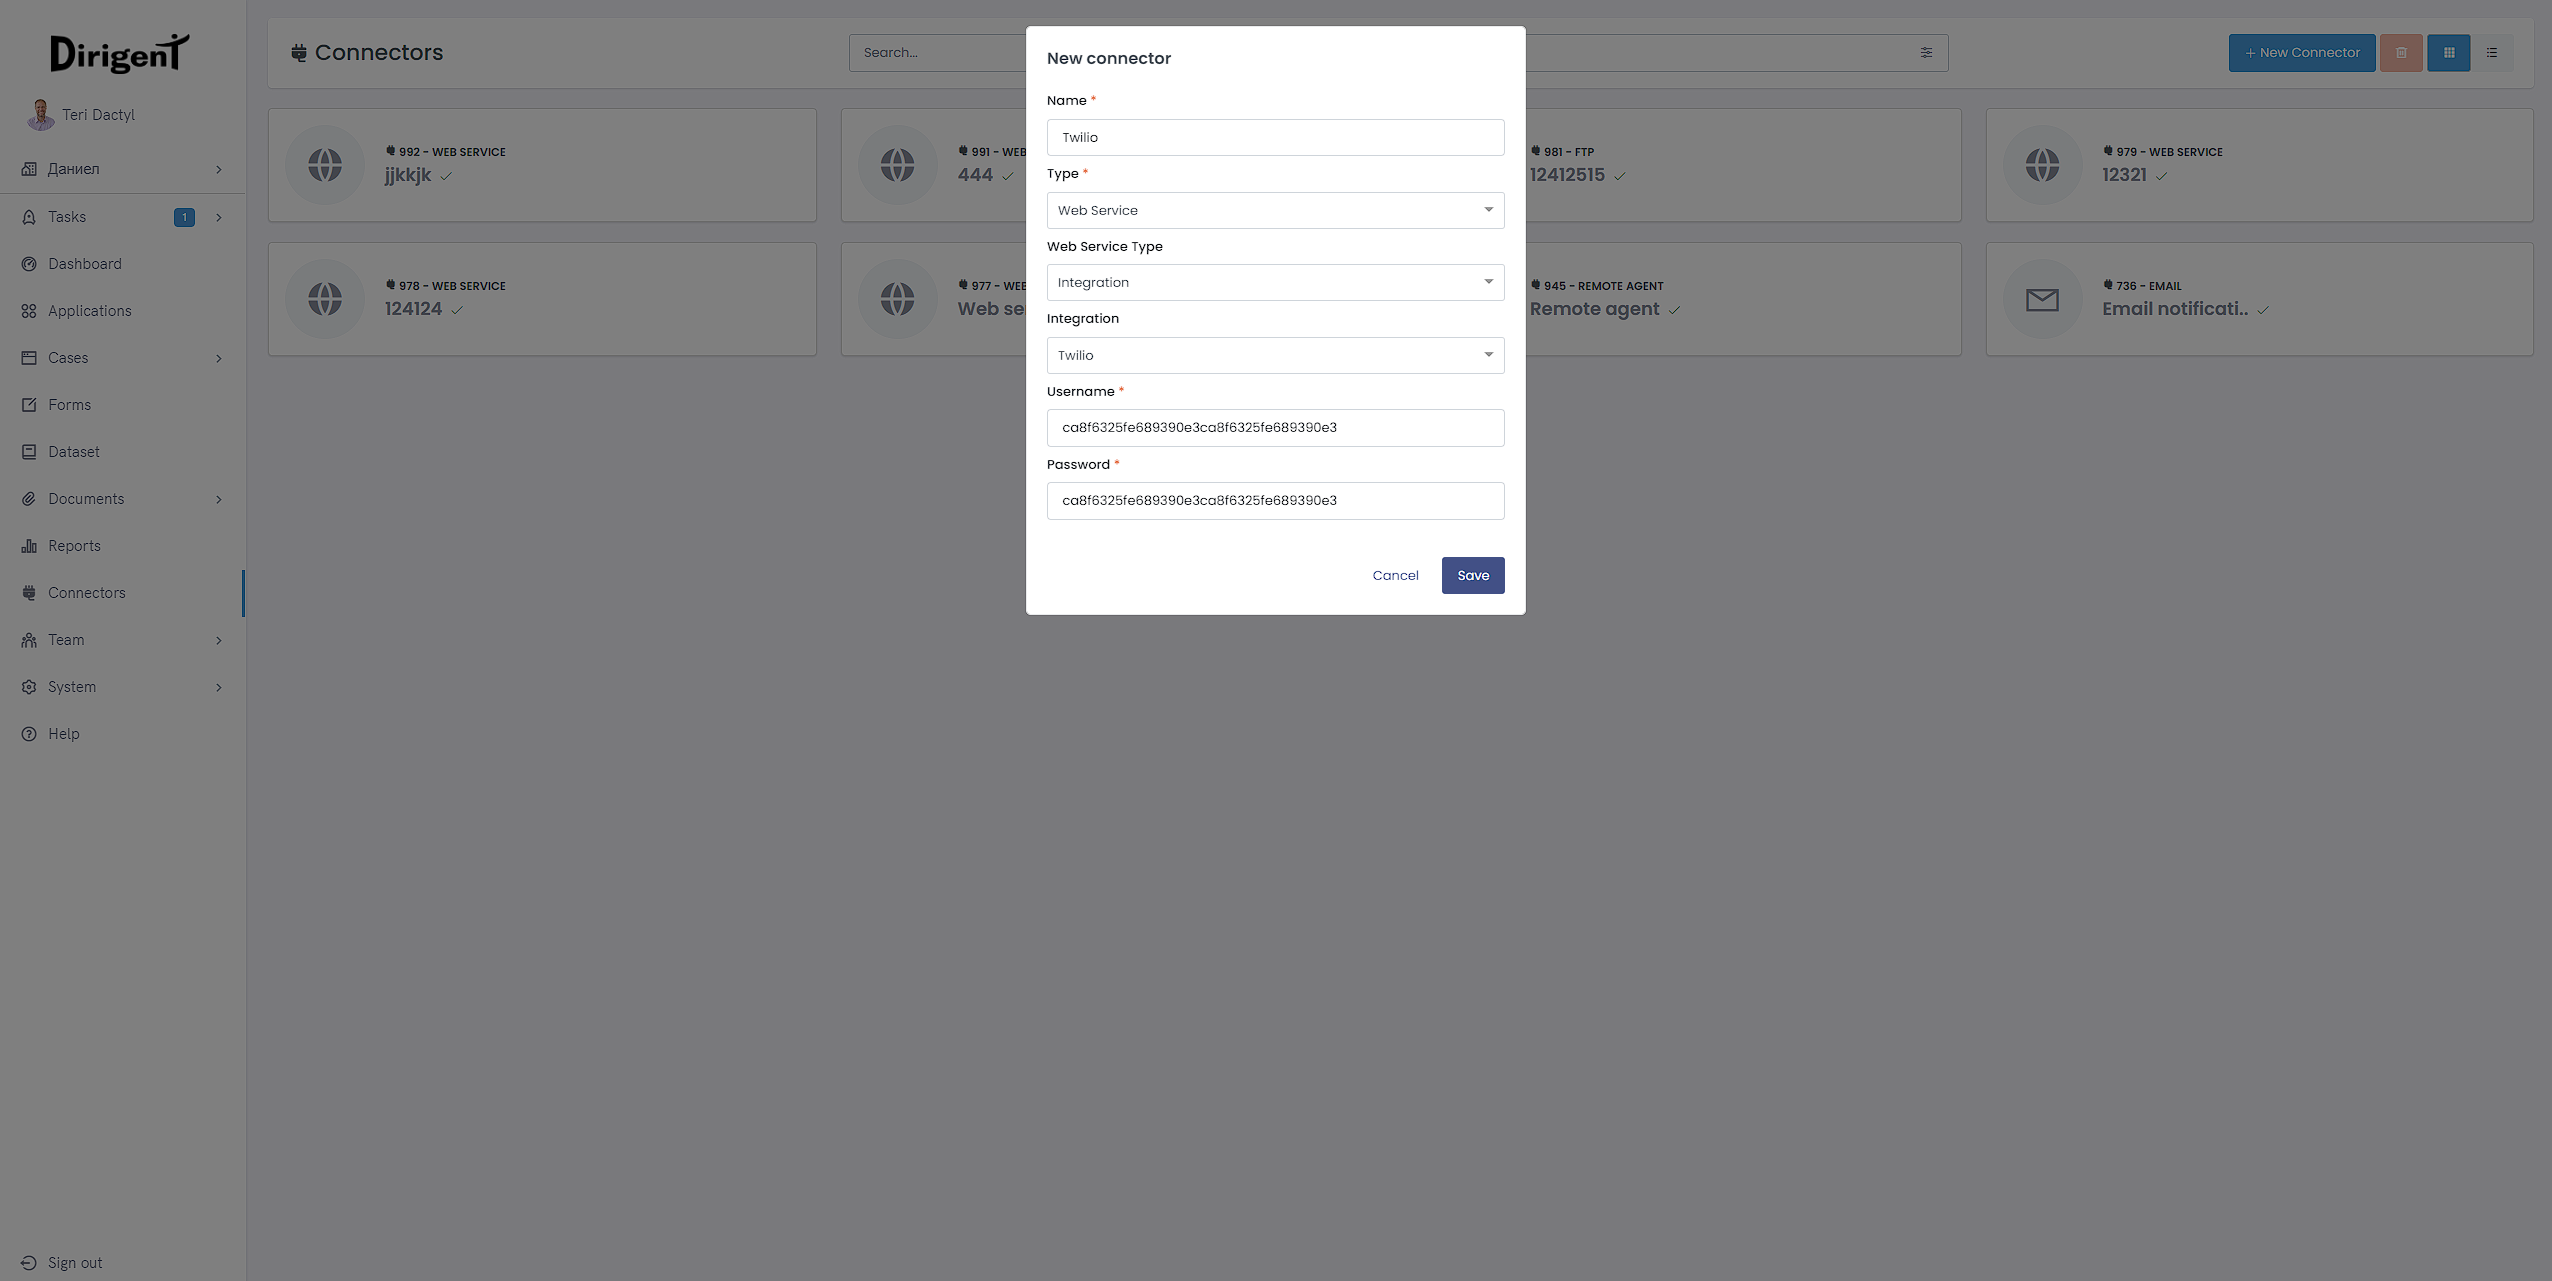
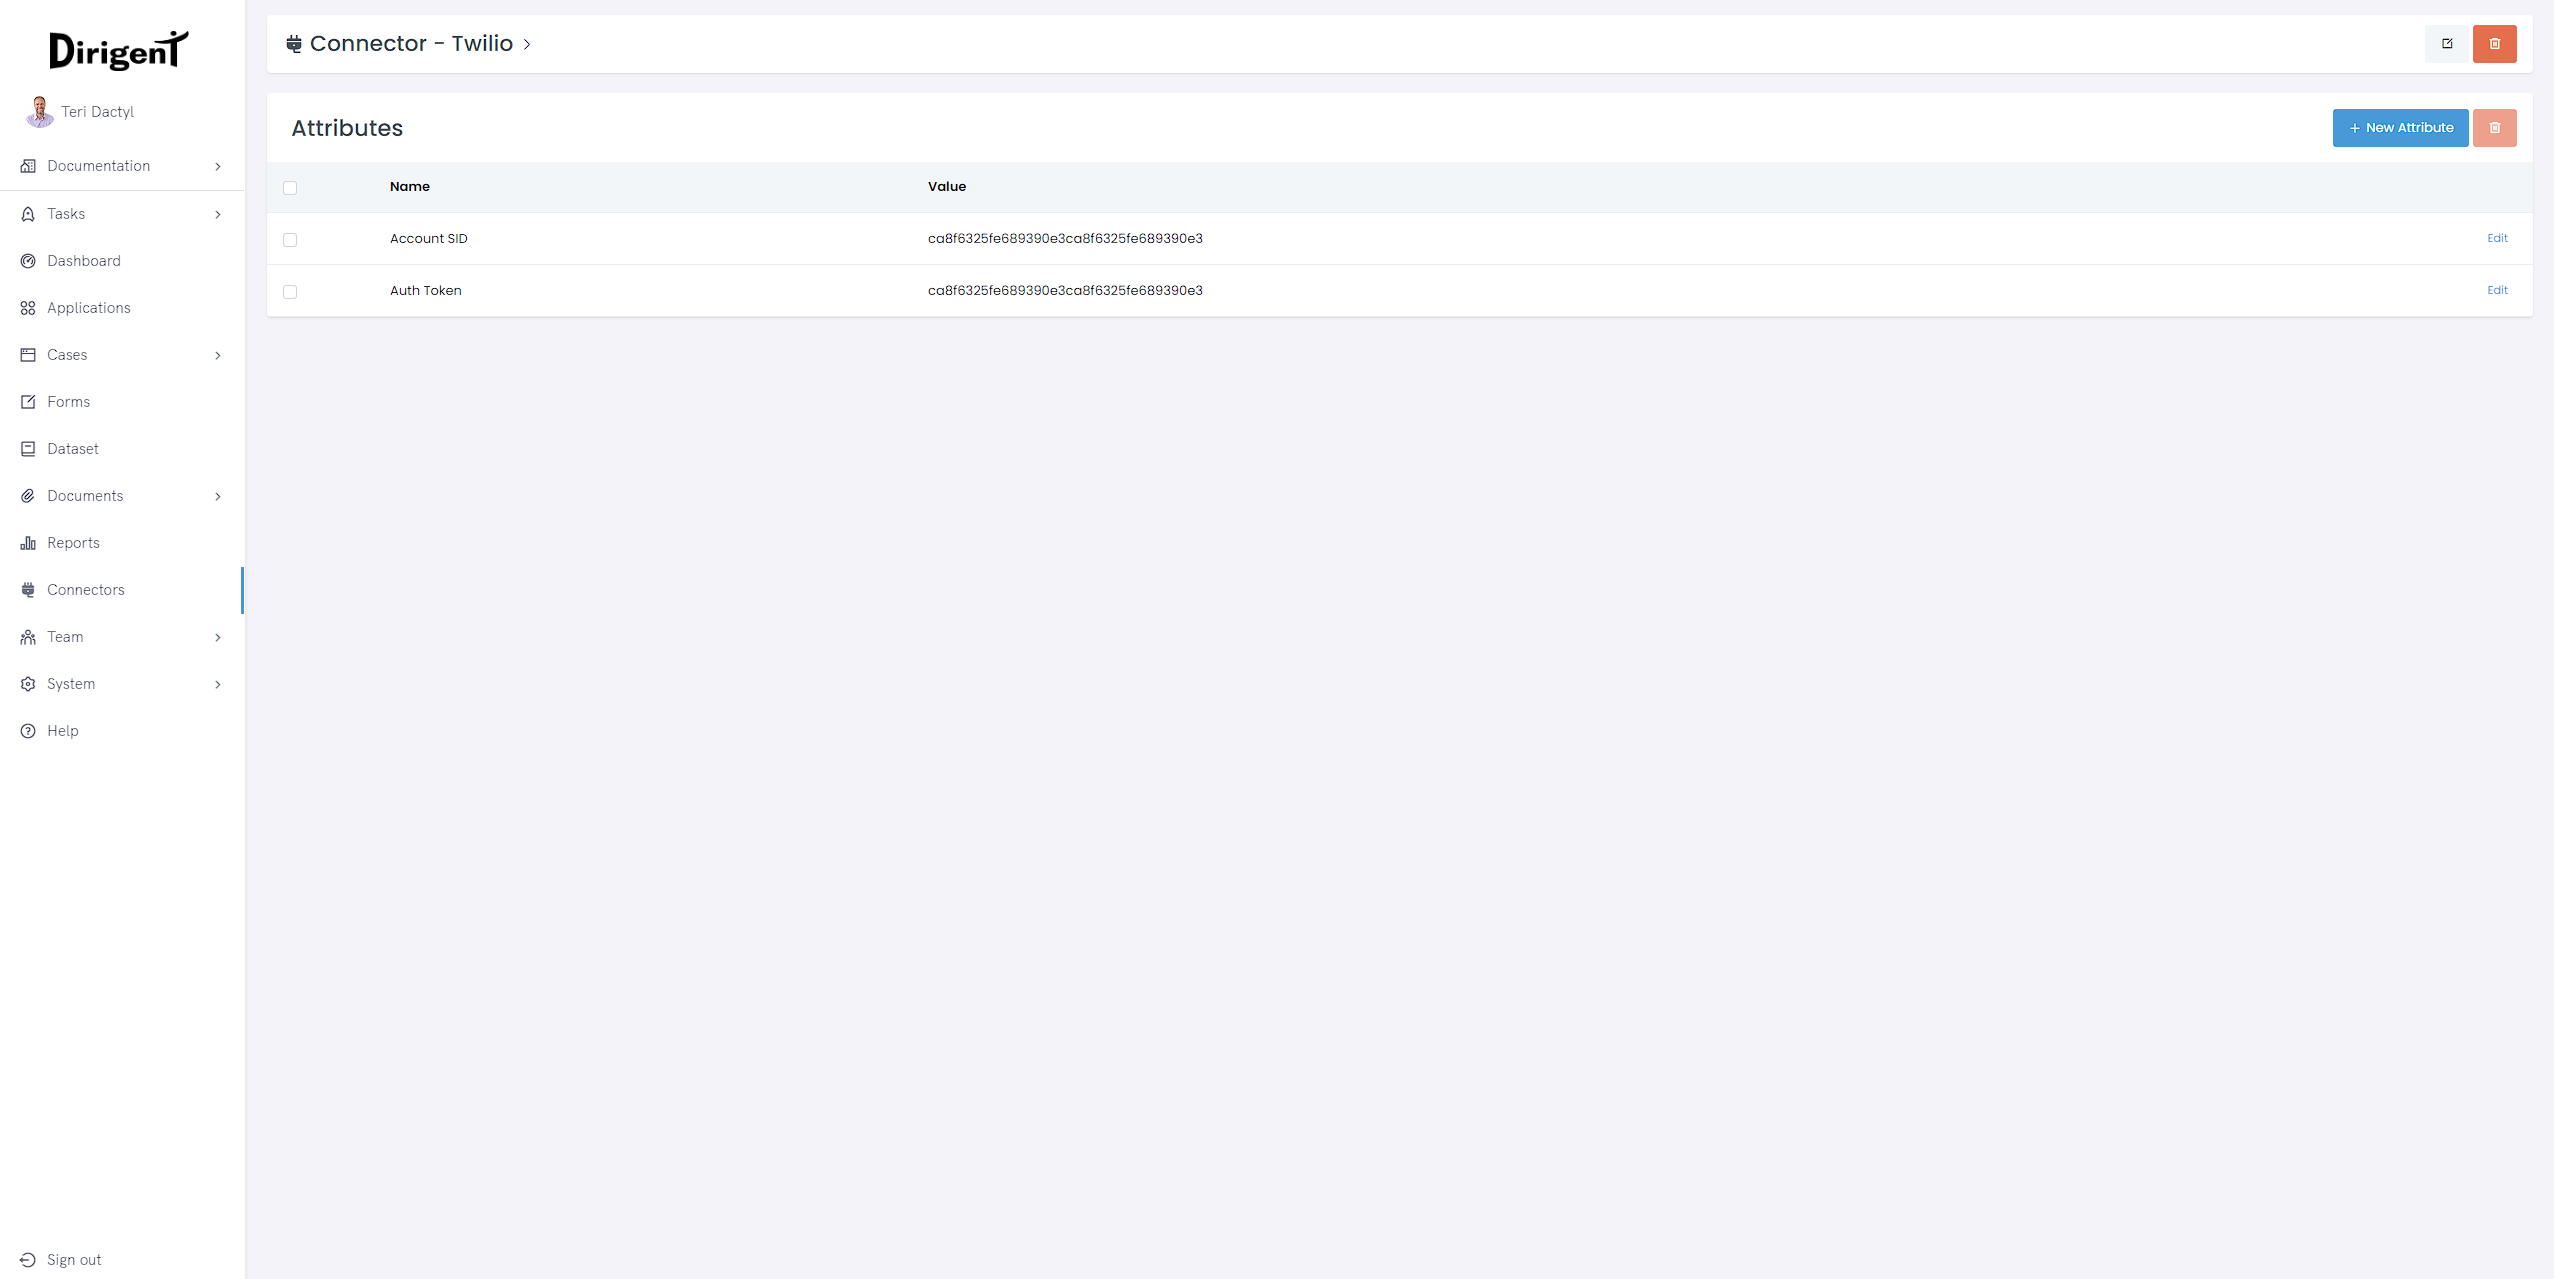
Once the connector has been successfully completed, it can be used in the Twillio task, enabling you to send SMS messages.
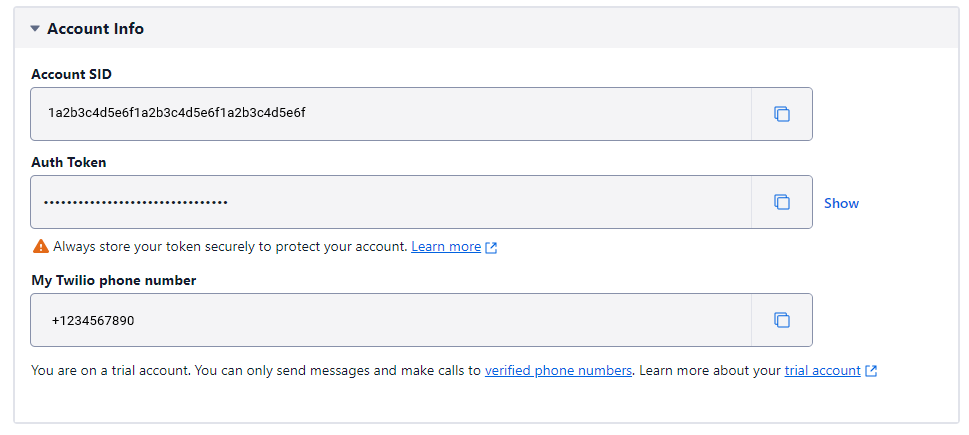
Where can I find the required information?
You can find the Auth Token in the Account Info pane of the Console Dashboard page.
Google Drive
Integration with Google Drive is done by clicking the Authorize with Google button, located on the Google drive connector page. Once the configuration process is comleted, the connector can be used in the Google Drive task.
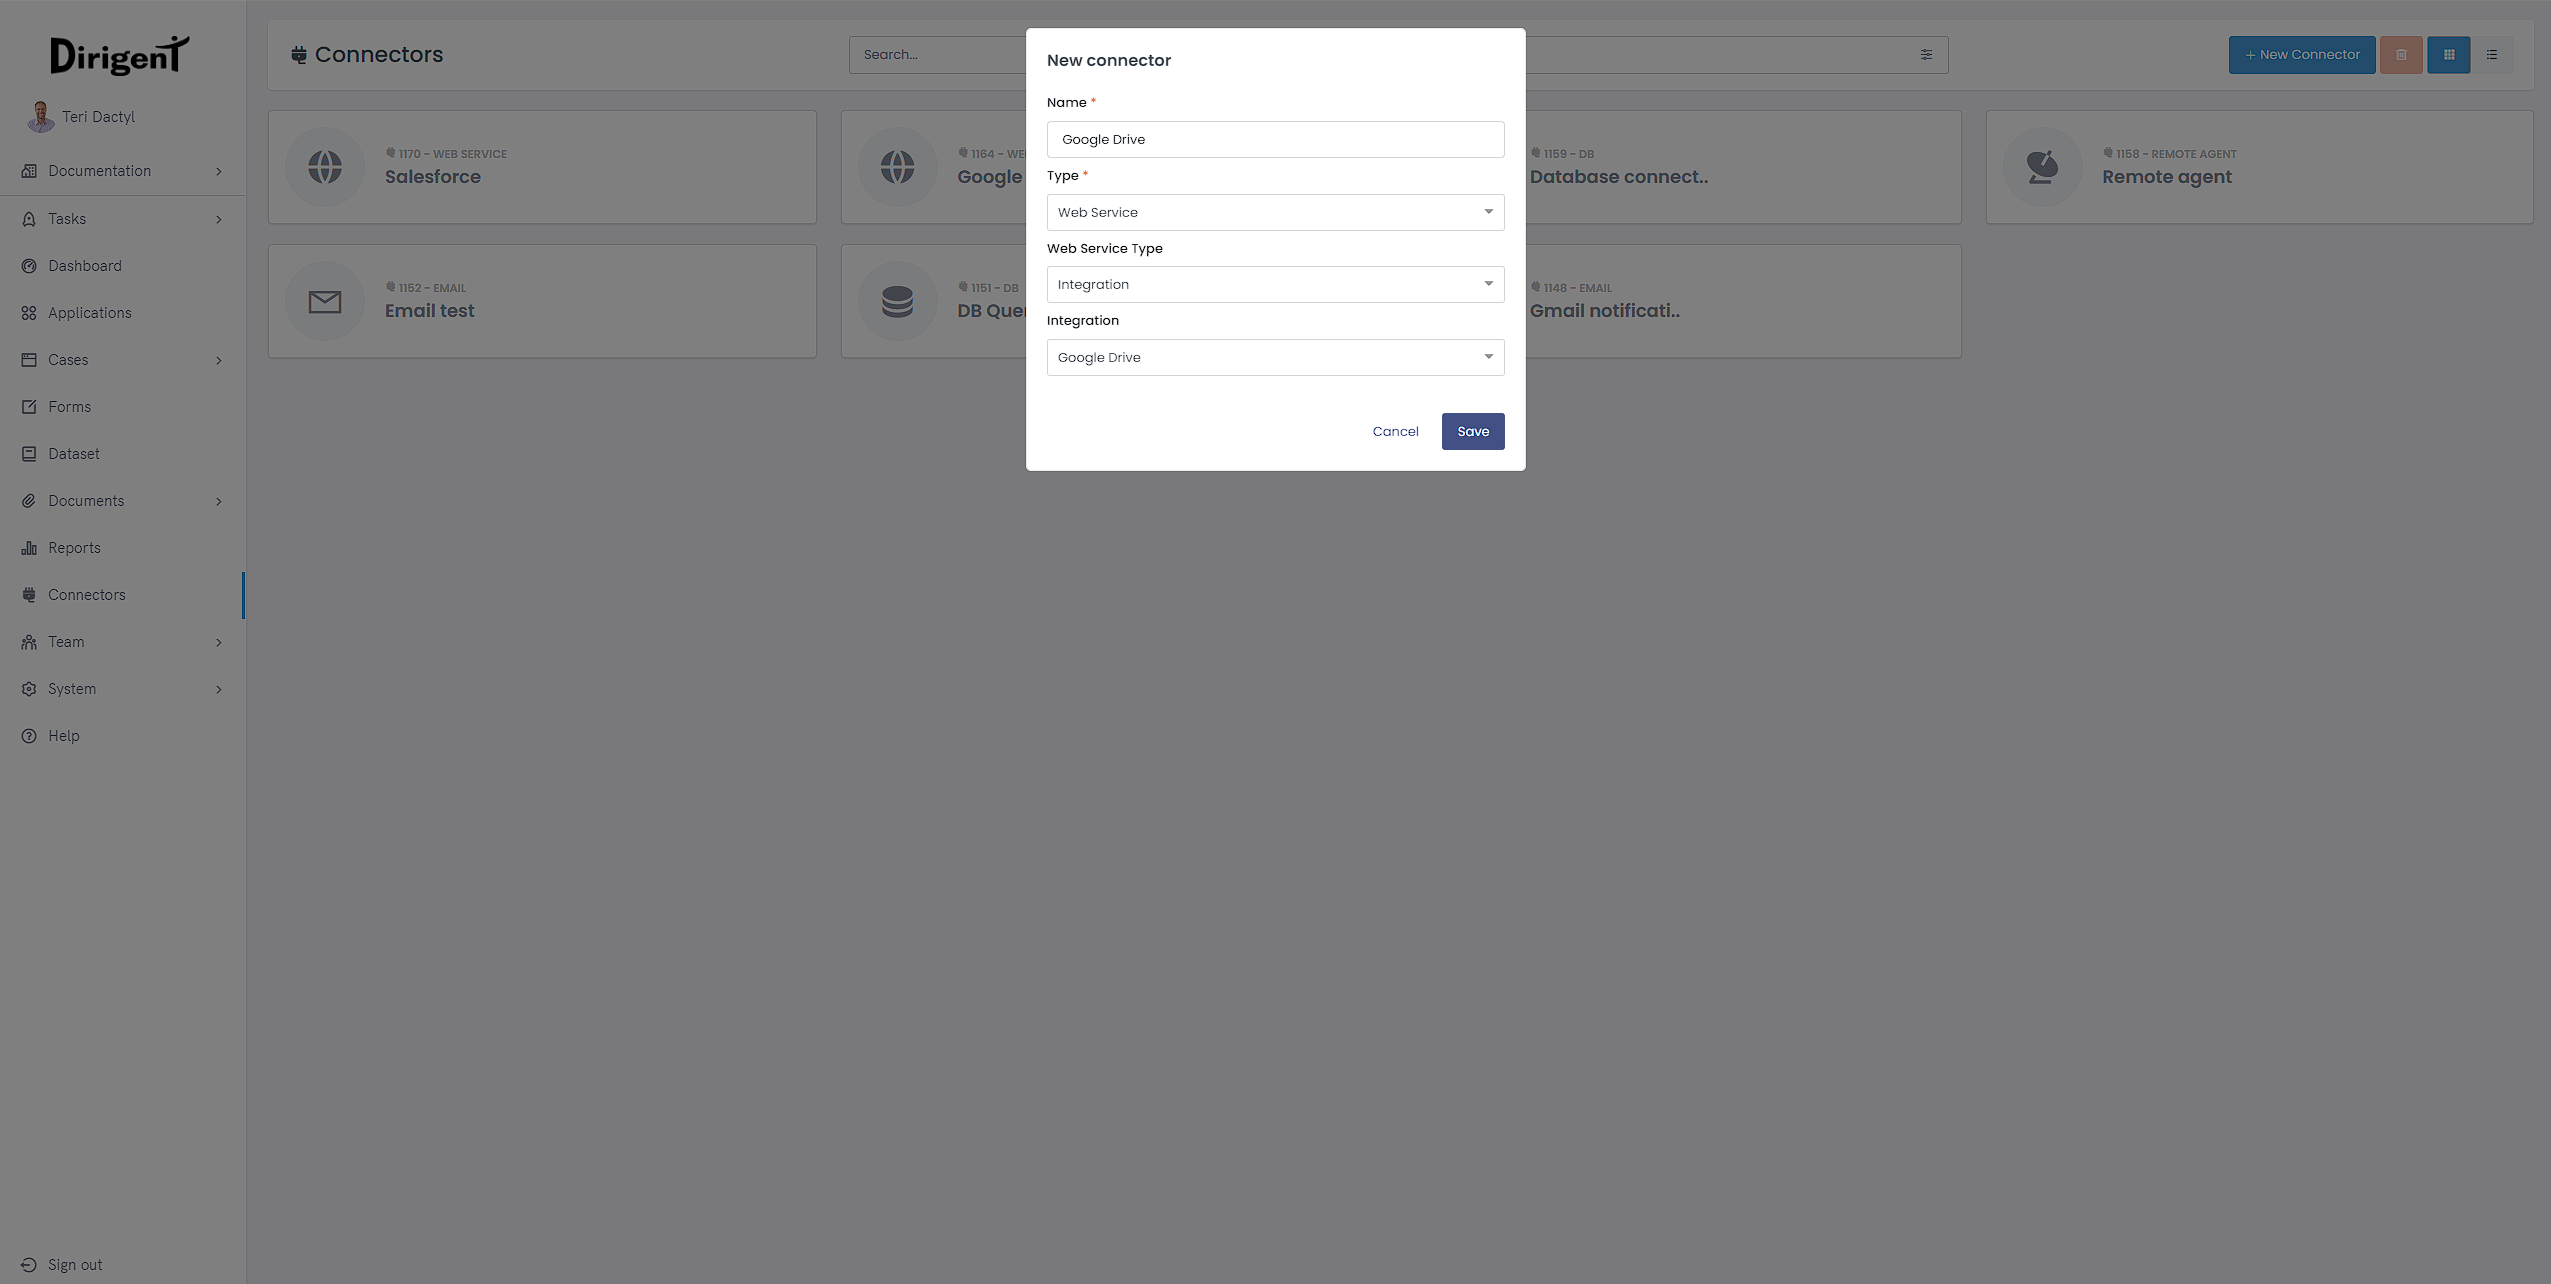
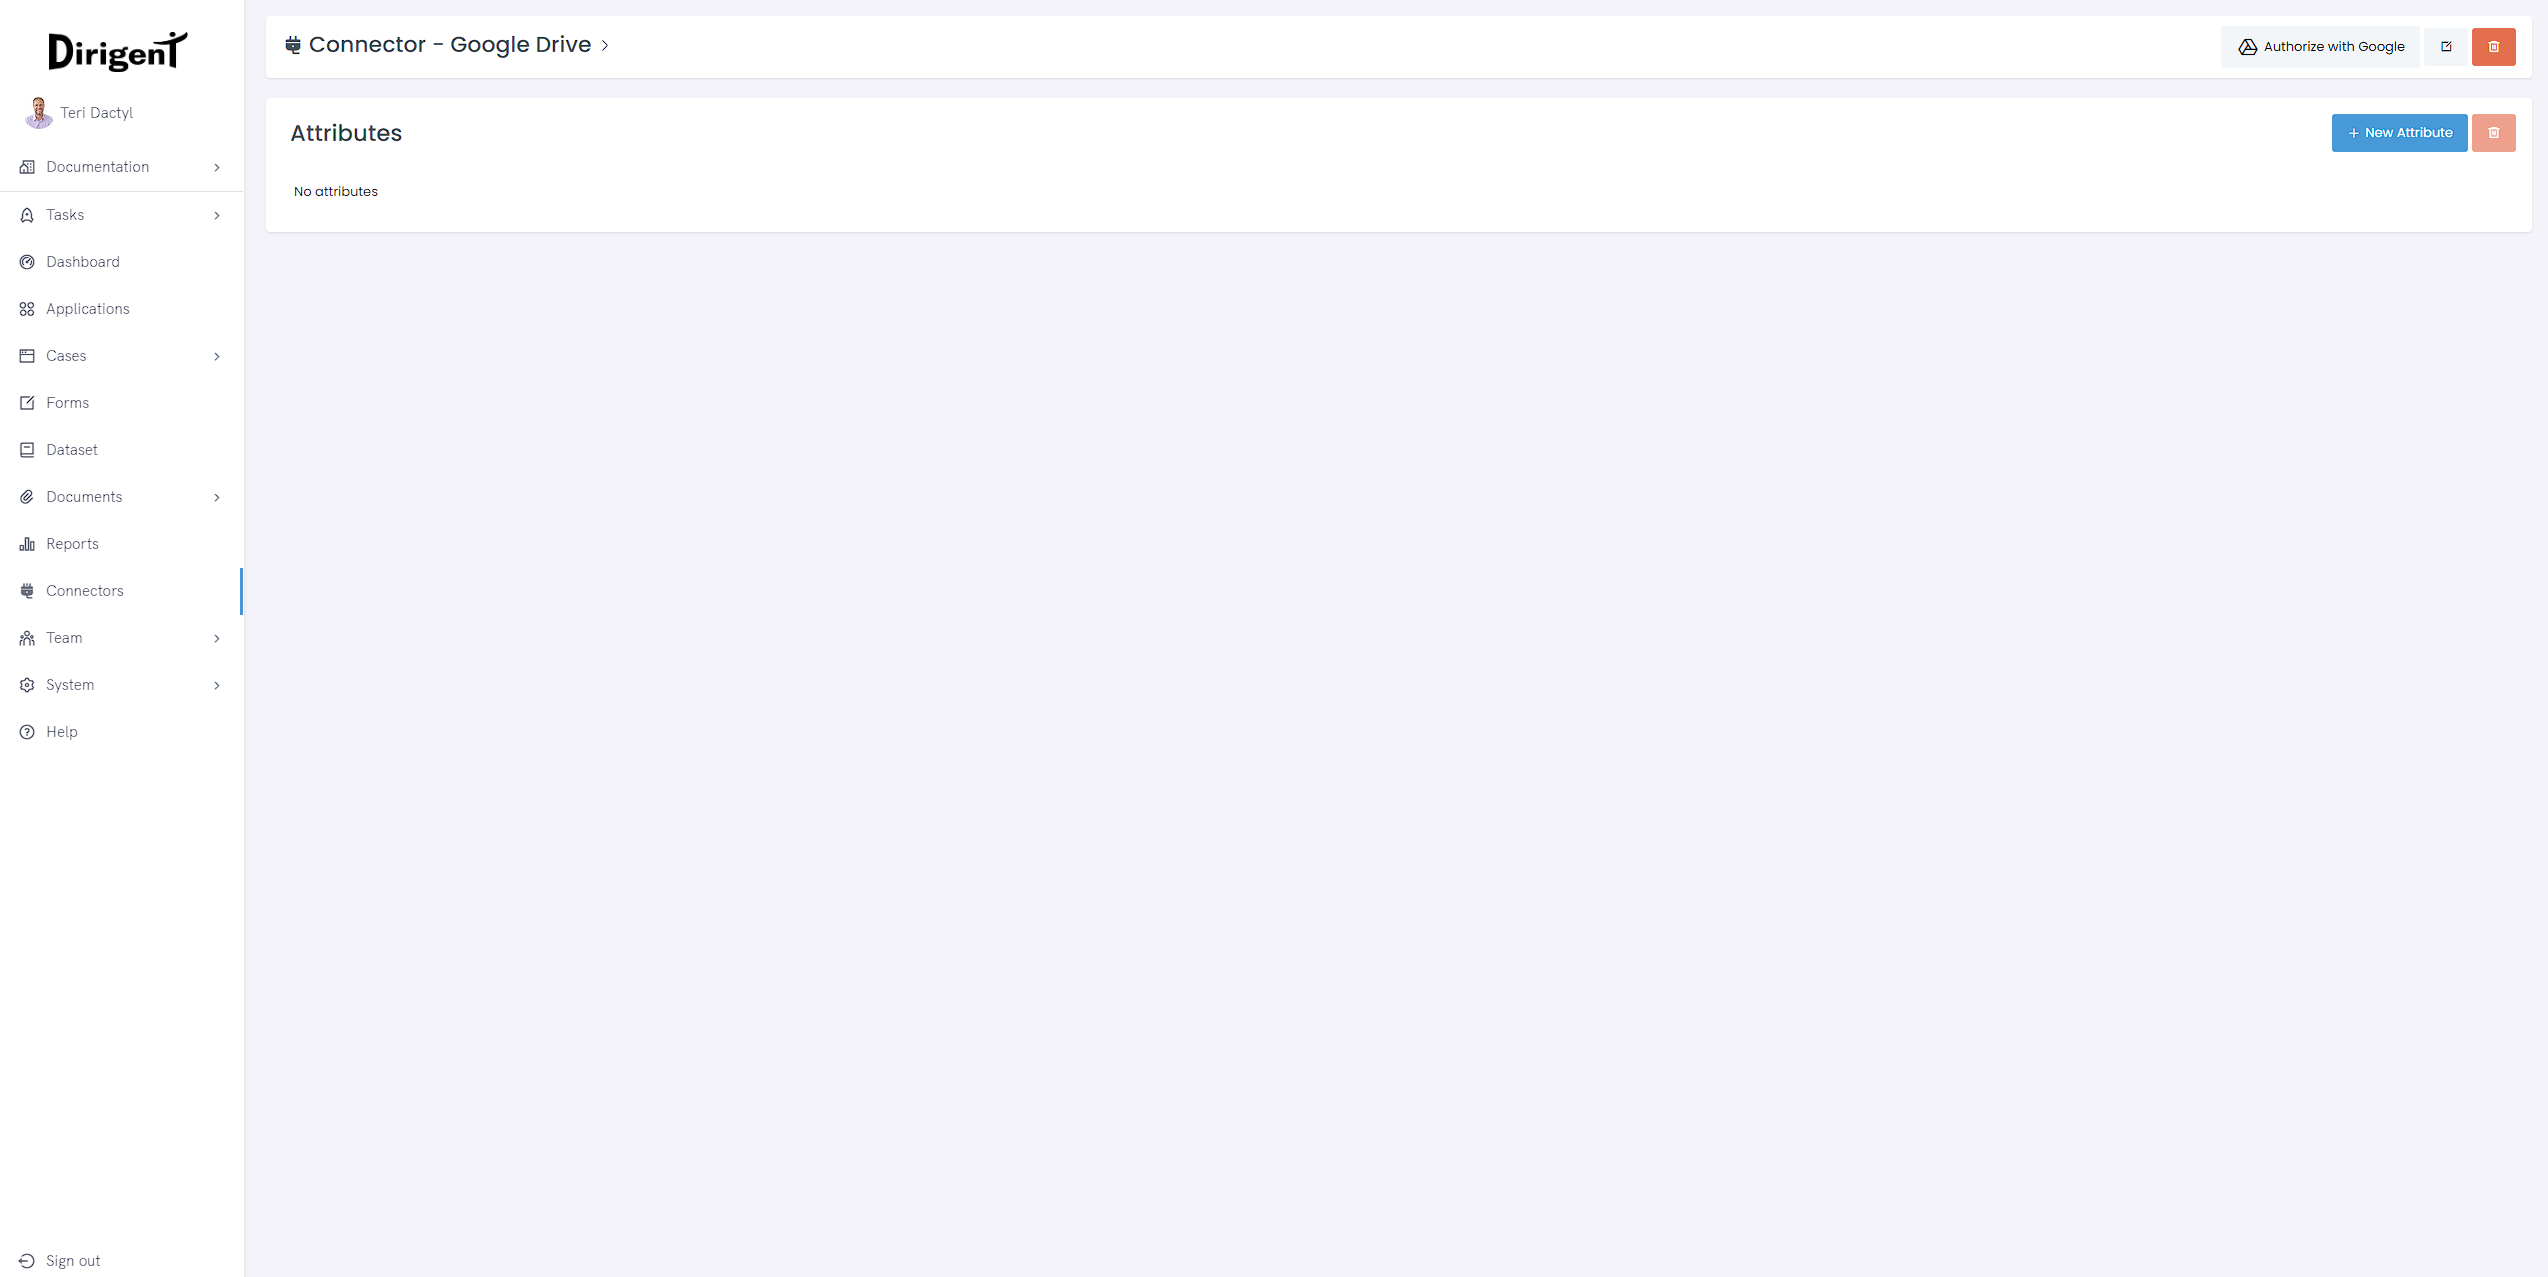
With the Google Drive connector, you will be able to use Google Drive task, which allows you to upload, download or bulk download files and folders.
Google Sheets
Integration with Google Sheets is done by clicking the Authorize with Google button, located on the Google drive connector page. Once the configuration process is comleted, the connector can be used in the Google Sheets.

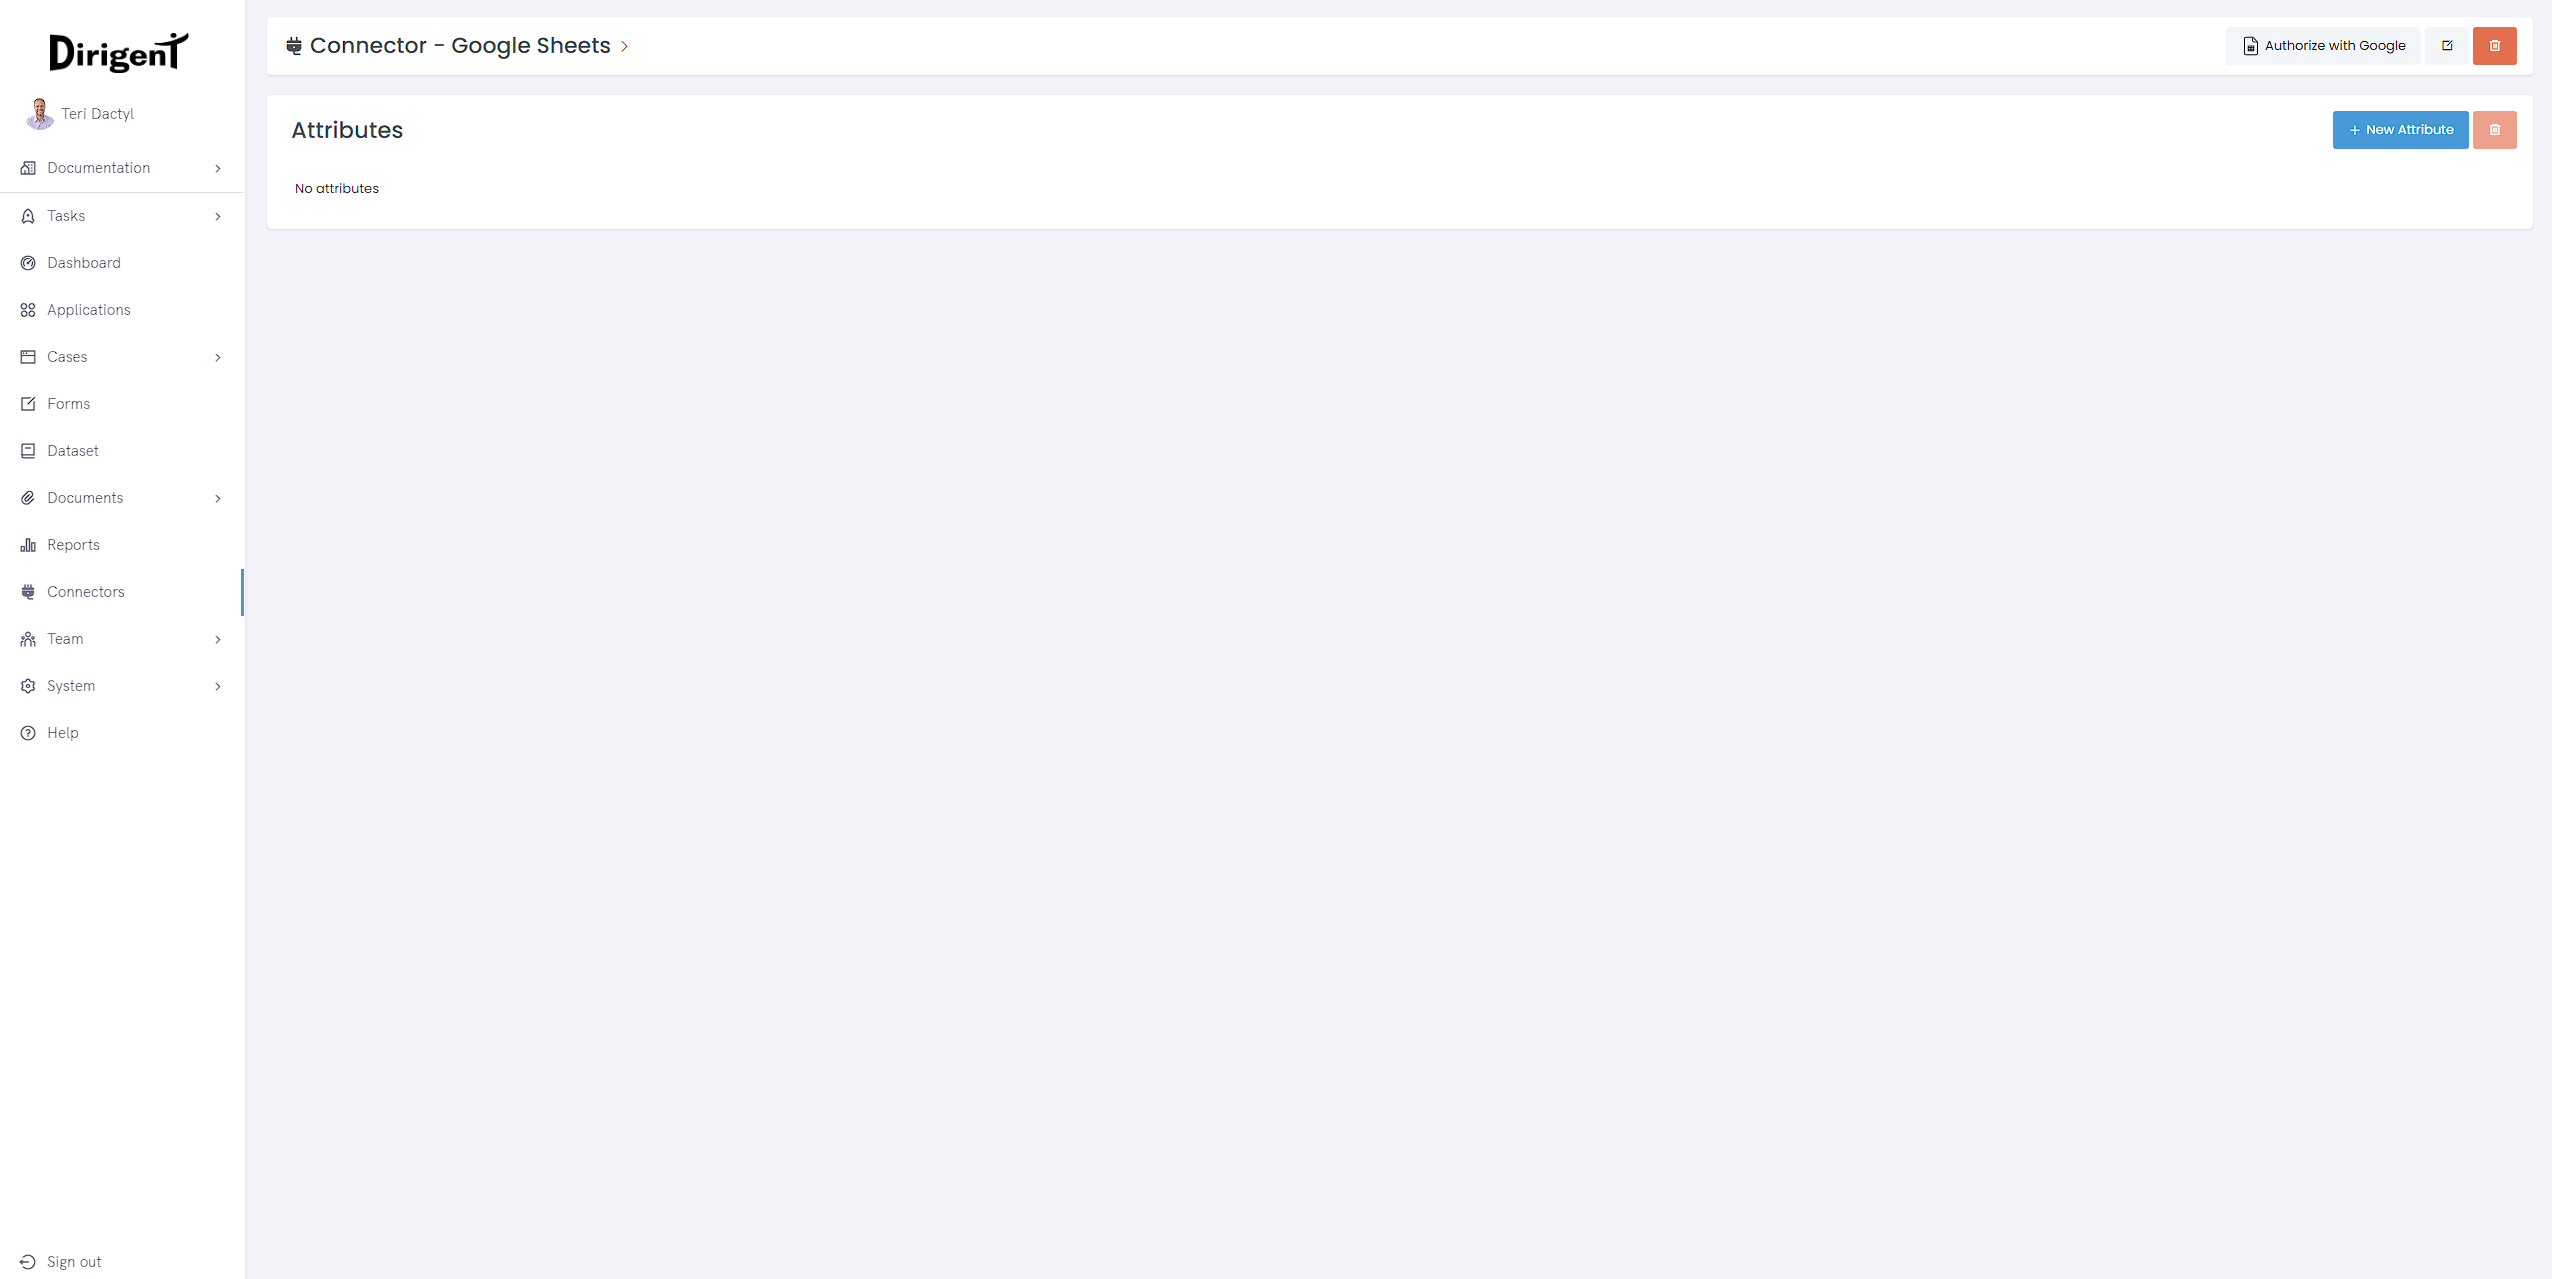
Once connecter, the Google Sheets connector will allow you to create blank spreadsheets, read, write, append and clear sheets.
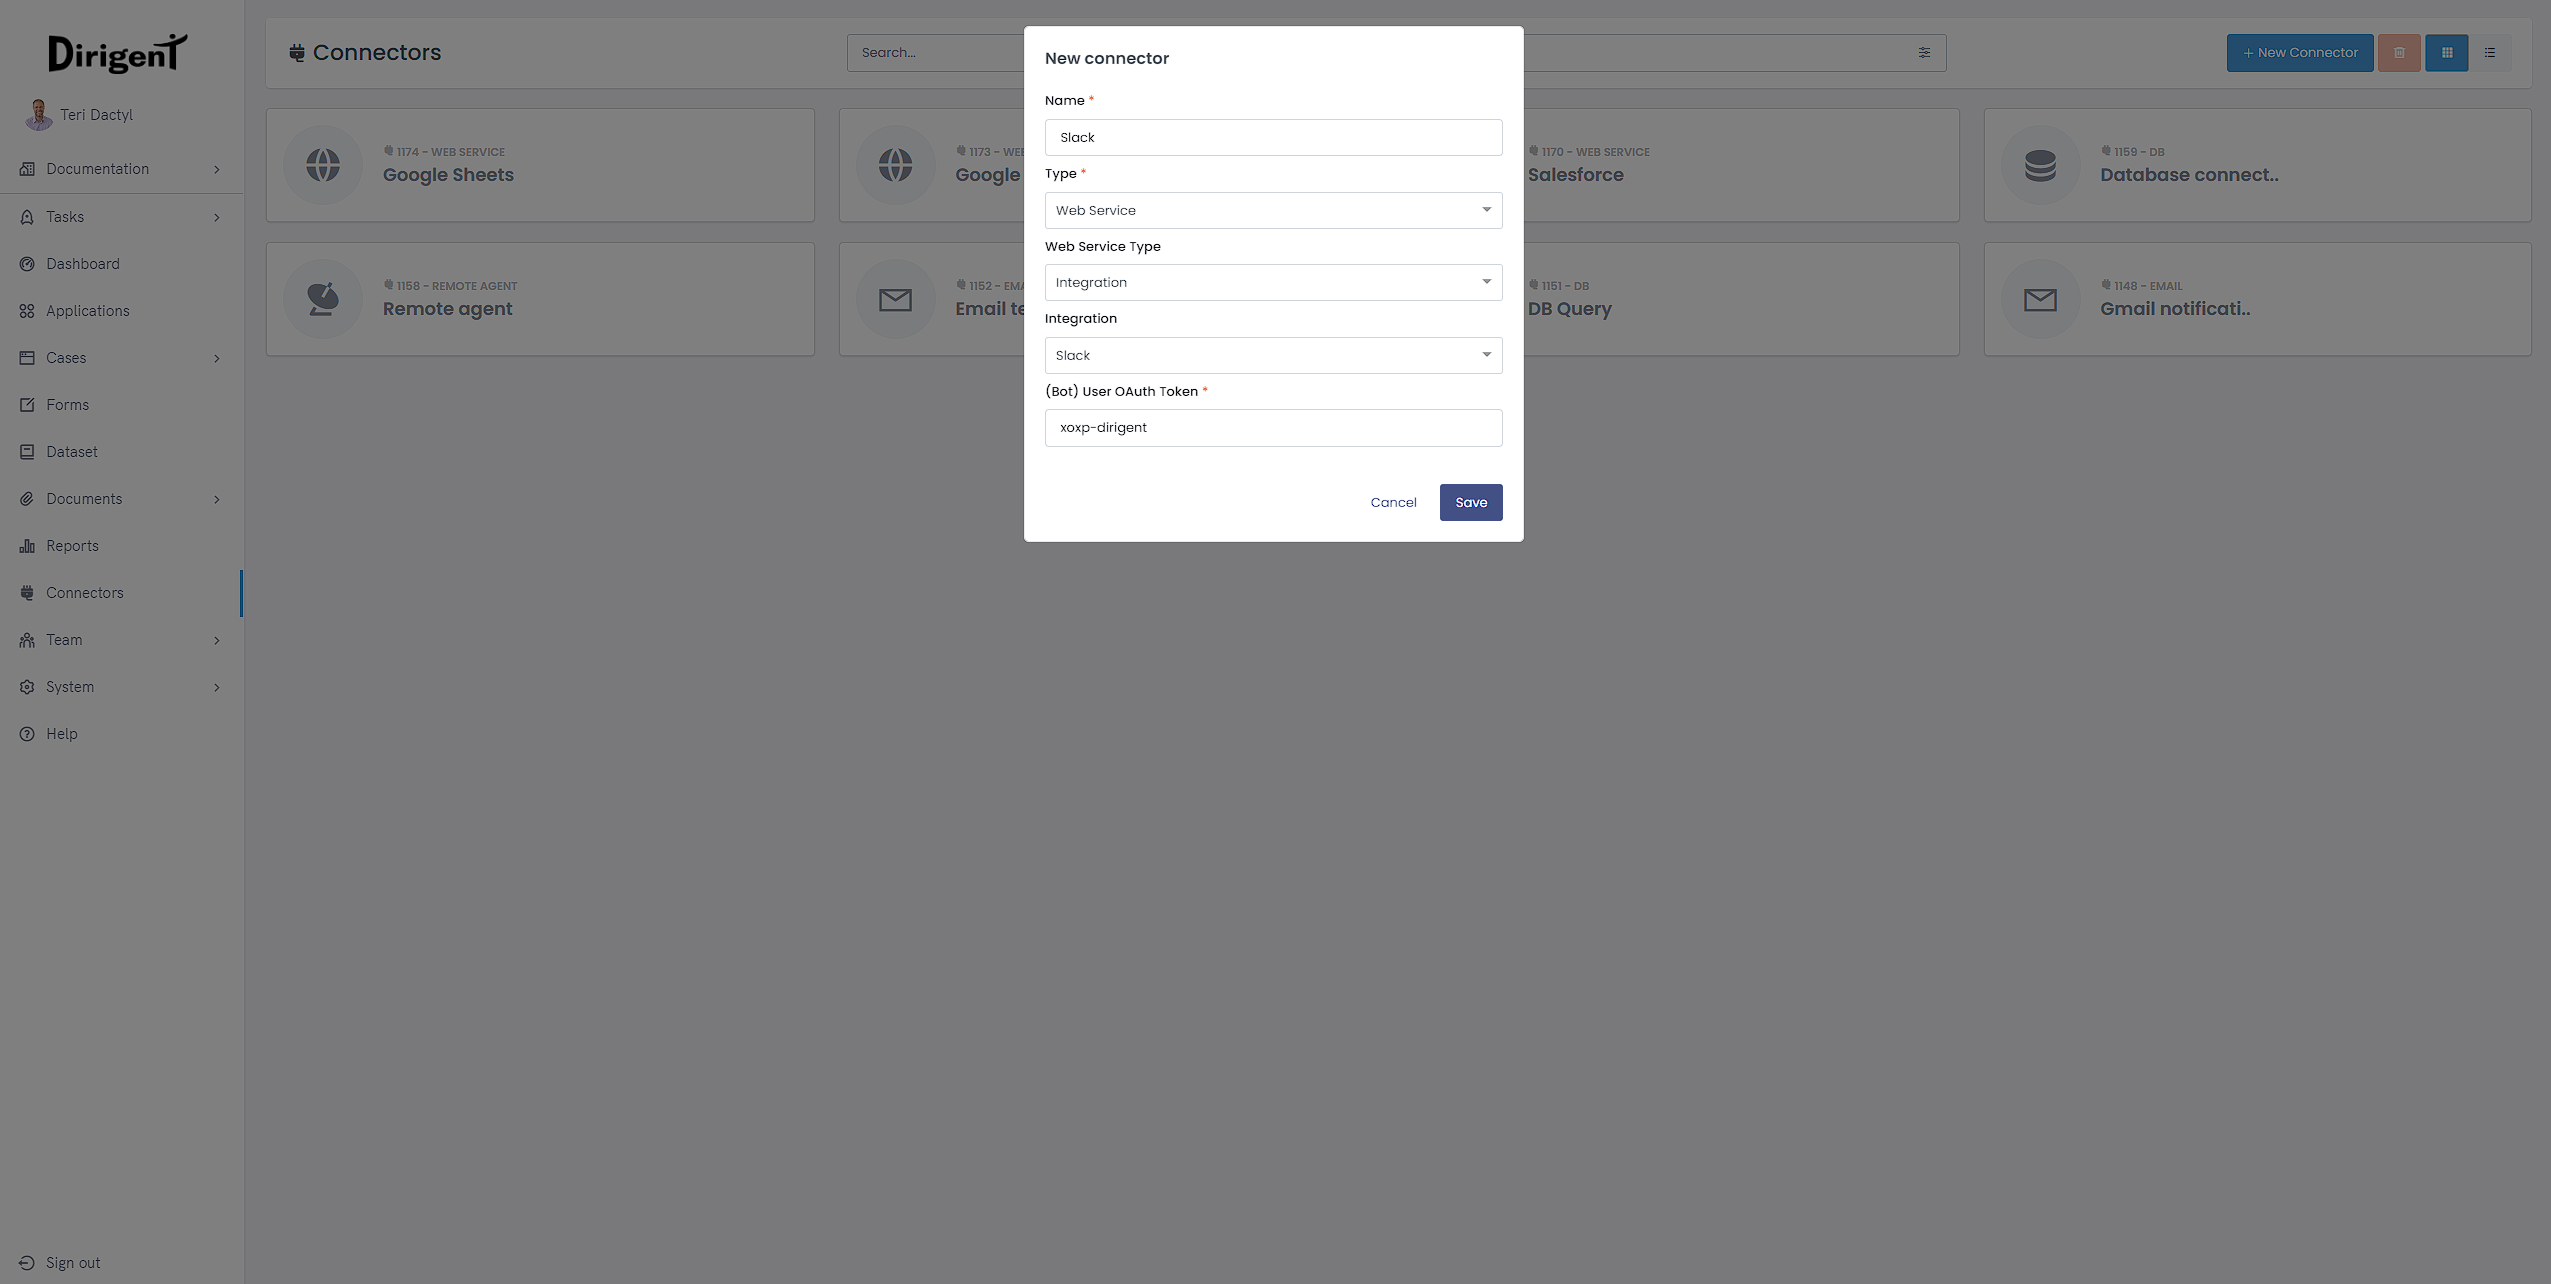
Slack
Slack connector consits of 5 fields, which are Header Key, (Bot) User OAuth Token, Header Prefix, Authentication Type and Token Location. You can interact only with the (Bot) User OAuth Token field while the rest is handled by Dirigent for you. Once the configuration process is comleted, the connector can be used in the Slack task.
(Bot) User OAuth Token - Token that was automatically generated when you installed the app to your team.
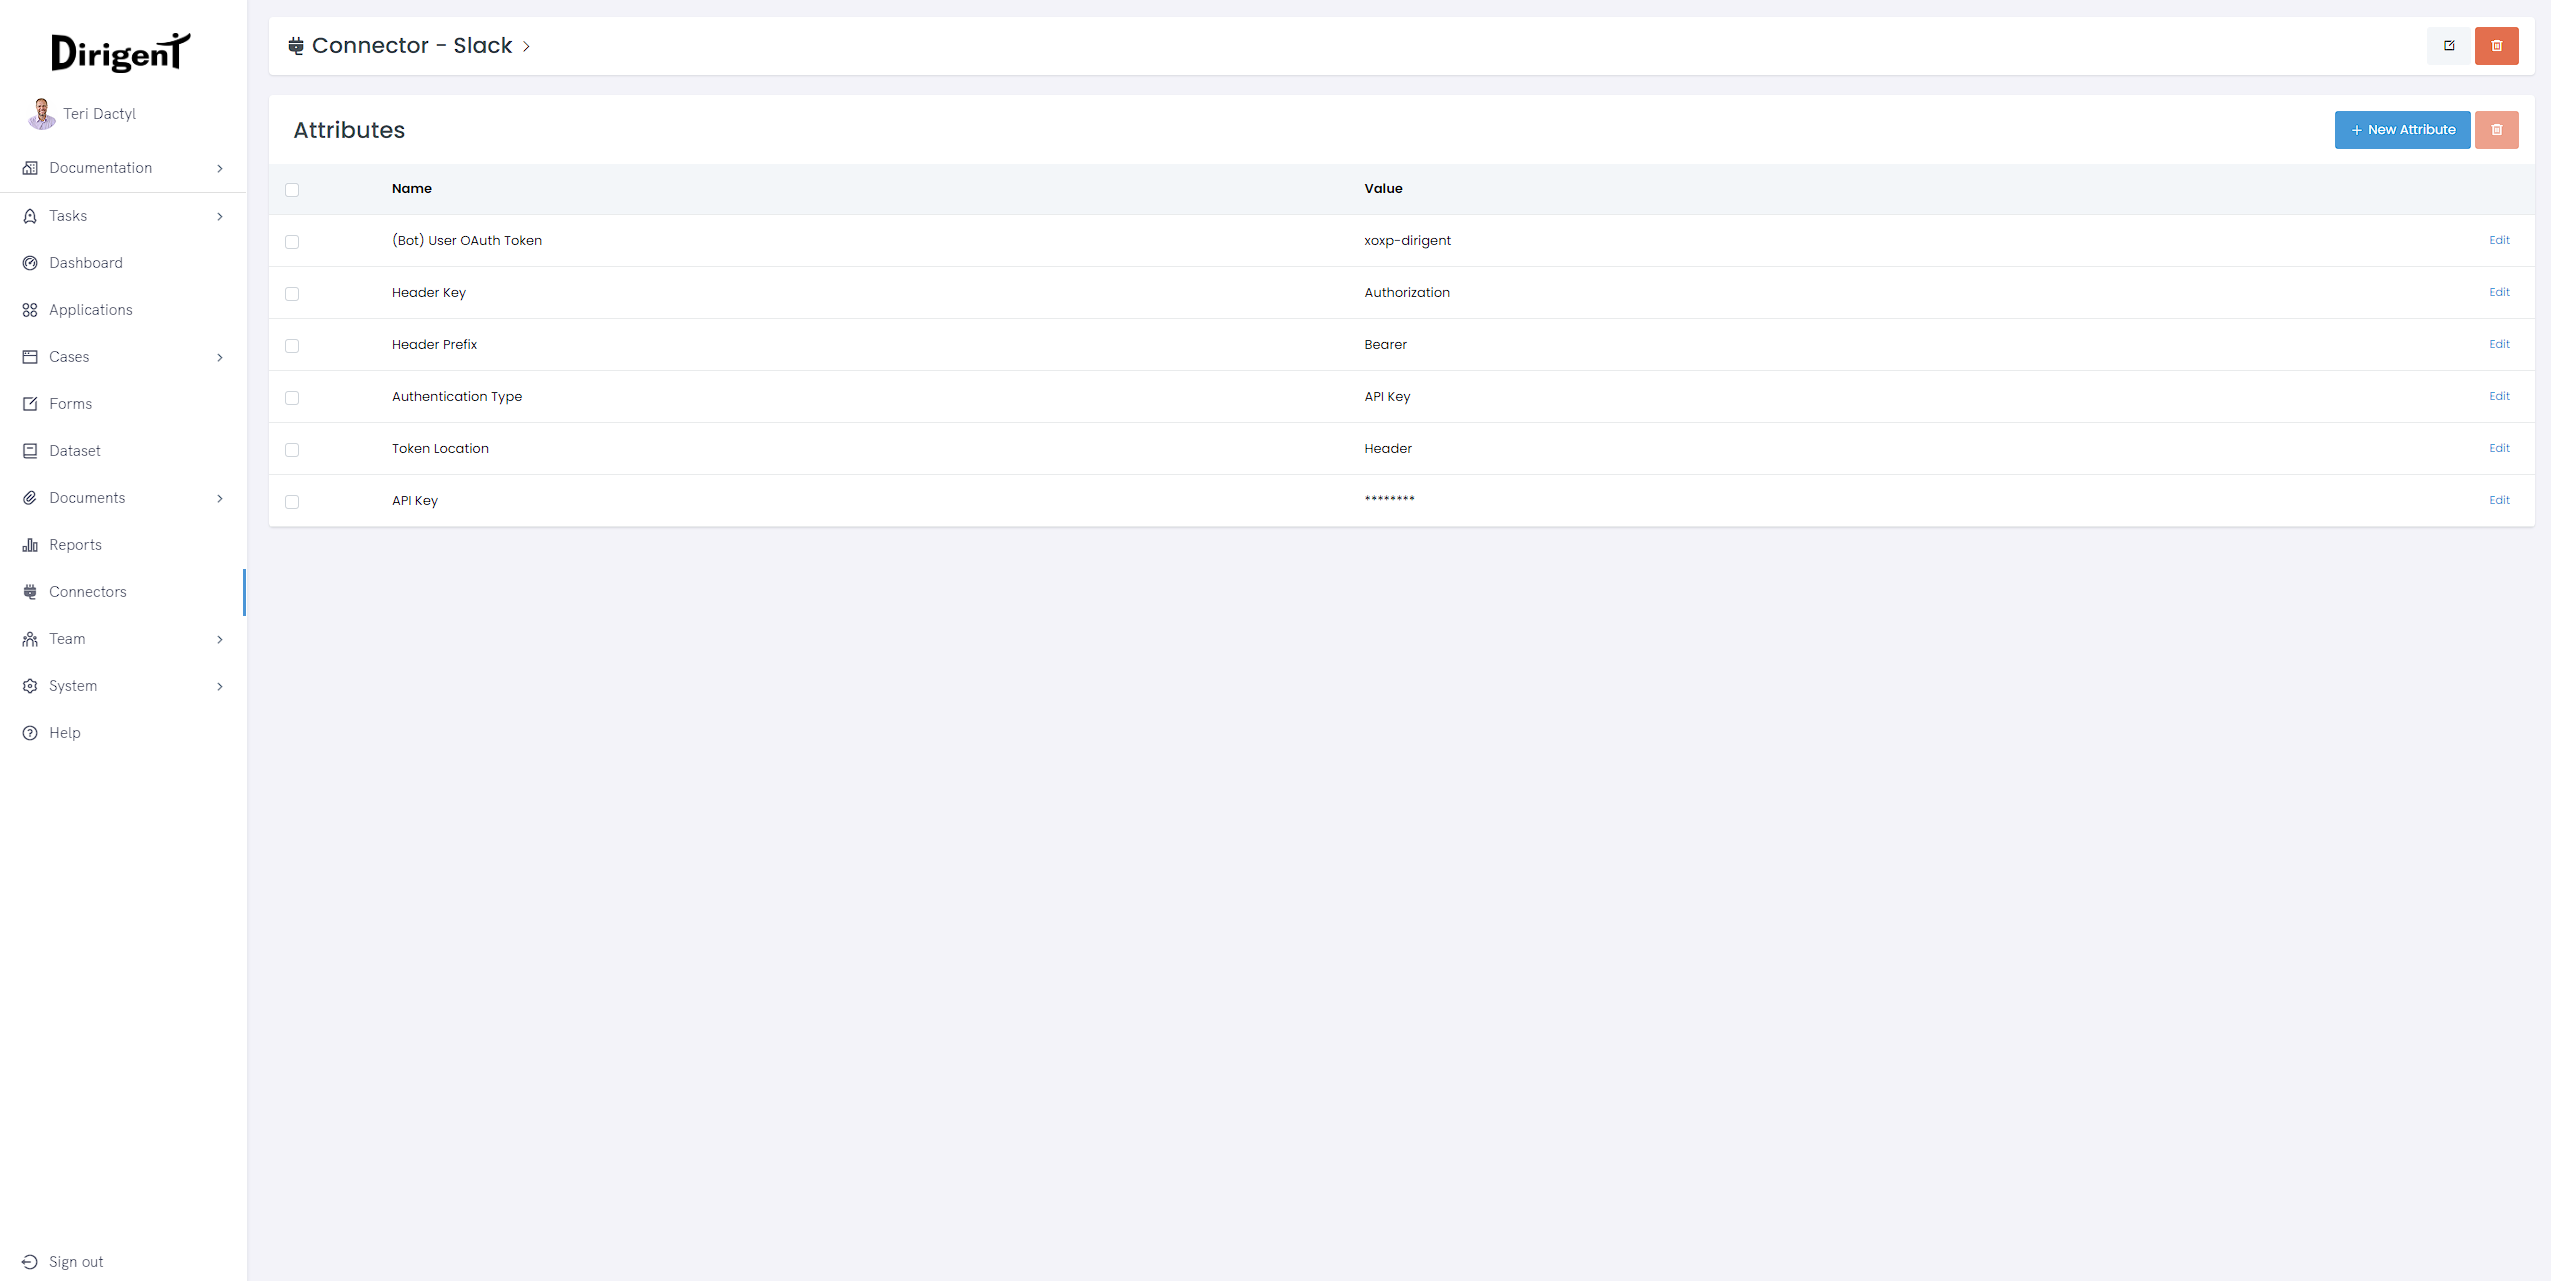
Once the Slack connector is configured, it can be used in the Slack task, allowing you to send messages and documents as either person or a bot to any channels.
Salesforce
To use the Salesforce Integration with Dirigent, you will need to create a Connected App and obtain the Consumer Key and Consumer Secret.
-
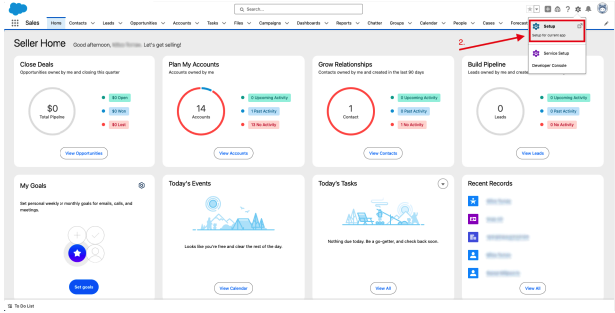
Navigate to Salesforce and open the Setup dropdown menu.
-
Click on Setup (Setup for current app)
-
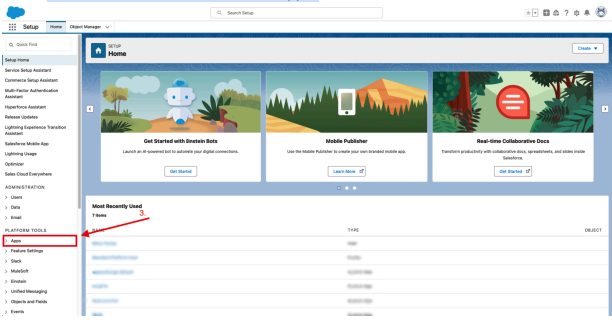
In the sidebar, locate and select Apps.
-
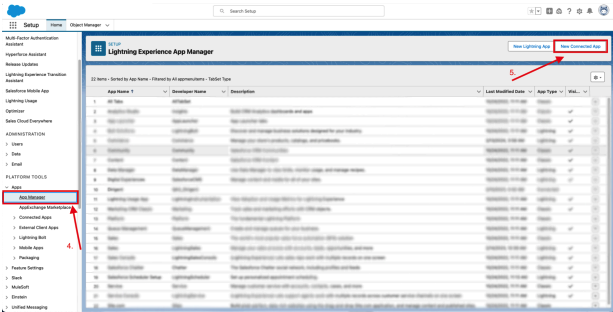
Open App Managar, and click the New Connected App button.
-
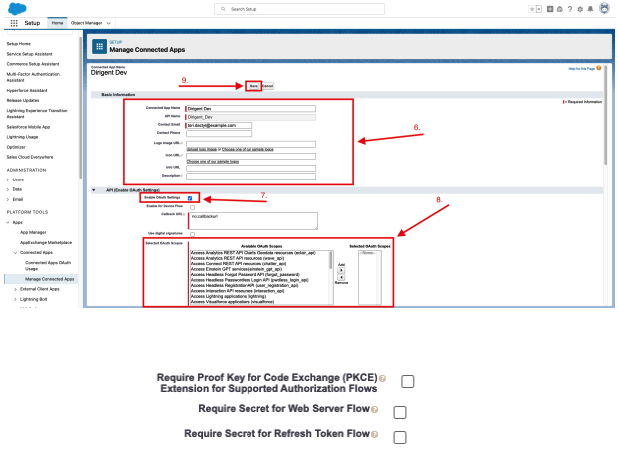
Fill out the form for the new connected app.
-
Enable OAuth Settings and disable the following:
- Require Proof Key for Code Exchange (PKCE) Extension for Supported Authorization Flows
- Require Secret for Web Server Flow
- Require Secret for Refresh Token Flow
-
Add OAuth Scopes and save.
-
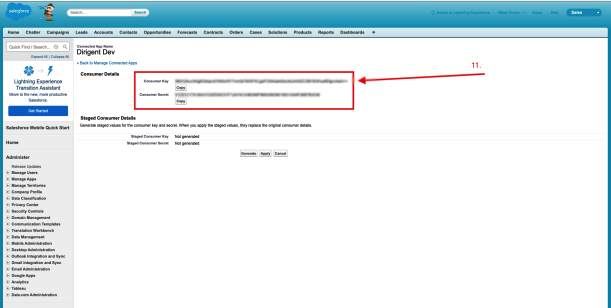
Click the Manage Consumer Details button.
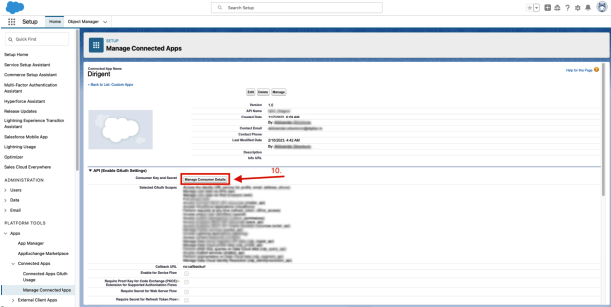
-
Copy Consumer Key and Consumer Secret
Now let's set up Salesforce connector in Dirigent.
For the Salesforce connector, you will be required to provide all of the fields in order for the integration to be successful. For the creation of the Salesforce connector, the following information is required: Consumer key, Consumer secret, Username, Password, Login URL, Domain and API Version.
Once the configuration process is completed, the connector can be used in the Salesforce task. Once created, other required fields will be present, allowing you to adjust the connector to your needs. Once the required information is provided, you will be able to create, update, get or delete contacts, accounts, leads or opportunities.
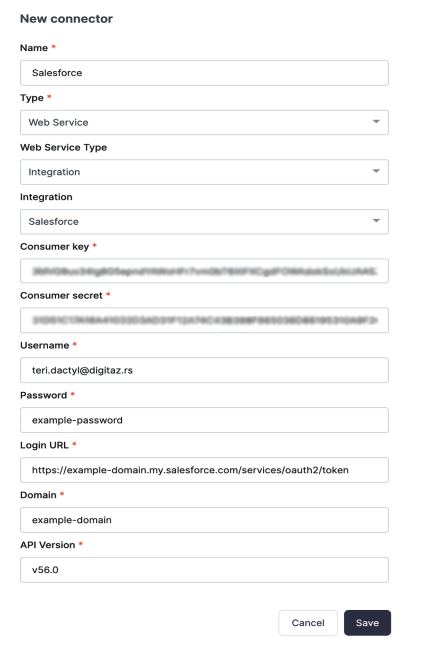
We recommend testing the connector before using it in a process. To test the connector configuration, use the test button in the top right corner.

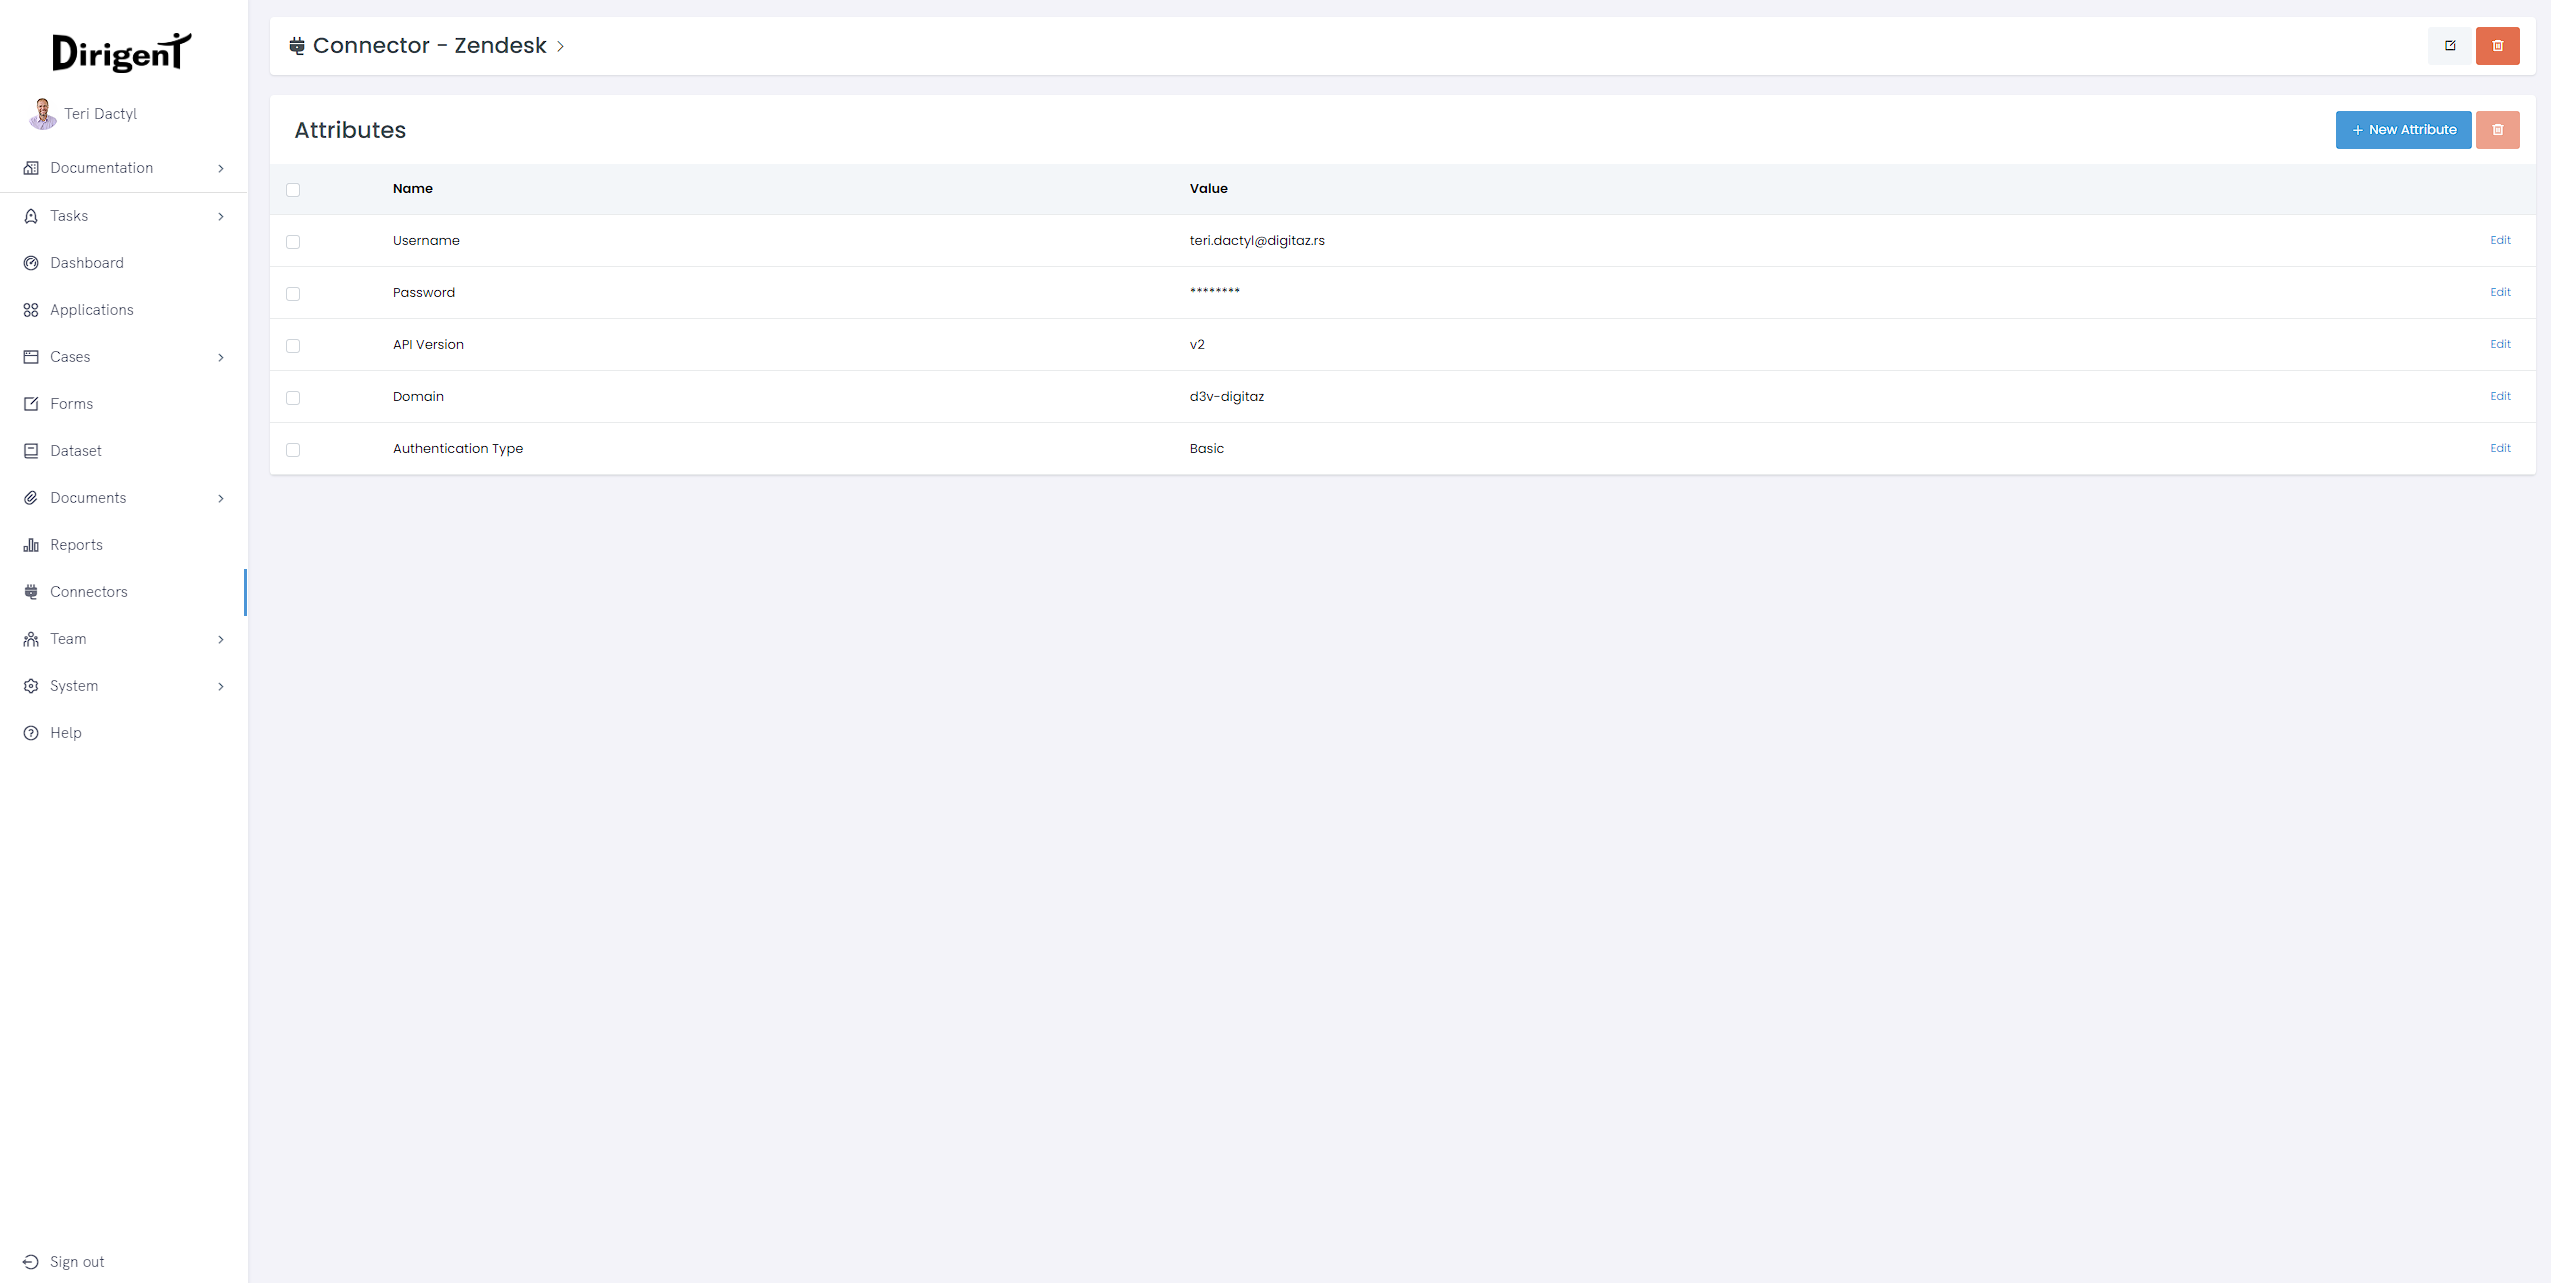
Zendesk
In order to create a connector for Zendesk, you should provide the username and password of your Zendesk account. Once the configuration process is comleted, the connector can be used in the Zendesk task.

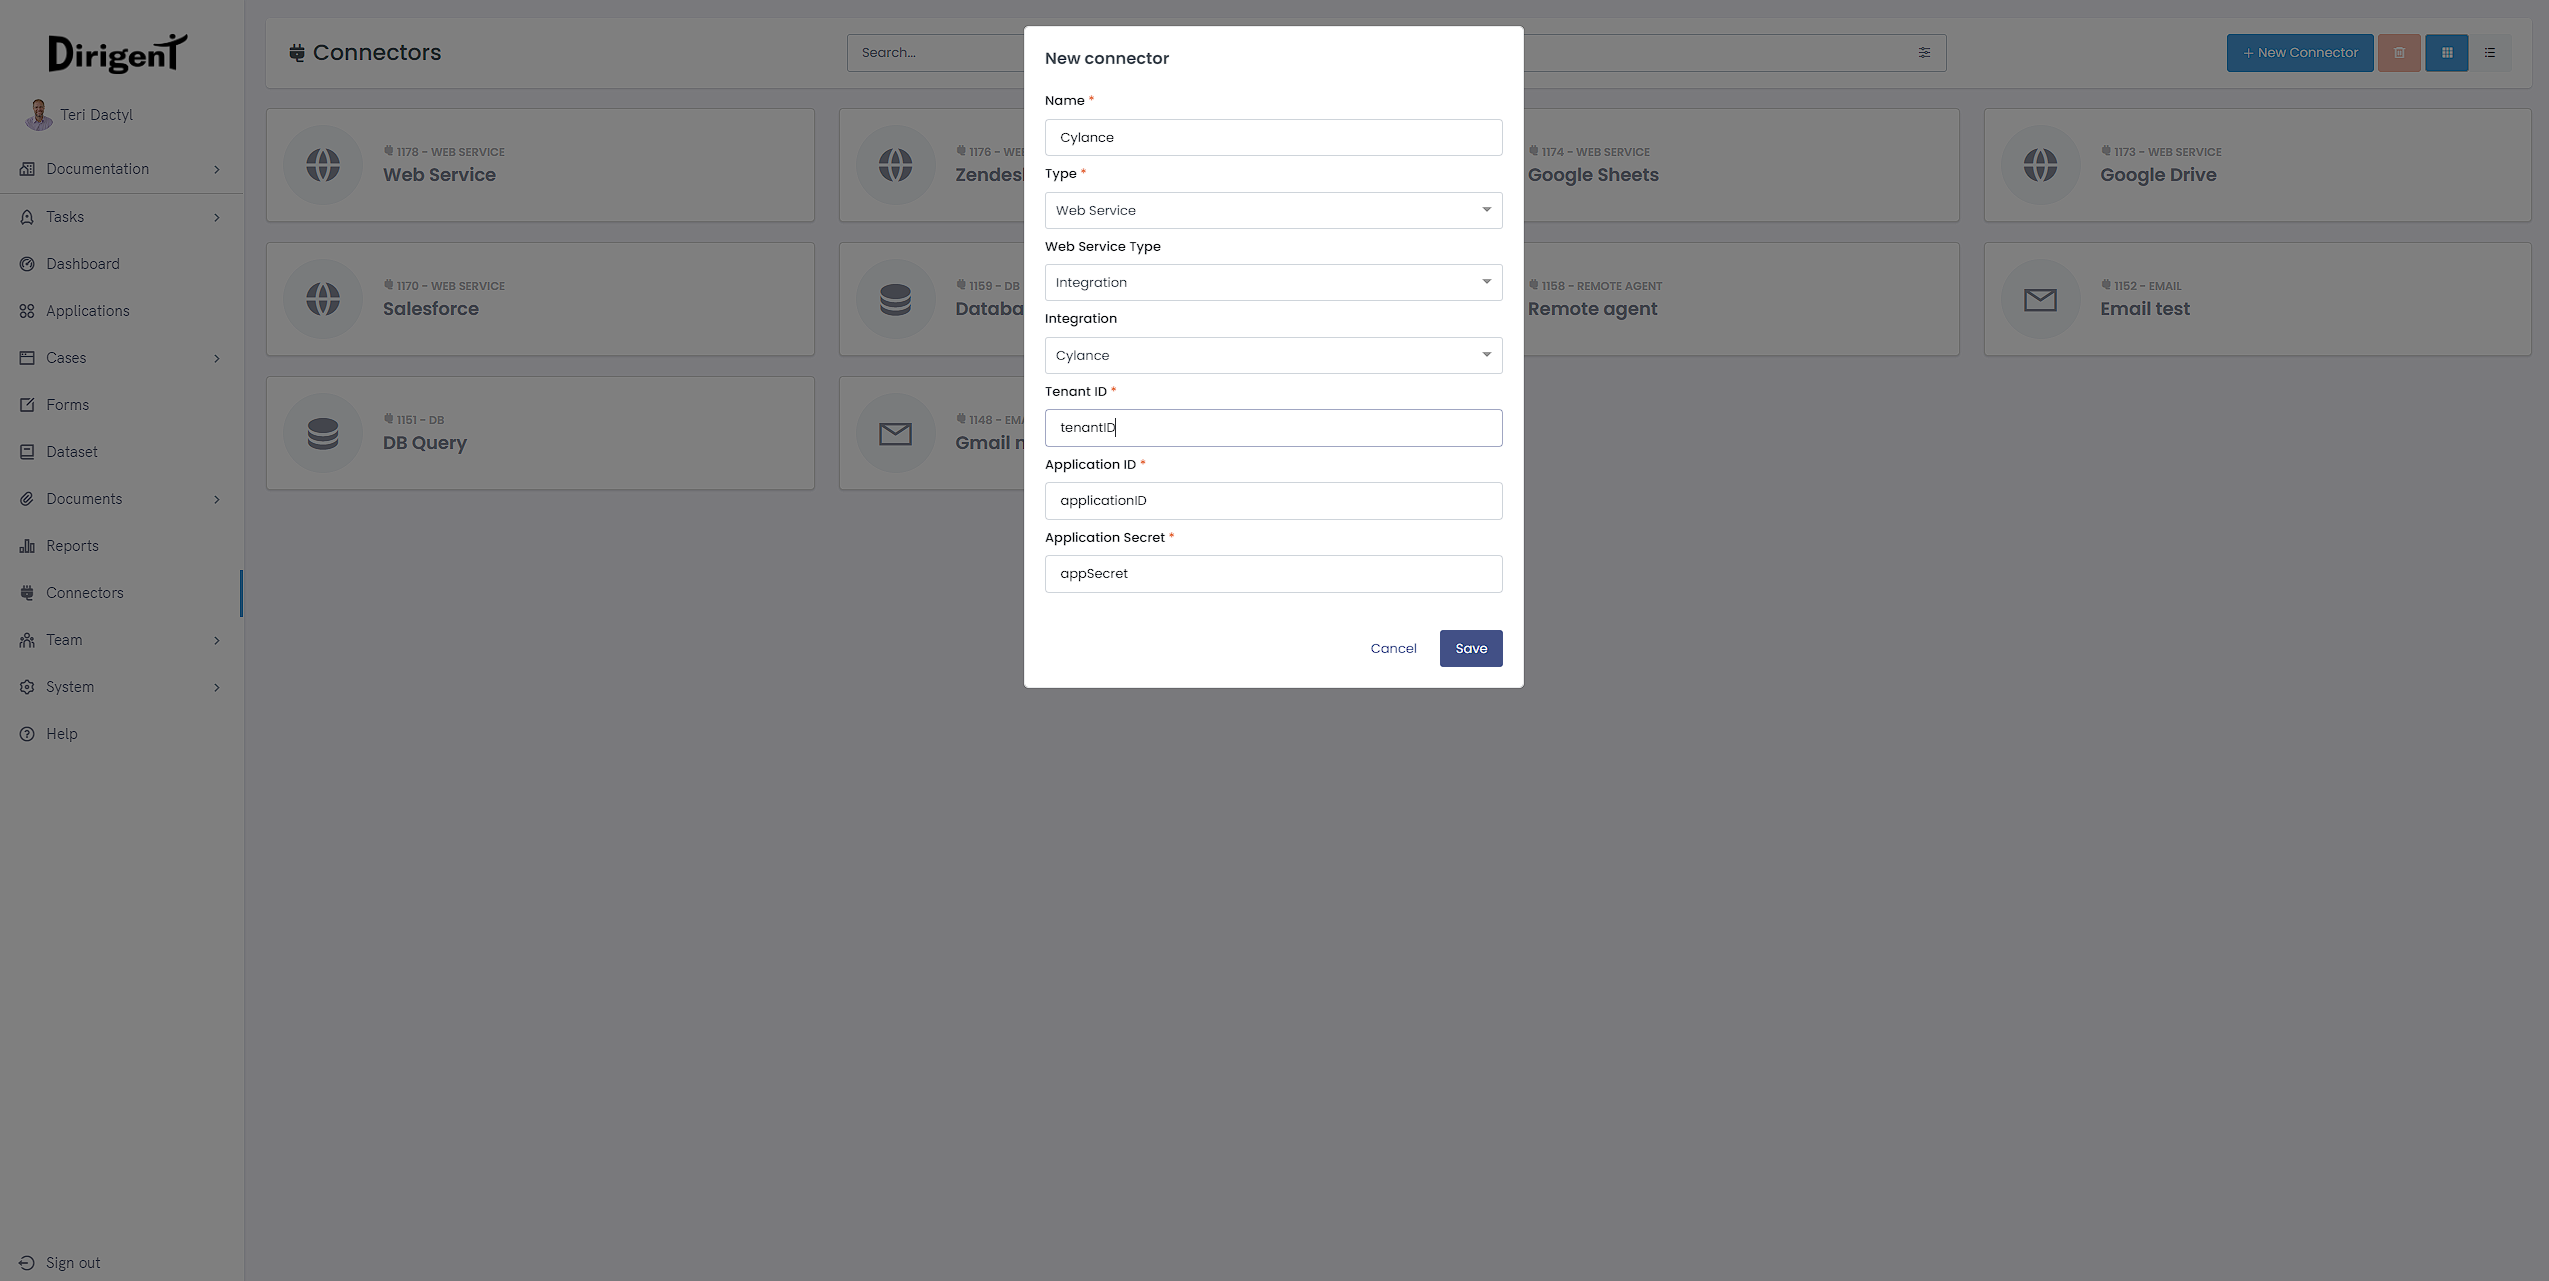
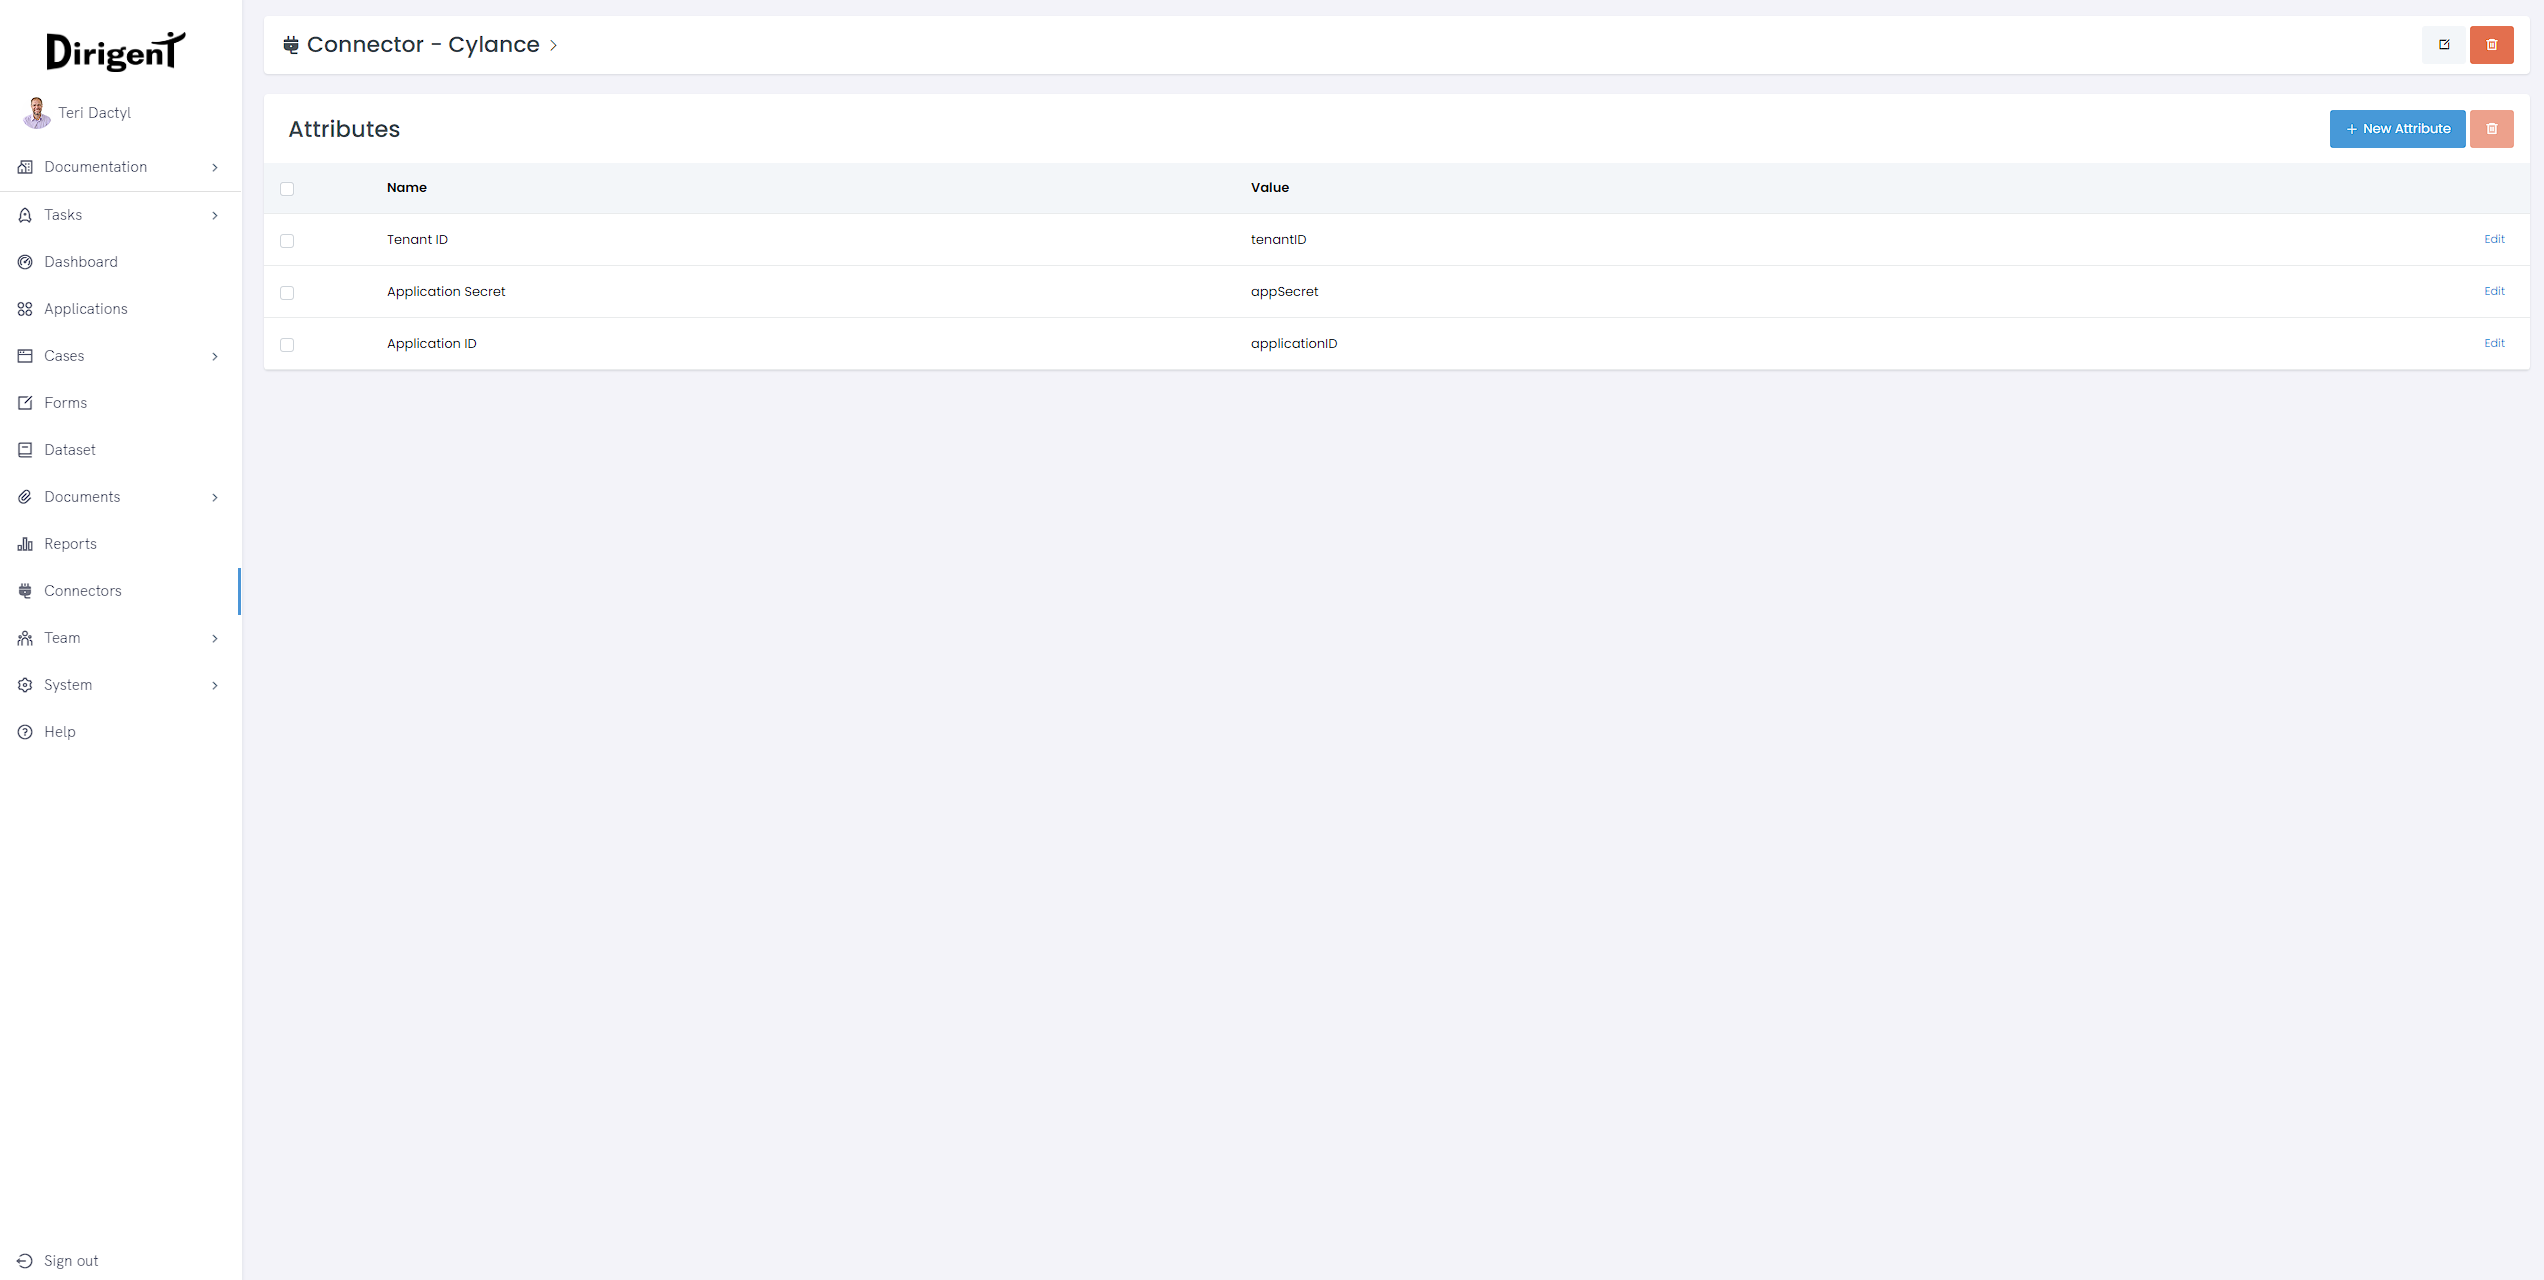
Cylance
In order to create a connector for Cylance, you should provide Tenant ID, Application ID, and Application Secret. Once the configuration process is comleted, the connector can be used in the Cylance task.
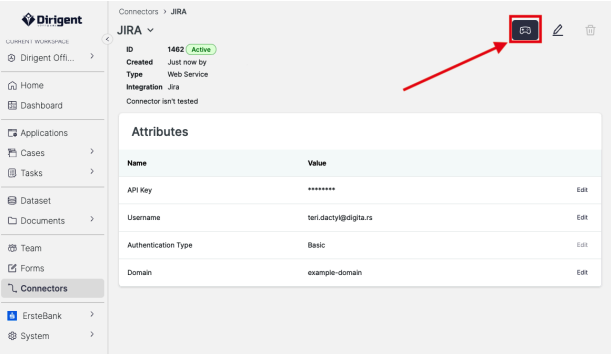
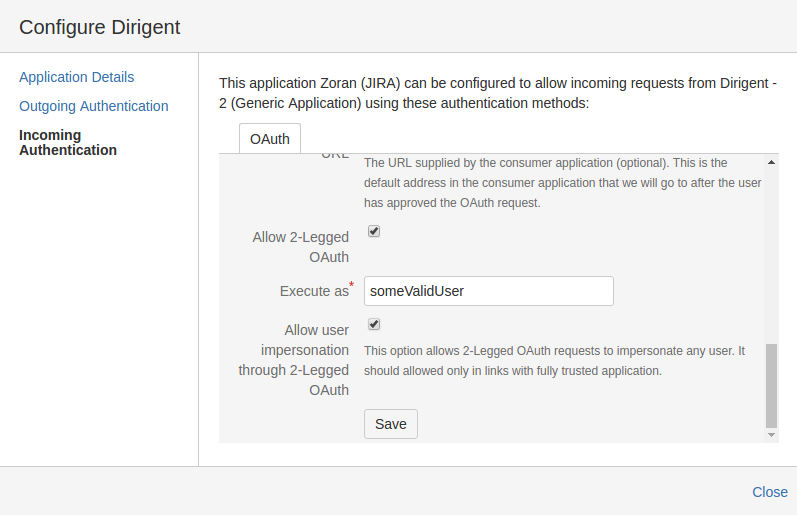
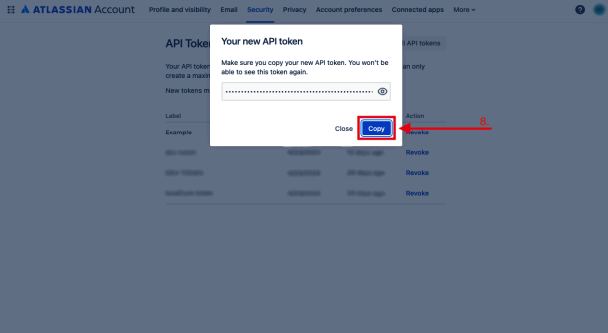
Jira
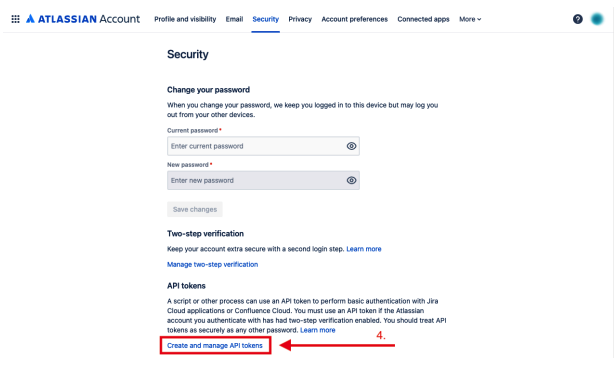
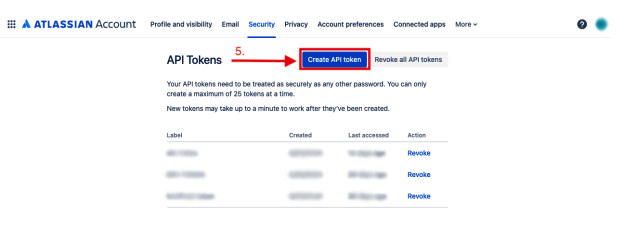
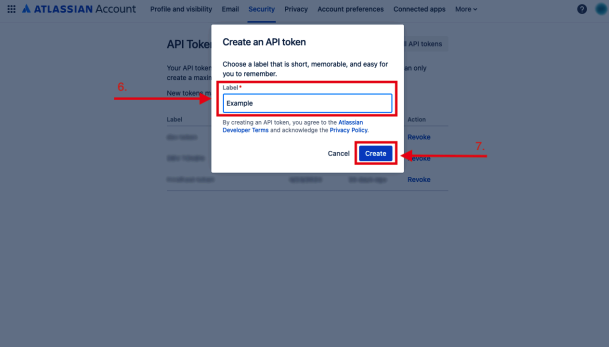
The JIRA connector can create automatic JIRA issues, add comments, or working logs. Once the configuration process is completed, the connectors can be used in the JIRA task. To use the JIRA Integration with Dirigent, you will need to obtain the API Token.
-
Navigate to JIRA and open the Settings dropdown menu located in the top right corner.
-
Navigate to JIRA and open the Settings dropdown menu located in the top right corner.
-
Navigate to JIRA and open the Settings dropdown menu located in the top right corner.
-
Navigate to JIRA and open the Settings dropdown menu located in the top right corner.
-
Navigate to JIRA and open the Settings dropdown menu located in the top right corner.
-
Navigate to JIRA and open the Settings dropdown menu located in the top right corner.
-
Navigate to JIRA and open the Settings dropdown menu located in the top right corner.
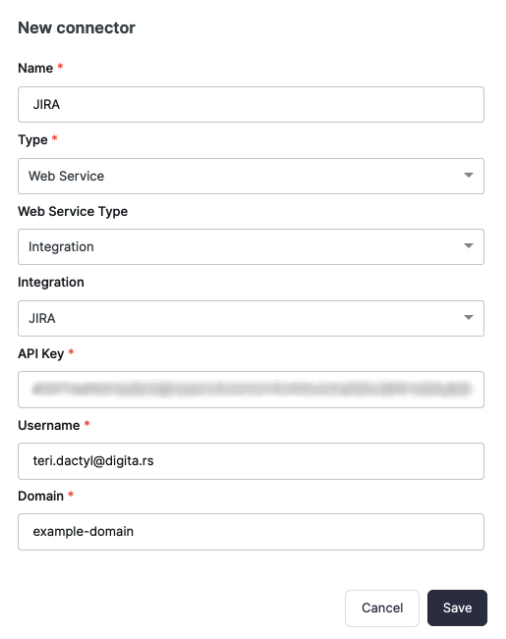
Now to configure JIRA in Dirigent. For the JIRA connector, you will be required to provide all of the fields in order for the integration to be successful. For the creation of the JIRA connector, the following information is required: API Key (Token), Username and Domain. Once the configuration process is completed, the connector can be used in the JIRA task. Once created, other required fields will be present, allowing you to adjust the connector to your needs.
We recommend testing the connector before using it in the process. To test the configuration, you can use the test button in the top right corner.